background image

3

Bedienungsanleitung

DE

Beschreibung der Bedienungselemente 

1. Taste Aufwärts   

2. Taste Menü 


3. Taste Abwärts 


4. Taste OK

5. Taste Modus 


6. Taste Sperren 


7. Taste Reset/MIK   

8. Taste Ein/Aus 

9. TF Karte

10. Lautsprecher 

11. Display 

12. Kameraobjektiv

13. Halterungsbefestigung

14. USB 

15. IR LED

Merkmale

Bevor Sie die Kamera benutzen, stecken Sie eine TF Karte ein, 

da alle Bilder auf der TF Karte gespeichert werden

1. Ein/Aus Funktion

Gerät einschalten: Kurzes drücken der Taste “Ein/Aus” start;

Gerät ausschalten: Langes drücken, 3S, der Taste “Ein/Aus” aus-

schalten;

Andere: Beim anschließen des Autoladegerätes schaltet sich das 

Gerät automatisch ein, beim entfernen des Ladegerätes schaltet 

sich das Gerät aus, nach einer eingestellten Zeit;

2. Aufnahmefunktion

Video: Aufnehmen aus dem Bereitschaftsmodus, kurzes drücken 

der Taste “OK” zum aufnehmen, erneutes drücken der Taste “OK” 

beendet die Aufnehme und speichert die Videodatei.

Summary of Contents for KOM0673

Page 1: ...Instrukcja obsługi PL Manual de utilizare RO Owner s manual EN Bedienungsanleitung DE Car DVR KOM0673 ...

Page 2: ......

Page 3: ...da alle Bilder auf der TF Karte gespeichert werden 1 Ein Aus Funktion Gerät einschalten Kurzes drücken der Taste Ein Aus start Gerät ausschalten Langes drücken 3S der Taste Ein Aus aus schalten Andere Beim anschließen des Autoladegerätes schaltet sich das Gerät automatisch ein beim entfernen des Ladegerätes schaltet sich das Gerät aus nach einer eingestellten Zeit 2 Aufnahmefunktion Video Aufnehme...

Page 4: ...in Fokus Maximale Vergrößerung 4 Mal 7 Lademodus Beim anschließen des Autoladegerätes Gerät manuell auss chalten langes drücken 3S der Taste Ein Aus Video Menü Video Modus drücken der Taste Menü zum Aufruf des Aufnah memenüs 1 Auswählen des Videoformats HD D1 VGA HD Einstellen der Videoauflösung 1280 720 D1 Einstellen der Videoauflösung 848 480 VGA Einstellen der Videoauflösung 640 480 2 Einstelle...

Page 5: ...st in Aufnahmebereitschaft oder entfernen des USB Kabel ausschalten nach 10S 30S Video ist in Aufnahmebereitschaft oder entfernen des USB Kabel ausschalten nach 30S Bilderfassungsmenü Kameramodus drücken der Taste Menü zum Aufruf des Kam eramenüs 1 Bilderfassungsmodus Aus Verzögerung 2S Verzöger ung 10S Kontinuierlich Aus Drücken der Taste OK Bild wird sofort gemacht Verzögerung 2S Drücken der Tas...

Page 6: ...perren 2 Dateien löschen Einzeln löschen Alle löschen Einzeln löschen Löschen der aktuellen Datei Alle löschen Löschen aller Dateien 3 Diashow Start Intervall Zyklisch Nur Bilddateien Start Drücken der Taste OK zum Begin der Diashow Intervall Der Zeitraum zwischen jeder Datei ist eingestellt zwi schen 1 und 10 Sekunden Zyklisch Die Diashow wird wiederholt Systemmenü Zuerst die Taste Menu drücken u...

Page 7: ...SC PAL 6 Stromfrequenz 50Hz 60Hz 7 Format Löschen aller Dateien auf der Speicherkarte 8 IR LED Aus Ein Automatisch Aus Infrarotlicht ist ausgeschaltet Ein Infrarotlicht ist eingeschaltet Automatisch Infrarotlicht wird bei schwachen Lichtverhältnissen automatisch eingeschaltet 9 Auf Werkseinstellungen zurücksetzen Zurücksetzen auf die Werkseinstellungen 10 Versionsinformation Anzeige der aktuellen ...

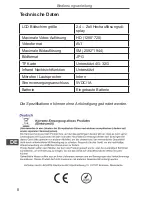
Page 8: ... Auflösung HD 1280 720 Videoformat AVI Maximale Bildauflösung 5M 2592 1944 Bildformat JPG TF Karte Unterstützt 4G 32G Infrarot Nachtsichtfunktion Unterstützt Mikrofon Lautsprecher Intern Stromversorgungsanschluss 5VDC 1A Batterie Eingebaute Batterie Die Spezifikationen können ohne Ankündigung geändert werden ...

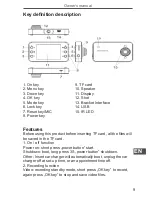
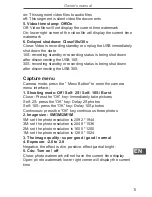
Page 9: ...ng this product before inserting TF card all the files will be saved in the TF card 1 On off function Power on short press power button start Shutdown boot long press 3S power button shutdown Other Insert car charger will automatically boot unplug the car charger off at set up time or an appointment time off 2 Recording function Video recording standby mode short press OK key to record again press...

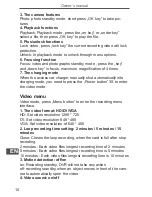
Page 10: ...ng mode you need to press the Power button 3S to enter the video mode Video menu Video mode press Menu button to enter the recording menu interface 1 The video format HD D1 VGA HD Set video resolution 1280 720 D1 Set video resolution 848 480 VGA Set video resolution of 640 480 2 Loop recording time setting 2 minutes 5 minutes 15 minutes Close Closes the loop recording when the card is full after s...

Page 11: ...B 30S Capture menu Camera mode press the Menu Button to enter the camera menu interface 1 Shooting mode Off Self 2S Self 10S Burst Close Press the OK key Immediately take pictures Self 2S press the OK key Delay 2S photos Self 10S press the OK key Delay 10S photos Continuous press the OK key continuous three photos 2 Image size 5M 3M 2M 1M 5M set the photo resolution is 2592 1944 3M set the photo r...

Page 12: ...rface 1 The date and time Set the current time and the time di splay format 2 Automatic shutdown 1 minute 3 minutes 5 minutes OFF 1 minutes standby mode automatically shut down after 1 minute 3 minutes standby mode after 3 minutes automatic shutdown 5 minutes standby mode after 5 minutes automatic shutdown OFF Standby does not automatically shut down 3 The sound Shutter start up sound key tone vol...

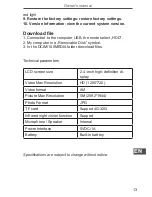
Page 13: ...emovable Disk symbol 3 In the DCIM 100MEDIA folder download files Technical parameters LCD screen size 2 4 inch high definition di splay Video Max Resolution HD 1280 720 Video format AVI Picture Max Resolution 5M 2592 1944 Photo Format JPG TF card Support 4G 32G Infrared night vision function Support Microphone Speaker Internal Power Interface 5VDC 1A Battery Built in battery Specifications are su...

Page 14: ...Owner s manual 14 EN ...

Page 15: ...życiem włóż kartę TF microSD wszystkie pliki będą zapi sywane na karcie 1 Włączanie wyłączanie Włączanie naciśnij przycisk zasilania Wyłączanie przytrzymaj przycisk zasilania przez 3 sekundy Inne Po podłączeniu ładowarki samochodowej urządzenie włączy się automatycznie po odłączeniu zasilania urządzenie wyłączy się od razu lub po ustalonym czasie 2 Funkcja nagrywania Wideo w trybie oczekiwania na ...

Page 16: ... podłączeniu ładowarki urządzenie automatycznie się włączy i zacznie nagrywanie wideo Menu Wideo W trybie wideo naciśnij przycisk menu by otworzyć menu wideo 1 Rozmiar filmu 1920 x 1080 1280 x 720 848 x 480 640 x 480 Wybór rozdzielczości nagrywanych filmów 2 Loop time Czas nagrywania w pętli Off 2 minuty 5 mi nut 10 minut Off nagrywanie trwa do zapełnienia karty 2 minuty maksymalny czas trwania dl...

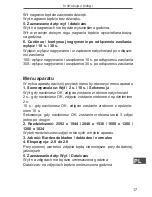
Page 17: ...tu naciśnij przycisk menu by otworzyć menu aparatu 1 Samowyzwalacz Wył 2 s 10 s Sekwencja Wył gdy naciśniesz OK zdjęcie zostanie zrobione natychmiast 2 s gdy naciśniesz OK zdjęcie zostanie zrobione z opóźnieniem 2 s 10 s gdy naciśniesz OK zdjęcie zostanie zrobione z opóźnie niem 10 s Sekwencja gdy naciśniesz OK zostanie zrobiona seria 3 zdjęć jedno po drugim 2 Rozdzielczość 2592 x 1944 2048 x 1536...

Page 18: ...pnie przycisk trybu by wejść do menu ustawień systemu 1 Data i czas Ustaw datę godzinę i format wyświetlania go dziny 2 Oszczędzanie energii 1 minuta 3 minuty 5 minut Off 1 minuta w trybie oczekiwania wyłącz urządzenie automatycznie po 1 minucie 3 minuty w trybie oczekiwania wyłącz urządzenie automatycznie po 3 minutach 5 minut w trybie oczekiwania wyłącz urządzenie automatycznie po 5 minutach Off...

Page 19: ... MSDC 2 W oknie Mój komputer wybierz dysk wymienny 3 Pliki znajdziesz w folderze DCIM 100MEDIA Specyfikacja techniczna Rozmiar ekranu LCD 2 4 cala wyświetlacz wysokiej rozdzielczości Maksymalna rozdzielczość wi deo HD 1280 720 Format wideo AVI Maksymalna rozdzielczość zdjęć 5M 2592 1944 Format zdjęć JPG Karta TF Obsługiwane od 4 GB do 32 GB Funkcja widzenia w podczer wieni Obsługiwana Mikrofon Gło...

Page 20: ...Instrukcja obsługi 20 PL ...

Page 21: ...sierele vor fi salvate pe cardul TF 1 Functia Pornire oprire Pornire apasati scurt butonul de pornire Oprire apasati lung timp de 3S butonul de pornire pentru inchi dere Altele Introducerea incarcatorului de masina va porni automat sistemul scoateti incarcatorul de masina la o ora presetata sau la o ora de incheiere programata 2 Functia de inregistrare Video inregistrare in asteptare apasati scurt...

Page 22: ...Modul incarcare In cazul in care incarcatorul auto este in functiune aparatul trece in mod automat in modul de incarcare trebuie sa apasati butonul Pornire timp de 3S pentru a intra in modul video Meniul video Modul video apasati Butonul de Meniu pentru a accesa interfata meniului de inregistrare 1 Format video HD D1 VGA HD Setati rezolutia video 1280 720 D1 Setati rezolutia video 848 480 VGA Seta...

Page 23: ...reste imediat dupa deconectarea de la USB 10S inregistrarea se opreste dupa 10 sec dupa deconectarea de la USB 30S inregistrarea se opreste dupa 30 sec dupa deconectarea de la USB Meniul captarii imaginilor Pe modul Camera apasati Butonul Meniu pentru a accesa interfata meniul camerei 1 Mod fotografiere Oprire Self 2S Self 10S Burst Inchidere Apasati Tasta OK pentru fotografiere imediata Self 2S A...

Page 24: ...nul OK pentru a porni afisarea succesiva sli de show Interval Intervalul dintre fisiere este setat intre 1 la 10 secunde Ciclu repetarea ciclica a afisarilor Meniul Sistemului Apasati intai Butonul Meniului apoi apasati Butonul Mod pen tru a accesa interfata meniului sistemului 1 Data si ora Setati ora curenta si formatul de afisare al orei 2 Oprire automata 1 minut 3 minute 5 minute OPRIRE 1 minu...

Page 25: ...une vizualizarea versiunii sistemului cu rent Descarcare fisiere 1 Conectare la dispozitivul USB al calculatorului selectand mo dul HDD 2 Selectarea optiunii HDD din My computer 3 Descarcarea fisierelor din directorul DCIM 100MEDIA Parametrii tehnici Dimensiuni ecran LCD 2 4 inch Rezolutie maxima video HD 1280 720 Format video AVI Rezolutie maxima imagine 5M 2592 1944 Format foto JPG Card TF Supor...

Page 26: ...Manual de utilizare 26 RO Specificatiile sunt supuse schimbarilor fara notificare prealabila ...

Page 27: ......

Page 28: ...www quer pl ...

Reviews: