background image

First steps

First dreams

Quax

®

First steps

First dreams

Quax

®

www

.quax.eu

[email protected]

37

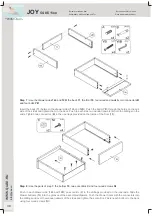
Step 5 : 

Use the parts of step

 1-2 

and

 4 

and ten eccentrics 

C

Insert six eccentrics (

C

) in the drillings provided at the underside of the bottom (

5

). Insert four eccentrics 

(

C

) in the drillings provided at the underside of the modesty panel (

30

). Push the bottom with its dowels 

into the drillings and over the connectors on the intermediate side (

2

) and fasten the eccentrics. Push the 

right side (

2R

) with its connectors in the holes and over the dowels of the bottom. Fasten the eccentrics. 

Push the modesty panel with its dowels into the drillings and over the connectors on the intermediate side 
(

2

) and fasten the eccentrics. Push the left side (

2L

) with its connectors in the holes and over the dowels 

of the modesty panel. Fasten the eccentrics. 

Step 6 : 

Use the parts of step

 3 

and

 5 

and twelve eccentrics 

C

Insert six eccentrics (

C

) into the holes provided at the top of a side. Insert three eccentrics (

C

) into the 

drillings at the underside of the bottom. Push the top (

1

) with its connectors into the openings and over the 

dowels on the sides and tighten the eccentrics. Push the cornice (

6

) with its connectors into the holes of 

the bottom and fasten the eccentrics.

JOY 

54 06 11xx

Bureau avec tiroir et porte

Desk with drawer and door

Bureel met lade en deur

Schreibtisch mit Schublade und Tür

Summary of Contents for JOY Desk with drawer and door 54 06 11 Series

Page 1: ...k Manuel Handbuch Manual V3 0 Sep 2014 Nederlands pagina 2 Fran ais page 12 Deutsch Seite 22 English page 32 JOY 54 06 11xx Bureau avec tiroir et porte Desk with drawer and door Bureel met lade en deu...

Page 2: ...en met zijn kledij of koordjes halssnoer en lintje van de zuigspeen wat een gevaar voor ophanging betekent Controleer alle verbindingspunten Inspectie Controleer het bureel regelmatig op onderdelen di...

Page 3: ...2 White Nettogewicht 40 kg Garantie Dit meubel wordt twee jaar lang gewaarborgd op fabricagefouten en middels vertoon van een aankoopbewijs en vermelding van het productienummer en datum vermeld op de...

Page 4: ...derbett mit verstelbarer Boden Quax First dreams First steps www quax eu info quax eu 4 3 Onderdelenlijst Controleer of je alle hieronder vermelde onderdelen terugvindt in de verpakking Bureau avec ti...

Page 5: ...e openingen onderaan een zijde Duw twee houten deugels A in de voorziene boringen bovenaan een zijde Bevestig de montageplaatjes RA op de voorziene gaten en schroef deze vast Plaats het drukslot DB op...

Page 6: ...n onderaan het topblad 1 Stap 4 Gebruik de bodem 5 het schaamschot 30 de kroonlijst 6 drie verbindingsbouten B en acht houten deugels A Duw vier deugels A in de voorziene boringen op de lange buitenka...

Page 7: ...jn verbindingsbouten in de gaten en over de deugels van de bodem Draai de excentrieken vast Duw het schaamschot met zijn deugels in de gaten en over de verbindingsbouten van de tussenzijde 2 Draai de...

Page 8: ...de openingen aan de binnenkant van het front 10 Stap 8 Gebruik de onderdelen van stap 7 de bodem 15 twee excentrieken C en vier houtschroeven NI Duw per ladezijde 12L en 12R twee excentrieken C in de...

Page 9: ...e tegen de achterste stop op de geleiders en duw de lade over de voorste stop van de geleider Hoogteregeling door de voorste stop op de geleiders aan te passen Duw de legboorddragers Y in de voorziene...

Page 10: ...awer and door Bureel met lade en deur Schreibtisch mit Schublade und T r JOY 54 06 11xx Stap 10 Gebruik de deur 14 beide scharnieren PB en vier houtschroeven NA Duw de scharnieren PB in de voorziene b...

Page 11: ...Bureel met lade en deur Schreibtisch mit Schublade und T r Stap 11 Gebruik de onderdelen van stap 9 en 10 Plaats de deur met de scharnieren op de scharnierplaatjes en schroef ze vast met de voorziene...

Page 12: ...oujours des pi ces d tach es originales obtenir chez le fabri cant ou le distributeur Risque d incendie Ne placez jamais le bureau proximit d une source de chaleur comme un chauffage lectrique un chau...

Page 13: ...meuble b n ficie d une garantie de deux ans contre tout d faut de fabrication et sur pr sentation d une preuve d ach t et num ro de production ainsi que sa date mentionn sur les cartons d emballage ou...

Page 14: ...stelbarer Boden Quax Quax First dreams First steps www quax eu info quax eu 14 3 Liste des pi ces d tach es Contr lez si vous retrouvez dans l emballage toutes les pi ces d tach es mentionn es ci dess...

Page 15: ...s les ouvertures pr vues en bas d un c t Ins rez deux chevilles en bois A dans les trous pr vus au dessus d un c t Fixez les plaquettes de charni re RA leur place pr vue au moyen des vis munis Fixez l...

Page 16: ...s du top 1 Etape 4 Utilisez le fond 5 la voile de fond 30 la corniche 6 trois boulons de raccord B et huit chevilles en bois A Ins rez quatre chevilles en bois A dans les trous pr vus aux extr mit s l...

Page 17: ...dans les per ages et travers les boulons du c t interm diaire 2 et serrez les excentriques Poussez le c t gauche 2L avec ses boulons dans les trous et travers les chevilles de la voile de fond Serrez...

Page 18: ...s de raccord B dans les ouvertures pr vues l int rieur du front 10 Etape 8 Utilisez les pi ces de l tape 7 le fond 15 deux excentriques C et quatre vis bois NI Poussez par c t 12L et 12R deux excentri...

Page 19: ...sembl contre l arr t l arri re des glissi res et poussez le tiroir travers la but e avant des glissi res R glage de la hauteur en adaptant l arr t avant des glis si res Poussez les supports d tag re Y...

Page 20: ...deux charni res PB et quatre vis bois NA Poussez les charni res PB dans les trous pr vus l arri re de la porte 14 et fixez chaque charni re avec deux vis bois NA Bureau avec tiroir et porte Desk with...

Page 21: ...Placez la porte avec ses charni res sur les plaques de charni re et fixez les avec les vis munies La porte peut tre ajust en trois dimensions en r glant les vis sur les charni res et leurs plaquettes...

Page 22: ...ei Feststellung solcher M ngel sofort den Gebrauch der Schreibtisch unterbrechen Brandgefahr Setzen Sie die Schreibtisch zur Vorbeugung der Brandgefahr keiner Heizquelle wie zum Beispiel der elektrisc...

Page 23: ...ettogewicht 40 kg Garantie F r dieses M bel gibt es eine zweij hrige Garantie angesichts Produktionsfehler mit tels Vorzeigung einer Einkaufsnachweis die Nummer der Produktion und das Datum erw hnt au...

Page 24: ...info quax eu 24 3 Unterteileliste berpr fen Sie die Vollst ndigkeit aller nachstehenden Unterteile in der Verpackung Bureau avec tiroir et porte Desk with drawer and door Bureel met lade en deur Schr...

Page 25: ...ndungsbolzen B in die L cher unten einer Seite Dr cken Sie zwei Holzd bel A in die Bohrungen an der Oberseite einer Seitenwand Die Montageplatten RA anziehen in die L cher auf der Vorderseite Stellen...

Page 26: ...esehen ffnungen unten der Obenplatte 1 Schritt 4 Benutzen Sie den Boden 5 die Sichtblende 30 das Gesims 6 drei Verbindungbolzen B und acht Holzd bel A Dr cken Sie vier Holzd bel A in den L chern an de...

Page 27: ...e L cher und ber der Bolzen der Zwischenseite 2 Die Exzenter anziehen Dr cken Sie die linker Seite 2L mit dem Verbindungsbolzen in den L chern und ber die D bel der Sichtblende und die Exzenter anzieh...

Page 28: ...anziehen in die Bohrungen auf der Innenseite des Fronts 10 Schritt 8 Benutzen Sie die Unterteile des Schrittes 7 den Boden 15 zwei Exzenter C und vier Holzschrauben NI Dr cken Sie proSeite 12 L und 1...

Page 29: ...Schublade dem hinterem Anschlag gegen ber Dr cken Sie Schublade ber dem vorderstem Arretierung hin H henverstellung der Schub laden durch Anpassung der vorderen Anschlag auf die F hrungen Dr cken Sie...

Page 30: ...niere PB und vier Holzschrauben NA Dr cken Sie die Scharniere PB in die vorgesehen Bohrungen auf der R ckseite der T r 14 und jede Scharnier mit zwei Holzschrauben NA anziehen Bureau avec tiroir et po...

Page 31: ...t ihrer Scharniere auf den Scharnierplatten und mit den mitgelieferten Schrauben anziehen Die T r lasst sich dreidimensional gesteuert werden durch Einstellung der Schrauben an den Scharnieren und Sch...

Page 32: ...rts Allways use original parts to obtain from the manufacturer or the distributor Fire hazard Do not place the desk near a heat source such as electrical heating gas heating etc in order to avoid any...

Page 33: ...ht 40 kg Guarantee This furniture comes with a two year guarantee on manufacturing defects and through a proof of purchase production number and date mentioned on the packaging or on this manual Info...

Page 34: ...odem Laufgitter mit verstelbarer Boden Quax First dreams First steps www quax eu info quax eu 34 3 Parts list Check whether all parts mentioned below are included in the packaging Bureau avec tiroir e...

Page 35: ...B into the holes at the bottom of a side Push two wooden dowels A into the holes provided at the top of a side Fix the hinge plates RA into the holes at the front of the side Hold the push lock DB at...

Page 36: ...s at the bottom of top 1 Step 4 Use the bottom 5 the modesty panel 30 the cornice 6 three connectors B and eight wooden dowels A Push four wooden dowels A in the holes provided at the long ends of the...

Page 37: ...y panel with its dowels into the drillings and over the connectors on the intermediate side 2 and fasten the eccentrics Push the left side 2L with its connectors in the holes and over the dowels of th...

Page 38: ...B in the openings provided on the inside of the front 10 Step 8 Use the parts of step 7 the bottom 15 two eccentrics C and four wood screws NI Push in each drawer side 12L and 12R an eccentric C in th...

Page 39: ...r against the stop at the end of the gliders Push the drawer over the stop at the front of the slides Height adjustment adjust the front stop on the slides Push the shelf supports Y into the holes pro...

Page 40: ...he two hinges PB and four wood screws NA Push the hinges PB in the provided holes on the back of the door 14 and fasten each hinge with two wood screws NA Bureau avec tiroir et porte Desk with drawer...

Page 41: ...the door with its hinges on the hinge plates and fasten with the provided screws The door can be three dimensionally adjusted by using the screws on the hinges and hinge plates JOY 54 06 11xx Bureau...

Reviews: