background image

Advanced 

Operation

27

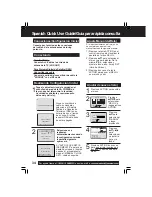
V-Chip Control Feature

Press ACTION to display MAIN MENU.

Enter Secret Code

V-Chip Control Feature is...

This unit has a built-in V-Chip Control which allows
you to block unwanted TV usage based on US
MOVIES and US TV PROGRAMS Ratings.

A 4-digit code must be entered to view a blocked program or
change rating settings.

1

• DO NOT forget your secret code.
• Once ratings are set, restricted tapes

or programs cannot be accessed
unless the secret code is entered.

Changing your secret code

• You will need your current

code. Do steps ~ 4. In step
5, press ADD/DLT to clear

current code. Repeat steps 4

and 5 to enter new code.

1) Press 

   to

select “TV.”

2) Press ACTION to

display SET UP TV
screen.

2

M A I N  MENU

T V

VCR

EX I T

CLOCK

C H

LANGUAGE

SET          : ACT I ON 

SELECT  :                              

1) Press 

 to select

LOCK.

2) Press   to display

screen.

3

1) Press number

keys to enter your
secret code.

2) Enter same code

again for confirmation.

4

Press   to display US
Ratings menu
(see page 28).
Or
Press ACTION
three times to exit.

5

LOCK


RECOGN I ZED

CHANGE  CODE : ADD / DLT   
CONT I NUE :  
END       : ACT I ON         

CONF I RM   4-D I G I T   CODE

****

****

Notes

Process of V-Chip Control
Feature

Setup

Blocking

Enter Code

ENTER  : 0 

9  

END       : ACT I ON    


LOCK


ENTER  4-D I G I T   CODE

-

---


• Step 2) not necessary

when changing rating
or secret code.

• Take care that you are

not observed entering
the secret code.

To Make Corrections
Press   repeatedly to
move the cursor. Press
number keys to make
the  correction.

LOCK

LOCK

CAPT I ON  
I NPUT   SELECT         : TUNER
V I DEO  ADJUST
 

SELECT :          
SET       :      
END       : ACT I ON      


SET  UP  TV  

SELECT/SET

 :CH UP

 :CH DOWN

 :VOL UP
 :VOL DOWN

ACTION

ADD/DLT

NUMBER Keys

Summary of Contents for Omnivision VV-1303A

Page 1: ...V 1303A VV 1303B LSQT0739A Forassistance pleasecall 1 800 211 PANA 7262 orsende mailto consumerproducts panasonic com Basic Operation Initial Setup TV Operation Timer Operation Advanced Operation For...

Page 2: ...ECTRICAL STORMS During a lightning storm or before leaving unit unused for extended periods of time disconnect all equipment from the power source as well as the antenna and cable system 4 WHEN UNIT I...

Page 3: ...er that important literature concerning the operation and maintenance of this unit has been included Therefore it should be read carefully in order to avoid any problems CAUTION TO REDUCE THE RISK OF...

Page 4: ...mark in this unit SP Standard Play 2 Hours 40Minutes 1 Hour 5 Hours 20Minutes 2Hours LP Long Play 3 Hours 8 Hours SLP SuperLongPlay Type of Video Cassette Tape Speed Setting T160 T60 Unit auto adjusts...

Page 5: ...12 Copy Your Tapes Dubbing 13 Tape Operation 22 24 Special VCR Features 25 26 V Chip Control Feature 27 29 On Screen Display OSD 30 Before Requesting Service 31 Limited Warranty 32 33 Customer Service...

Page 6: ...around on screen menu PROGRAM Displays SET PROGRAM screen You can set Timer Program and On Timer FAST FORWARD SEARCH Fast forwards tape and searches forward scene CM ZERO In Stop mode goes to the coun...

Page 7: ...rding FAST FORWARD SEARCH See previous page REC See previous page PHONES Jack Connect an earphone or headphones PROG TIMER Indicator Lights when the unit is set for Timer Recording ON TIMER Indicator...

Page 8: ...VHF UHF VHF UHF 2 6 2002 WED 12 00PM DST ON AUTO CLOCK SET COMPLETED SETTING CH 10 If AUTO CLOCK SET IS INCOMPLETEscreen appears set the clock using MANUAL CLOCK SET procedureonnextpage Initial Setup...

Page 9: ...e date year time and DST Daylight Saving Time 3 Press ACTION twice to start CLOCK and exit 3 1 2 Do Initial Setup on page 8 Model VV 2003A unit shown POWER ACTION SELECT SET CH UP CH DOWN VOL UP VOL D...

Page 10: ...SET ACT I ON SELECT TV EX I T CLOCK CH For Spanish For French Language MAIN MENU TV VCR EX I T CLOCK CH LANGUAGE SET ACT I ON SELECT Channels Clock Press ACTION to display MAIN MENU 3 Press to select...

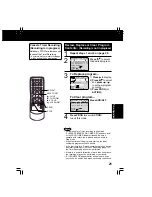
Page 11: ...channel with number keys and press ADD DLT CHANNEL 08 DELETED To delete channel Select channel with CH or number keys and press ADD DLT ACTION key on the unit Using keys CH UP CH DOWN VOLUME UP VOLUME...

Page 12: ...t a preset time PROG TIMER indicator lights on the unit 1 Insert a cassette with record tab The unit power comes on automatically Notes remove loose or peeling labels from tapes Forward Reverse scene...

Page 13: ...LINE mode See Selecting Input Mode below Press REC then PAUSE SLOW immediately to put in Standby mode Press PAUSE SLOW to start dubbing Press STOP to stop dubbing Selecting Input Mode Method 1 Press...

Page 14: ...ied or headphones not supplied to the Phones Jack NIGHT NITE Mode Color and picture intensity levels are adjusted so the screen is easier on your eyes during night time use Press NIGHT to set NIGHT mo...

Page 15: ...t color intensity TINT Control Adjust for natural flesh tones BRIGHTNESS Control Adjust picture brightness PICTURE Control Adjust picture intensity by adjusting both contrast and color level in the pr...

Page 16: ...norder 4 Press to select ALARM ON or OFF When ON is selected an alarm will gradually increase in volume for one minute or until canceled by pressing any button including VOL To Make Corrections use an...

Page 17: ...ining is 9 15 countdown will restart from 10 00 Press CH on the unit with CANCEL SET screen displayed to set alarm Time changes in the order shown left Alarm will sound at 0 00 Press any button to sto...

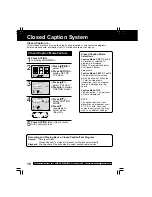
Page 18: ...Selections Caption Mode CAP C1 or C2 A narration of selected TV programs is displayed Check TV program listings for CC Closed Caption broadcasts Caption Mode TEXT C1 or C2 The lower half of the screen...

Page 19: ...ct CAPTION 2 Press to display CAPTION screen 1 Press to select CAPTION MODE 2 Press repeatedly to select OFF 1 Press to select CC ON MUTE 2 Press repeatedly to select desired mode Each press of will c...

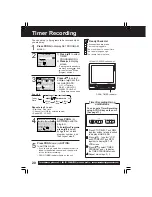
Page 20: ...is in place SELECT START DATE 7 FRI TODAY DATE START STOP CH SLP SELECT SET END PROG ACT I ON Press PROG to display SET PROGRAM screen 1 Press to select TIMER PROGRAMMING 2 Press to display screen If...

Page 21: ...ngs will be performed as programmed PressADD DLT Review Replace or Clear Program Contents Recording is not in progress 2 minutes before Timer recording is performed PLEASE PREPARE FOR TIMER REC appear...

Page 22: ...Example 2 To go to rec 6 from rec 2 enter 4 and press FF 6 1 5 7 2 3 4 1 7 5 3 4 6 2 Press SEARCH twice in Playback or Stop mode to display PROGRAM END SEARCH screen Press FF to start search Upon loca...

Page 23: ...no record tab reaches its end Rewind Stop Eject DETECTING TAPE POSITION is displayed only when a cassette is first inserted and it takes several seconds for correct tape position to appear The presen...

Page 24: ...de and stops at the last point the Counter was set to 0 00 00 Press DISPLAY during playback to display the Counter Playback repeats when tape end is reached or unrecorded portion over 30 seconds is de...

Page 25: ...blue back feature selecting ON will have no effect on theotherequipment VCR Lock All operations are prohibited except Timer recording and tape eject Useful for families with small children VCR LOCK A...

Page 26: ...eat step 4 until the CaptionListiscomplete To Make Corrections Press then to select channel number Press to change or ADD DLT to delete Channel Caption is Station names e g ABC TNN etc are set so they...

Page 27: ...y SET UP TV screen 2 MAIN MENU TV VCR EX I T CLOCK CH LANGUAGE SET ACT I ON SELECT 1 Press to select LOCK 2 Press to display screen 3 1 Press number keys to enter your secret code 2 Enter same code ag...

Page 28: ...ather bulletins and emergency information usually have no ratings 3 1 Press to select VIEW NR PROGRAMS 2 Press to set YES or NO 2 1 Press to select CHANGE SETTINGS 2 Press to display screen You may se...

Page 29: ...AUTIONED May contain sophisticated themes sexual situations strong language and more intense violence MATURE AUDIENCE May contain mature themes profane language graphic violence and sexual situations...

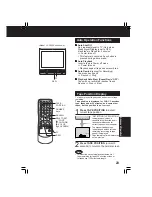
Page 30: ...eed Channel Caption See page 26 VCR Status Clock Display Blue Screen Display Channel Function Display OSD PLEASE SET CLOCK BEFORE PROGRAMMING CHECK CASSETTE RECORD TAB TO CANCEL TIMER REC HOLD DOWN ST...

Page 31: ...tte record tab is intact P 3 Check that clock is set to current time and date Make sure DSS CABLE box if used is left on and tuned to channel to be recorded Set recording Start Stop times correctly P...

Page 32: ...ceipt or other proof of the original purchase date is required for warranty service Carry In Mail in or In Home Service For Carry In Mail In or In Home Service as applicable in the United States call...

Page 33: ...se neglect mishandling misapplication alteration faulty installation set up adjustments misadjustment of consumer controls improper maintenance power line surge lightning damage modification or commer...

Page 34: ...a entrada de antena de laTV VHF UHF Para Sistema Digital de Satelite DSS Convertidor de cable Conecte la salida del convertidor de cable la VHF UHF con el RF cable Conectando Realizando Configuracion...

Page 35: ...las teclas num ricas correspondiente Seleccione la velocidad de grabaci n Presione SPEED SP reproducci n normal LP reproducci n larga SLP reproducci n super larga La velocidad seleccionada debe apare...

Page 36: ...laybackSpeedSettings 4 RemoteControlButtons 6 RepeatPlay 24 ResetLanguage Channels Clock 10 Resetunit 9 ReverseSearch 12 Rewind 12 S SecretCode 27 ServicenterList 32 SleepTimer 17 SlowMotion 12 Spanis...

Reviews: