54
Performing Initial Configuration
DXi6902 Installation and Configuration Guide
Connecting the
Ethernet Cables
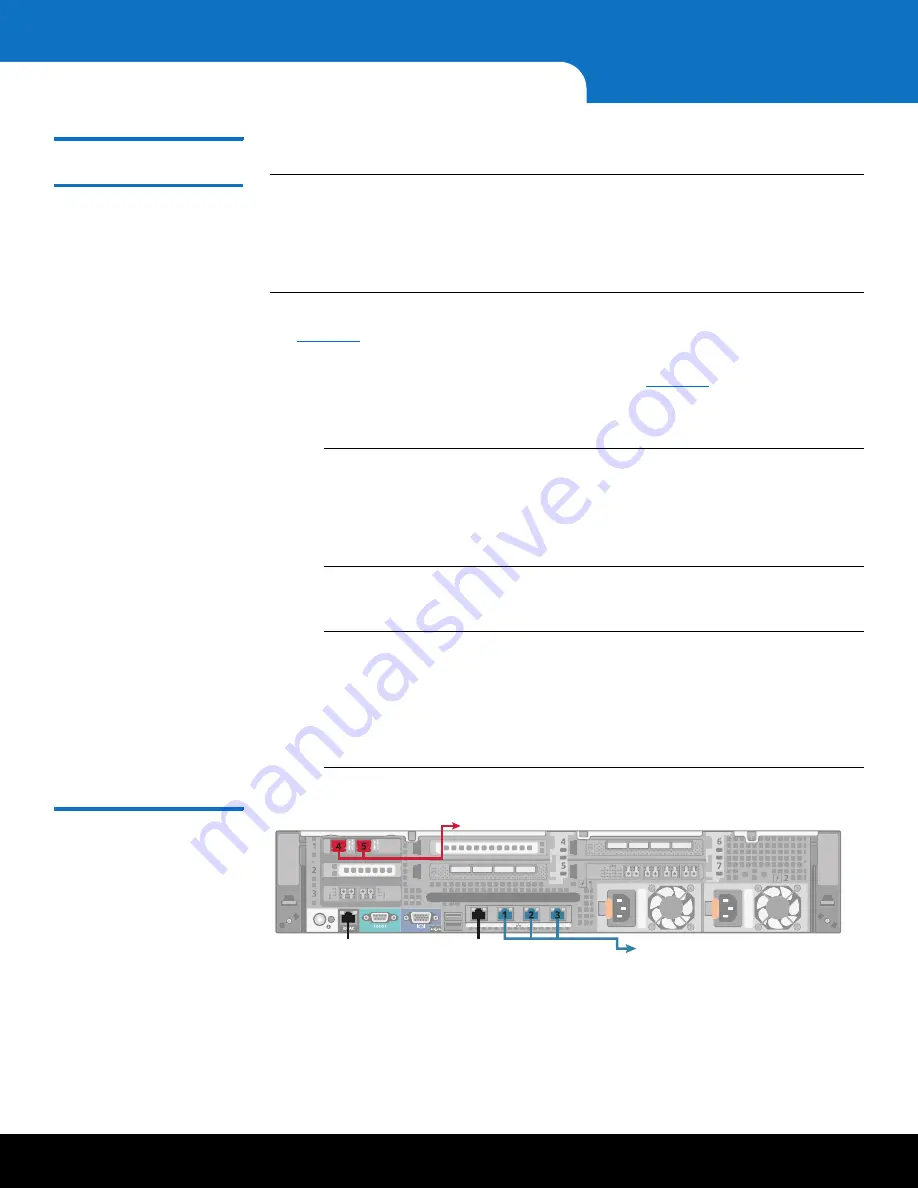
Connect the Ethernet cables to the DXi6902 Node as follows:
Note:
The Ethernet cables are used for remote management, NAS and OST
connectivity, and replication. Review the
DXi6902 Site Planning Guide
(6-68161) to determine the number of Ethernet cables to attach. When
connecting and disconnecting Ethernet cables or making configuration
changes, it is normal for the
Admin Alert
indicator to display on the remote
management console.
1
Connect up to three CAT6 Ethernet cables to the 1 GbE ports (1, 2, and 3) (see
).
2
There are two 10 GbE (SFP+) options available for the DXi6902 (Optical or Twinax).
Connect the appropriate cable for your system (see
):
•
Optical Option
- Insert an SFP+ unit into the 10 GbE ports (4 and 5) and
connect up to two 10 GbE optical cables.
Note:
Quantum DXi6902 systems support 10 GbE optical cable lengths of up
to 300 meters with OM3 cables and up to 100 meters with OM2 cables.
Quantum recommends using the DXi6902 10 meter LC to LC optical
cable type that are shipped with the DXi6902 system. Consult your
10GbE Optical switch/SFP documentation for additional information on
optical cable requirements.
•
Twinax Option
- Connect up to two 10 GbE Twinax cables to the 10 GbE ports
(4 and 5).
Note:
The 10 GbE Copper (Twinax) cable options that Quantum provides do
not support all switches. Please note the supported switches during the
purchase-configuration process, and if the Twinax cables supplied by
Quantum are
not
compatible with your switch, then you will need to
provide your own compatible Twinax cables from your switch vendor.
Be sure to have these available before the system installation takes
place.
Figure 47 DXi6902 Ethernet
Cabling
System Node (Rear)
To 10 GbE Network
To 1 GbE Network
iDRAC Port
(Not for Customer Use)
Service Port
(Not for Customer Use)


