4 of 14
2
To prepare the E1106 for use, proceed as follows:
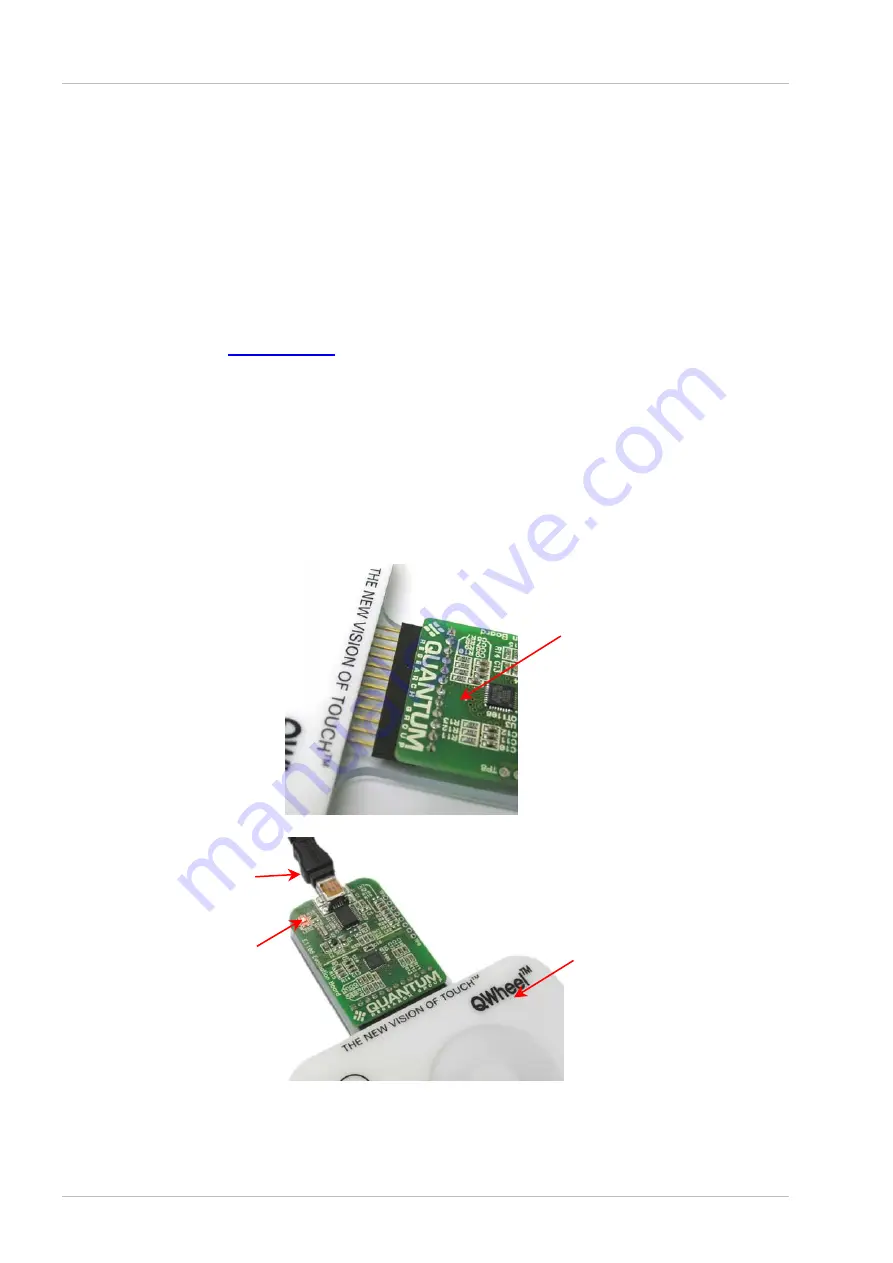
1. Connect the E1106 control board to the QWheel or QSlide evaluation assembly, ensuring
correct orientation of the connector (see
Figure 2
).
2. Using the USB cable provided, connect the E1106 control board to the computer (see
Figure 2
). The LED on the E1106 is lit constantly to indicate that there is power to the board.
3. Install the QT1106 Demo software; either method is acceptable:
a. Put the supplied CD in the CD drive of the computer. Copy the contents of the CD to the
computer. Double-click the QT1106 Demo software to open it.
OR
b. Go
to
www.qprox.com
, point to the
Support
tab and click
Download Archive
. Click
Software
and then the
QT1106 Demo
link. A dialog box appears asking if you want to run
or save the file that you are about to download. Click
Run
. This automatically downloads
the software.
If a dialog box appears saying “The publisher could not be verified. Are you sure you want
to run this software?” click
Run
.
4. QT1106 Demo software is displayed on the computer monitor (see
Figure 3, page 5
).
Note:
the E1106 QWheel and QSlide assemblies are supplied with a grounded transparent
backplate that allows the assemblies to be operated while being handheld, without requiring
recalibration. The backplate can be removed if required.
Figure 2: E1106 Connections
Connecting the E1106 Control Board to the E1106 QWheel or QSlide
Connections between the E1106 Control Board and computer
USB cable to computer
QWheel
Assembly
LED
Control board
should be
component
side up.


