www.quantolux.com
Deliver Results !
Quanto
Lux
Quick Guide
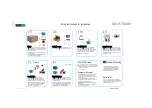
Setup Instructions for Installation
1
2
3
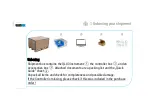
Unboxing
Shipment box contains the QLX3 instrument
①
,
the controller box
②
, and an accessories box
③
.
Attached documents are a packing list and this
quick guide sheet
④
.
Unpack all items and check for completeness and
possible damage.
If the Controller is missing, please check if this
was included in the purchase order !
①
②
③
④
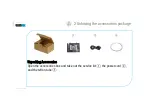
Unpacking Accessories
Open the accessories box and take out the service
kit
①
, the power cord
②
, and the teflon tube
③
.
①
②
③
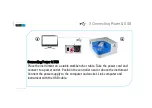
Connecting Power & USB
Place the instrument on a stable workbench or
table. Take the power cord and connect to a
power outlet. Position the controller near or above
the instrument. Connect the power supply to the
computer and socket. Link computer and
instrument with the USB cable.
4
Prepare gas accessories
Remove the two protective red caps from the
teflon tube ends
①
. Unplug the cap at the back
of the instrument: push in the plastic ring and
remove the tube piece
②
. Put all in the service
kit. Push the filter
③
into the exhaust pipe right
from the argon inlet.
6
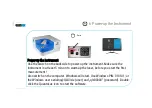
Power-up the instrument
Use the switch on the backside to power-up the
instrument. Make sure the instrument is at least 5
min on to warm-up the laser, before you start the
first measurement !
Also switch on the computer. Use Windows PIN:
010101; or the Windows user [email protected]
(user) and „qlx00000“ (password). Double-click
the QuantoLux icon to start the software.
5 min
Need help?
Windows licencing
Computer missing?
QLX 4.0 Software
If the instrument was ordered without controller,
this item is missing in your shipment. In that
case you need to provide your own computer and
Windows licence.
In this case the USB thumb drive contains the
setup routine for the QLX software as well as the
calibration data of your instrument.
Please refer to the installation guide provided on
the USB drive.
The software and calibration data are licenced to
work on this instrument only!
The controller comes with a Windows 10
licence. During production, Windows was
setup and used in offline mode. Please
register and activate Microsoft Windows
to make full use of the system!
If you have any questions or queries about
installation, please check the user manual, write
to [email protected] or contact your local
QuantoLux service partner.
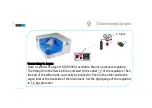
Connecting to Argon
Have a cylinder of argon 4.8 (99.998%)
available. Mount a pressure regulator. The
fitting from the Service Kit is screwed to the
outlet
①
of the regulator. Then the end of the
teflon tube can easily be pushed in. Push in the
other end to the argon inlet at the backside of
the instrument. Set the right gauge of the
regulator to 1.5 bar pressure!
5
1.5 bar
①
②
③
①
The QLX software is easy to use. Please refer to the
user manual for more details. Please customize your
software. The default users and their passwords are:
•
Supervisor – 193027
•
User – 12345
Part No. QL00188
Summary of Contents for QLX3
Page 1: ...QLX3 Installation Guide ...

