16
17
WARNING!
Don’t allow any liquid to get inside the charger; electric shock may result. To
facilitate the cooling of the battery pack after use, avoid placing the charger or
battery pack in a warm environment, such as in a metal shed, or an un-insulated
trailer.
WARNING!
Never attempt to open the battery pack for any reason. If the plastic housing of
the battery pack breaks or cracks, return it to a service centre for recycling; do not
put it into further use.
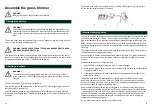
Install the guard
1. Remove four mounting screws from motor housing.
Note:
They are pre-mounted on the motor housing by factory to help the end-user find them
quickly and indicate to the end-user where these four screws should be used.
2. Fit the safety guard onto the motor housing.
3. Fix the safety guard in place by using these four screws.
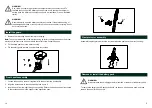
Front handle assembly
1. Loosen the knob and remove it together with the bolt from the front handle.
2. Align the front handle to the support and place it onto it.
3. Insert the bolt from the right through the opening. Ensure that the bolt head sits properly
in the recessed shape in the support, then tighten the knob.
Plant protector assembly
Assemble the plant protector into the slot in between the guard and the motor housing.
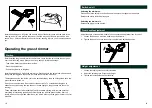
Remove or install the battery pack
WARNING!
Always release the on/off trigger before insertion or removal of the battery pack.
To remove the battery pack: Depress button (A) on the end of the battery pack, and then
remove the pack (B) from the tool.
knob
bolt

