background image

Original instructiOns

18 Volt 

cordless grass trimmer

HElPlinE nO 0844 8010979

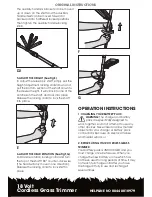
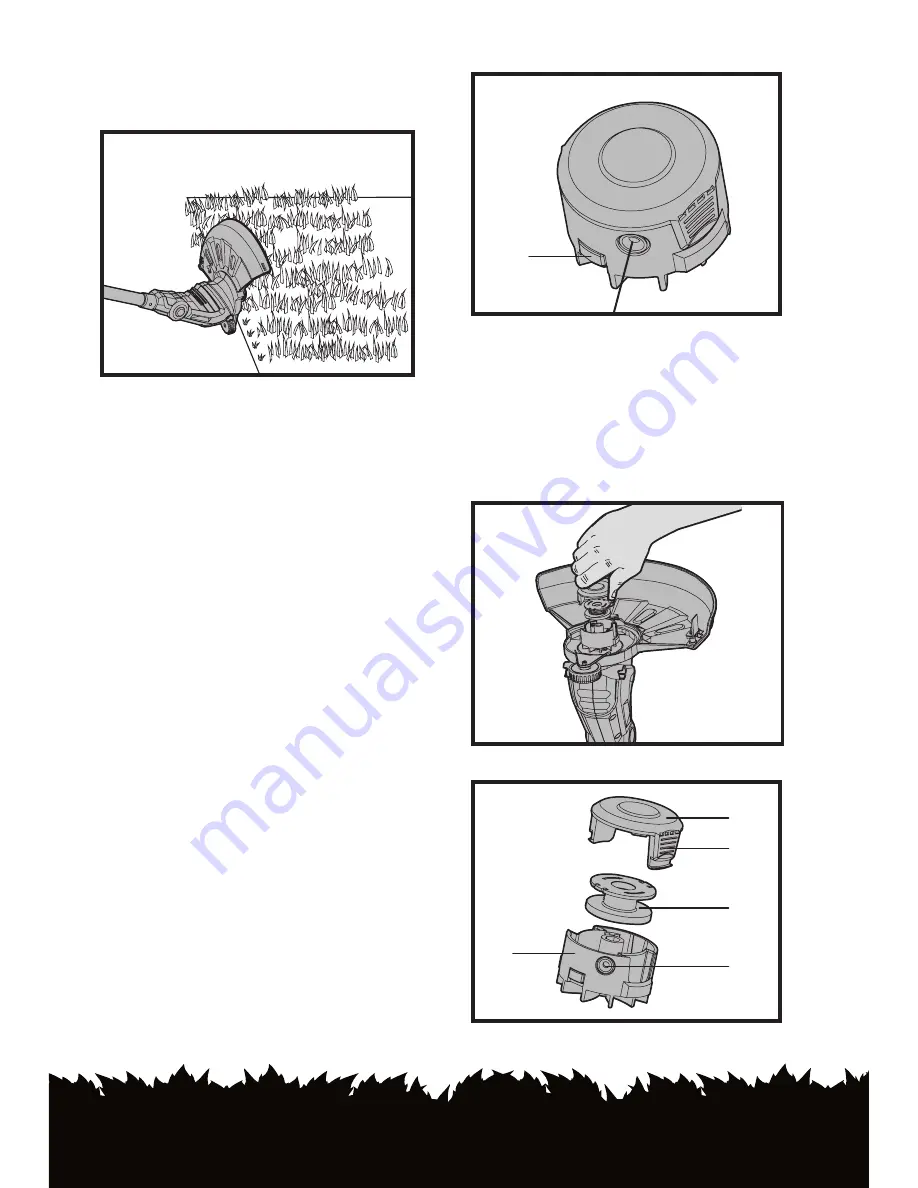
6.cutting edges

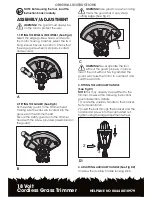
To edge, rotate the shaft 180

0

. Place edge 

guide and trimmer head above the surface 
you are going to edge, as shown in Fig P.
  

P

AutoMAtIc lINe feed SySteM

When initially switching on the trimmer, a small 
length of line is fed out.
A ‘clattering’ noise will be heard when the 
lines hit the line cutter. DO NOT BE ALARMED 
this is quite normal. After about 5 seconds the 
line will be cut to the correct length and the 
noise will reduce as the motor achieves full 
speed.
If the noise of the line being cut can’t be 
heard, more line will be fed out.
To feed more line, it is first necessary to allow 
the trimmer to stop completely, then restart, 
allowing the motor to reach full speed.
Repeat above until you hear the lines hitting 
against the line cutter. (Do not repeat this 
procedure more than 6 times).

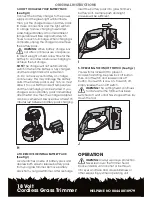
to MANuAlly feed tHe lINe (See fig Q)

If required, line can be fed out manually.
To operate, press and release manual line 
feed button (18), while gently pulling out the 
lines until the lines reach the line cutter.
When the required amount of line is fed out, 
gently pull on the second line (there is no 
need to press the manual line feed button 
again)
If the line extends past the line cutter, too 
much line has been fed out.
If too much line is fed out, remove the spool 
cap and turn spool counter-clockwise until 

the line is at the desired length.

Q

18

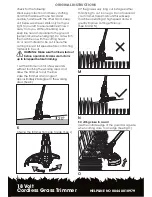
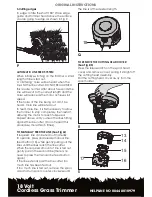
to ReMove tHe cuttING HeAd coveR 

(See fig R,S)

Press the release latch on the spool head 
cover and remove cover, pulling it straight off 
the cutting head assembly.
Pull the cutting head cover away from the 
spool holder.

R

S

13

14

17

15

16

Summary of Contents for cgt183a

Page 1: ...OPErating instructiOns cgt183a 18 Volt cordless grass trimmer HElPlinE nO 0844 8010979 ...

Page 2: ...able for outdoor use Use of a cord suitable for outdoor use reduces the risk of electric shock f If operating a power tool in a damp location is unavoidable use a residual current device RCD protected supply Use of an RCD reduces the risk of electric shock NOTE The term residual current device RCD may be replaced by the term ground fault circuit interrupter GFCI or earth leakage circuit breaker EL...

Page 3: ...are a Recharge only with the charger specified by the manufacturer A charger that is suitable for one type of battery pack may create a risk of fire when used with another battery pack b Use power tools only with specifically designated battery packs Use of any other battery packs may create a risk of injury and fire c When battery pack is not in use keep it away from other metal objects like pape...

Page 4: ...provided or recommended by the manufacturer k Always ensure that ventilation openings are kept clear of debris l Under abusive conditions liquid may be ejected from the battery avoid contact If contact accidentally occurs flush with water If liquid contacts eyes additionally seek medical help Liquid ejected from the battery may cause irritation or burns MAINTENANCE a When not in use store the mach...

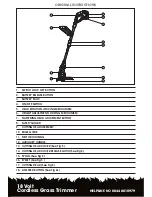
Page 5: ...cking mechanism 6 height adjustment locking mechanism 7 Flattening head adjustment button 8 Safety Guard 9 Cutting head assembly 10 Edge guide 11 Motor housing 12 Auxiliary handle 13 Cutting head cover See Fig S 14 Cutting head cover release latch See Fig S 15 Spool See Fig S 16 Eyelet See Fig S 17 Cutting head See Fig S 18 Line feed button See Fig Q 1 11 12 10 2 3 5 6 7 8 9 4 ...

Page 6: ... the safety guard onto the trimmer head with the screw provided assembled on the guard B WARNING Take great care when doing this as the guard has a very sharp cutting edge See Fig C c a WARNING Never operate the tool without the guard properly in place Use of the unit without having installed the guard will cause the motor to overheat and void the warranty 3 FITTING THE AUXILIARY HANDLE See Fig D1...

Page 7: ...AD ROTATION See Fig F G Pull Handle rotation locking collar and turn the top of the shaft 1800 counter clockwise The head will only move in one direction Release the locking collar to lock shaft in place f G OPERATION INSTRUCTIONS 1 CHARGING YOUR BATTERY PACK WARNING The charger and battery pack are specifically designed to work together so do not attempt to use any other devices Never insert or a...

Page 8: ... cool first to ambient temperature and then recharging can be started If you charge a second battery pack immediately after the first one then the charger adapter can be overheated Always allow at least 15 minutes rest between battery pack charging H 4 TO REMOVE OR INSTALL BATTERY PACK See Fig I Locate latches on side of battery pack and depress both sides to release battery pack from your grass t...

Page 9: ...before contacting material to be cut Warning Make sure that line is fed out before operation Make sure motor is up to full speed before trimming 1 Let the trimmer run for a few seconds without touching the working area and allow the trimmer to cut the line 2 Use the trimmer at an angle of approximately 20 degree to the working area See K 20o k 3 Swing the trimmer from side to side See L l 4 If the...

Page 10: ...wing the motor to reach full speed Repeat above until you hear the lines hitting against the line cutter Do not repeat this procedure more than 6 times TO MANUALLY FEED THE LINE See Fig Q If required line can be fed out manually To operate press and release manual line feed button 18 while gently pulling out the lines until the lines reach the line cutter When the required amount of line is fed ou...

Page 11: ...complete MAINTENANCE AND STORAGE Important note Always remove battery before cleaning repair and storage 1 Always remove the battery pack whenever you carrying out any cleaning or repair 2 Your tool requires no additional lubrication or maintenance There are no user serviceable parts in your tool 3 Never use water or chemical cleaners to clean your power tool Wipe clean with a dry cloth 4 Always c...

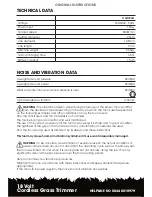
Page 12: ...r drilled The tool being in good condition and well maintained The use of the correct accessory for the tool and ensuring it is sharp and in good condition The tightness of the grip on the handles and any anti vibration accessories are used And the tool is being used as intended by its design and these instructions This tool may cause hand arm vibration syndrome if its use is not adequately manage...

Page 13: ...umber of days ACCESSORIES Auxiliary handle 1 Charger 1 Safety guard 1 Battery pack 1 We recommend that you purchase your accessories from the same store that sold you the tool Use good quality accessories marked with a well known brand name Choose the type according to the work you intend to undertake Refer to the accessory packaging for further details Store personnel can assist you and offer adv...

Page 14: ... Grass Trimmer HELPLINE NO 0844 8010979 ENVIRONMENTAL PROTECTION Waste electrical products should not be disposed of with household waste Please recycle where facilities exist Check with your Local Authority or retailer for recycling advice ...

Page 15: ......

Page 16: ......
Reviews: