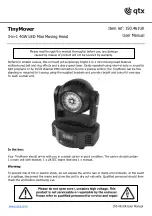

150.461UK User Manual
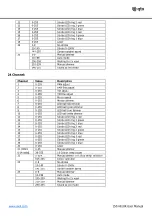
1.
Menu button
2.
Up button
3.
Down button
4.
LED display
5.
Enter button
6.
IEC input (110-240 Vac, 50/60 Hz)
7.
DMX output
8.
DMX input
9.
Laser key (on side)
Manual control menu:
Pre
ss the “
MENU
” butto
n to enter the settings menu.
P
ress “
UP
” and “
DOWN
”
buttons to navigate through various setting functions.
Press
“
ENTER
”
button to confirm the desired setting.
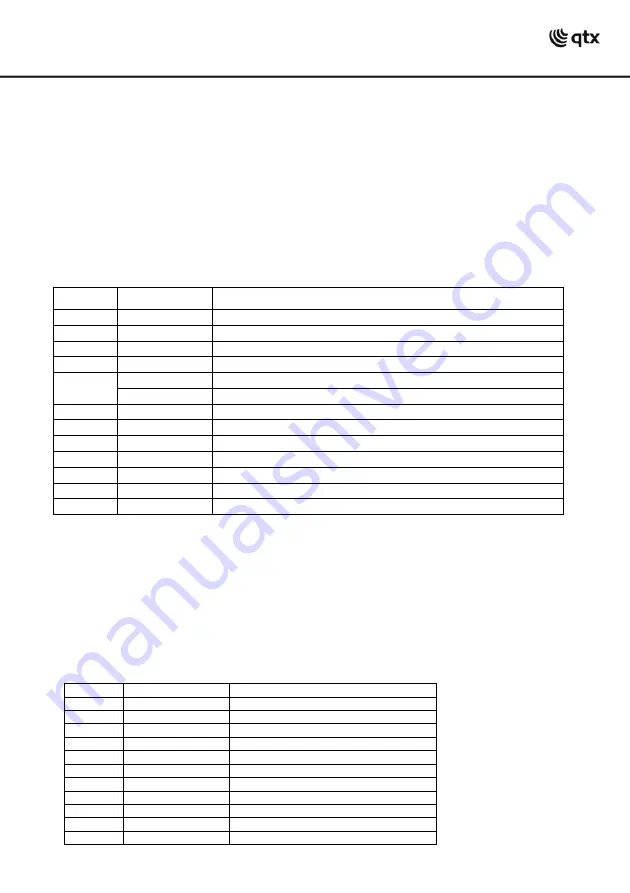
Menu
Function
Description
Addr
A001 - A512
DMX address settings
CHnd
20CH-24CH
DMX channel select
SLnd
Mast-d512
Master or slave select
Shnd
Sh1-Sh4
Sound active modes
Auto
Aut1-Aut4
Auto mode select
Sp1-Sp9
Auto mode speed select (slow to fast)
Sens
1-100
Sound active mode sensitivity adjust
LED
On-Off
LED display setting
diSP
On-off
LED display reverse
Pan
No-Yes
X-axis positive phase/X-axis reverse phase
Tilt
No-Yes
Y-axis positive phase/Y-axis reverse phase
Ver
V10
Software version
Rest
Factory reset
DMX mode:
The TinyMover can be controlled by DMX signal, simply connect the DMX signal source to the DMX input
on the unit via a balanced XLR lead. Extra fixtures can be controlled by the same DMX signal by looping
through the DMX out on the unit. To enter DMX mode, select A001 from the menu and confirm the correct
start address by using the
“
UP
”
and
“
DOWN
”
buttons and
“
ENTER
”
. The A on the LED display will begin
to flash once it
’
s received the DMX signal from the controller. This unit has 20 or 24 DMX channels as
indicated in the tables below:
20 Channel:
Channel
Value
Description
1
0-255
PAN adjust
2
0-255
Tilt adjust
3
0-255
Motor speed
4
0-255
Master dimmer
5
0-255
LED ball red dimmer
6
0-255
LED ball green dimmer
7
0-255
LED ball blue dimmer
8
0-255
LED ball white dimmer
9
0-255
Strobe LED ring 1 red
10
0-255
Strobe LED ring 1 green
11
0-255
Strobe LED ring 1 blue


