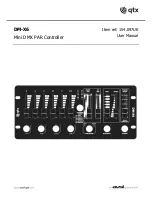
154.097UK User Manual
Setting up
Connect all PAR lights to be controlled in a chain from DMX outputs to DMX using a good quality DMX leads
(XLRF-XLRM) and connect the DMX OUT connector (12) on the DM-X4 to the DMX input of the first PAR
light in the chain. Various DMX PAR lights may have different channel allocations and the DM-X4 can be set
to one of 6 modes to control these. The chart below shows the 6 modes with channel fader allocations.
Mode
F1
F2
F3
F4
F5
F6
For cans with DMX allocation
RGBD
Red
Green
Blue
Master
RGB cans + CH4 Master Dim
RGBWD
Red
Green
Blue
White
Master
RGBW cans + CH5 Master Dim
RGBWAD
Red
Green
Blue
White
Amber
Master
RGBWA cans + CH6 Master Dim
RGBWAV
Red
Green
Blue
Master
Amber
Violet
RGBWAV cans
DRGBWAV
Green
Blue
White
Amber
Violet
Red+M
RGBWAV cans CH1 UV/Master Dim
RGBWAVD
Red
Green
Blue
White
Amber
UV
RGBWAV cans with Master on CH7
Note: RGBWAVD mode transmits 100% on CH7 to hold master dimming open.
Select the correct mode to match the type of PAR cans to be controlled. The above table gives examples of
fader 1-6 allocations and it important to try each mode to see which delivers the correct behaviour from the
lights that the DM-X6 is controlling. Remember that there may be a choice of DMX modes on each type of
PAR can and it is best to set all cans to a similar DMX mode. Selecting a mode that does not match the DMX
allocation of the fixture(s) may give unexpected and confusing results or may not work at all.
In addition, the DM-X6 can control 4 groups of lighting fixtures separately via the four Group buttons (2).
Each group of PAR lights should be set with the relevant start address as shown below.
Group DMX start address
Pressing the “1-10” Group button, engages Group 1
1
1
Pressing the “11-20” Group button, engages Group 2
2
11
Pressing the “21-30” Group button, engages Group 3
3
21
Pressing the “31-40” Group button, engages Group 4
4
31
Multiple groups can be selected together to control simultaneously
Groups that are selected are indicated by a blue flashing LED and any controls from the DM-X6 will affect
the group(s) selected. When a particular group is switched out, any further fader movements will not affect
that group. This feature makes a multi-zone light show possible with selected groups operating from auto
programs or sound-activated (see below) and others with manual control or static colour.
Operation
Connect the supplied mains adaptor to the DC input of the DM-X6 (13) and switch the power on (14)
For the selected group(s), moving the channel faders controls the amount of red, green, blue, white, amber
and ultra-violet light output of DMX PAR fixtures.
In addition to the 4 channel faders, the DM-X6 has a MIX fader (7) which allows fast access to RGBW colour
mixes in a single movement. For warm colours and UV content, an additional AV MIX slider (8) controls the
amount of amber and violet components in the output.
For strobe effects, pressing the Strobe button (6) will perform a white flashing sequence with a rate of
between 1Hz and 20Hz governed by the Strobe Speed/Sound Sensitivity slider (11). Moving the slider to
zero produces no strobe output. Releasing the Strobe button will return lights back to the previous state.


