Руководство пользователя
3. Installing System Components
54
www.qtech.ru
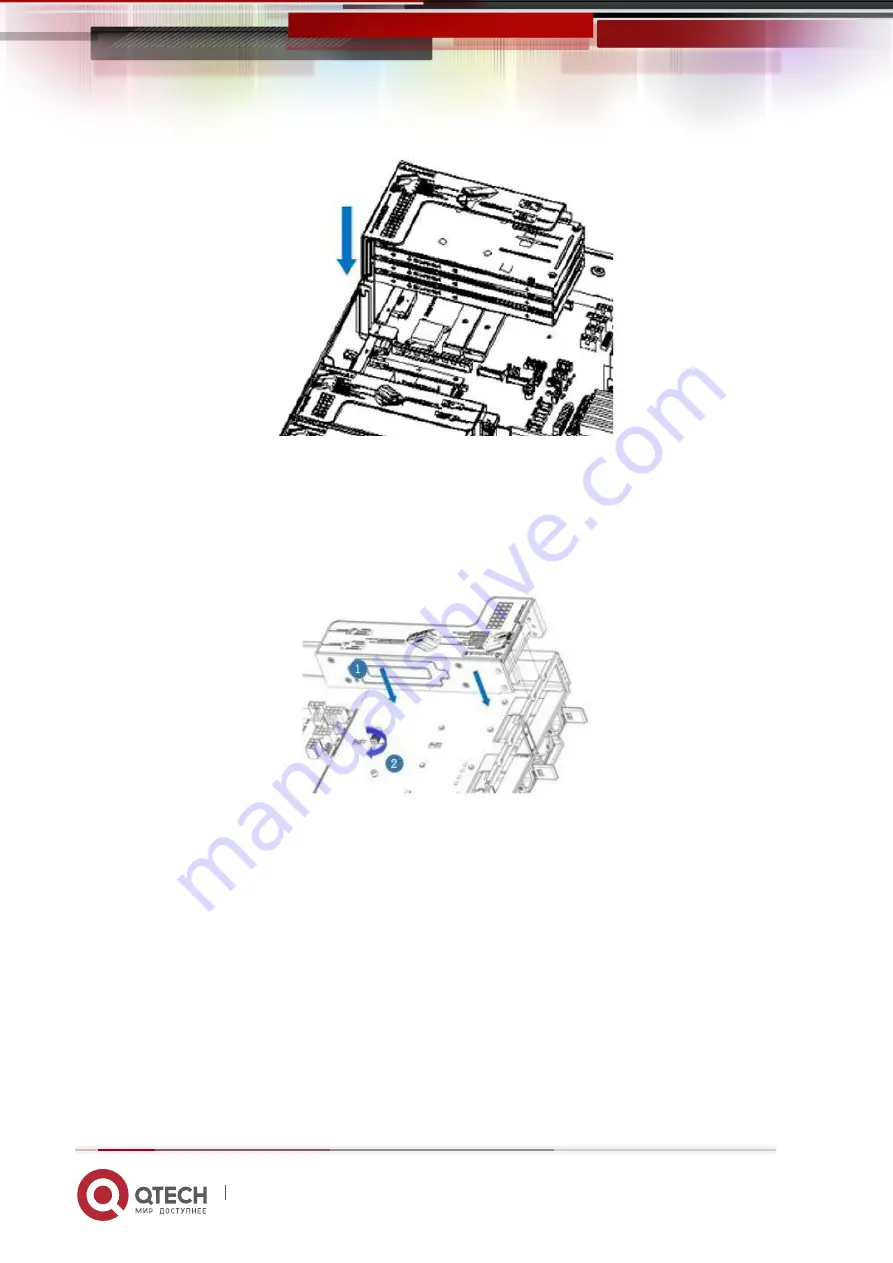
Figure 3-19
Riser4 module installation steps: rear window PCIE components, placed vertically
downward-align the PCIE slot, align the positioning holes, place it flush with the rear
window, and then tighten the side screws.
Figure 3-20
3.8 Rear hard disk module backplane installation
Step 1: Install the rear hard disk module backplane
1. Pull the back plate limiting shrapnel outward with your hand, and hold the shrapnel
with your hand-keep the shrapnel open
2. Align the nail holes of the hard disk backplane with the nails of the hard disk module
bracket and push it forward, and then place it down in place, release the hard disk
limit shrapnel, and the shrapnel automatically springs back to the original position;
Summary of Contents for QSRV-26 Series
Page 1: ...www qtech ru QTECH QSRV 26xxxx platform 2U manual server barebones...
Page 33: ...2 Product Introduction 33 www qtech ru Figure 2 9...
Page 51: ...3 Installing System Components 51 www qtech ru Figure 3 14 Figure 3 15...
Page 57: ...3 Installing System Components 57 www qtech ru Figure 3 25 Figure 3 26...
Page 60: ...3 Installing System Components 60 www qtech ru Figure 3 30 Figure 3 31...
Page 64: ...3 Installing System Components 64 www qtech ru Figure 3 37...
Page 67: ...4 System cabinet Installation 67 www qtech ru Figure 4 2...
Page 70: ...4 System cabinet Installation 70 www qtech ru Figure 4 5...
Page 135: ...5 BIOS parameter setting description 135 www qtech ru User Operator Administrator...
Page 148: ...6 RAID Setting Instructions 148 www qtech ru Figure 6 12...
Page 184: ...6 RAID Setting Instructions 184 www qtech ru Figure 6 76...
Page 199: ...6 RAID Setting Instructions 199 www qtech ru Figure 6 105...
Page 204: ...6 RAID Setting Instructions 204 www qtech ru Figure 6 57...
Page 208: ...6 RAID Setting Instructions 208 www qtech ru Figure 6 120...
Page 225: ...7 IPMI Rapid Deployment 225 www qtech ru Figure 7 13 KVM interface composition...


