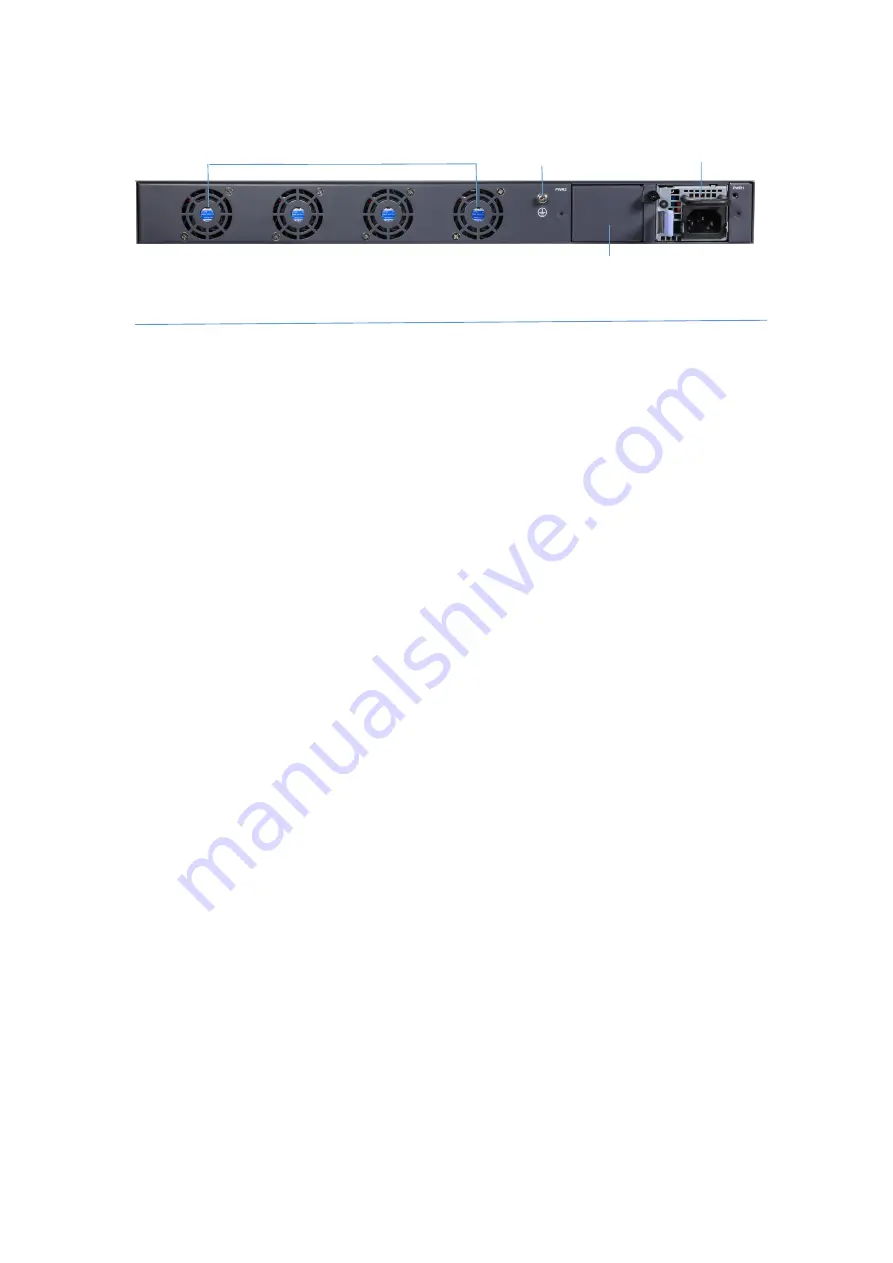
QSFPTEK S7300-48TE4X2Q Quick Start Manual Download Page 4

www.qsfptek.com

v1.0

4 / 11

Back Panel

Installation Requirements

Tools Preparation

Screwdriver

Static-proof wristband

Bolt

Ethernet cable

Other Ethernet terminal devices

Control terminal

Safety Principles

Keep dustless and clean during or after the installation.

Put the cover at the safe place.

Put tools at the right place where they are not easily falling down.

Put on relatively tight clothes, and fasten the tie or scarf well and roll up the sleeve, avoiding stumbling the machine box.

Put on the protective glasses if the environment may cause damage to your eyes.

Avoid incorrect operations that may cause damage to human or devices.

Site Environment

Make sure that the workshop is well-ventilated, the heat of electrical devices is well-discharged

Avoid to damage devices by following the electrostatic discharge prevention procedure. S5300-48M6X Hardware Installation

Manual

Put the machine box at the place where cool air can blow off the heat inside the machine box. Make sure the machine box is

sealed.

4 Bulit-in Fans

Grounding Column

AC POWER2

AC POWER1

Summary of Contents for S7300-48TE4X2Q

Page 1: ...www qsfptek com v1 0 1 11 V1 0 S7300 48TE4X2Q Quick Start Guide 48 Port Multi Gigabit Ethernet L3 Switch 48x 100M 1000M 2 5GBASE T with 4x 1G 10G SFP and 2x 40G QSFP Uplink Support BGP...

Page 2: ...It supports mature IPv6 features comprehensive security and reliability features simple to deploy and manage It can be used as an ideal and cost effective access or aggregation layer switch for campus...

Page 3: ...ort Front Panel LEDs LEDS Status Description RJ45 Port 1 48 Green On 2 5G port link Blinking 2 5G packets receiving or transmitting SFP Port TE1 TE4 Green On 10G port link Blinking 10G packets receivi...

Page 4: ...d roll up the sleeve avoiding stumbling the machine box Put on the protective glasses if the environment may cause damage to your eyes Avoid incorrect operations that may cause damage to human or devi...

Page 5: ...v1 0 5 11 Mounting the Switch Connecting the Power 1 Plug the AC power cord to the switch power port on the back rear 2 Connect the other end of the power cord to a AC power source equipment Connectin...

Page 6: ...s PC printer server storage etc 2 Connect the other end of the Ethernet cable to the switch RJ45 port Connecting the SFP Port 1 Insert the SFP module into the SFP port 2 Plug a fiber patch cable to th...

Page 7: ...er end of the fiber to the device that you want to realize data communication Connecting the Management Ports Connecting the Console Port 1 Prepare an console cable 2 Insert the RJ45 connector of the...

Page 8: ...Ethernet cable and open a web browser Step 2 Set the IP address of the computer to 192 168 0 x where x is any number from 2 to 254 and the subnet mask to 255 255 255 0 Step 3 Open a web browser and ty...

Page 9: ...h console port to your computer Step 2 Launch the terminal simulation software such as Hyper Terminal on the computer Step 3 Configure the parameters of the terminal emulation software as follows 9600...

Page 10: ...and air inlet are clean and then do relative operations in section 2 3 Requirements for Common Locations 3 If the switch cannot be started and the PWR indicator is off check the power Faults Relative...

Page 11: ...sources customer success stories Product Warranty S7300 series switches are backed by a 5 year limited warranty supported by QSFPTEK And you are eligible to apply for a return or e xchange of your ite...

Reviews: