7
TD-001654-01-A
Installation — NC-12x80 & NC-20x60 PTZ
3
1
2 (x4)
5
4 (x4)
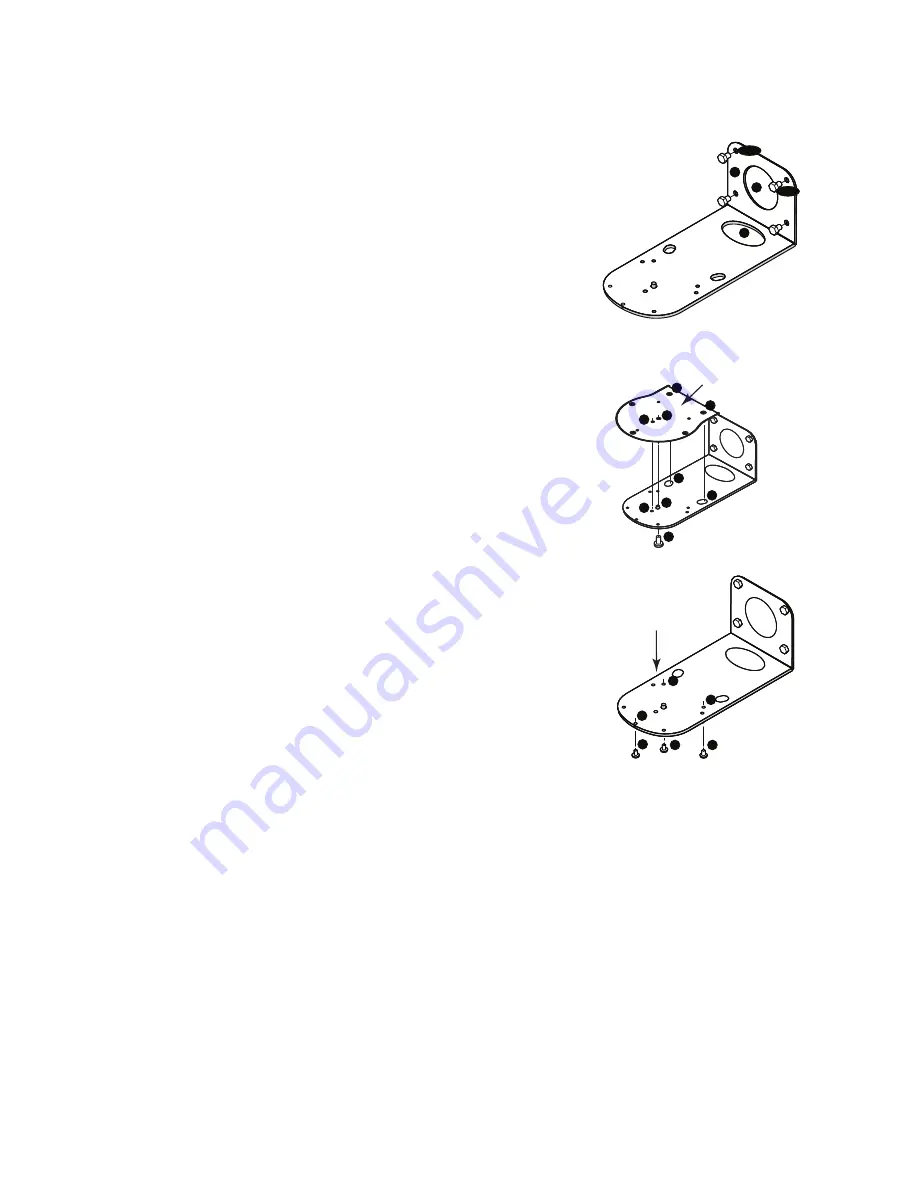
Install the Wall Mount Bracket
1. Select a location on the wall or other vertical surface where the camera is to
be mounted. Make sure the surface is strong enough to hold the weight of the
camera and bracket.
2. Use the short side (1) of the bracket as a template to mark the location of the
four mounting holes (2) onto the wall.
3. If the camera cables are installed inside the wall, run the cables through the
large hole (3) in the short side of the bracket.
4. Using appropriate screws (4), as necessary, attach the bracket to the wall.
Tighten the attaching hardware. (Screws not supplied.)
Bottom plate of Camera
– Camera not shown
C
C
C
C
B
B
B
A
A
Mount the Camera on the Wall Bracket
1. Align hole A on the bottom of the camera with the alignment pin A on the
wall bracket. Place the camera onto the bracket so the alignment pin is
inserted into the alignment hole on the camera and the rubber feet (C) on the
bottom of the camera are inserted into the two slots (C).
2. Install the larger screw (B) up through the wall bracket into the threaded hole
on the bottom of the camera. Use a Phillips screwdriver to loosely tighten the
screw.
3. Install three smaller screws D, E, and F up through the wall bracket into the
bottom of the camera. Tighten the screws using a Phillips screwdriver.
Bottom plate of Camera
– Camera not shown
F
F
D
D
E
E
4. Tighten the larger screw installed earlier.
5. If the camera cables are not installed in the wall, run the cables up through
the oval hole (5) in the longer part of the bracket.
6. Attach the cables to the appropriate connectors on the back of the camera
per installation requirements.
7. Secure the cables to the bracket so that there is no strain placed on the
connectors.


