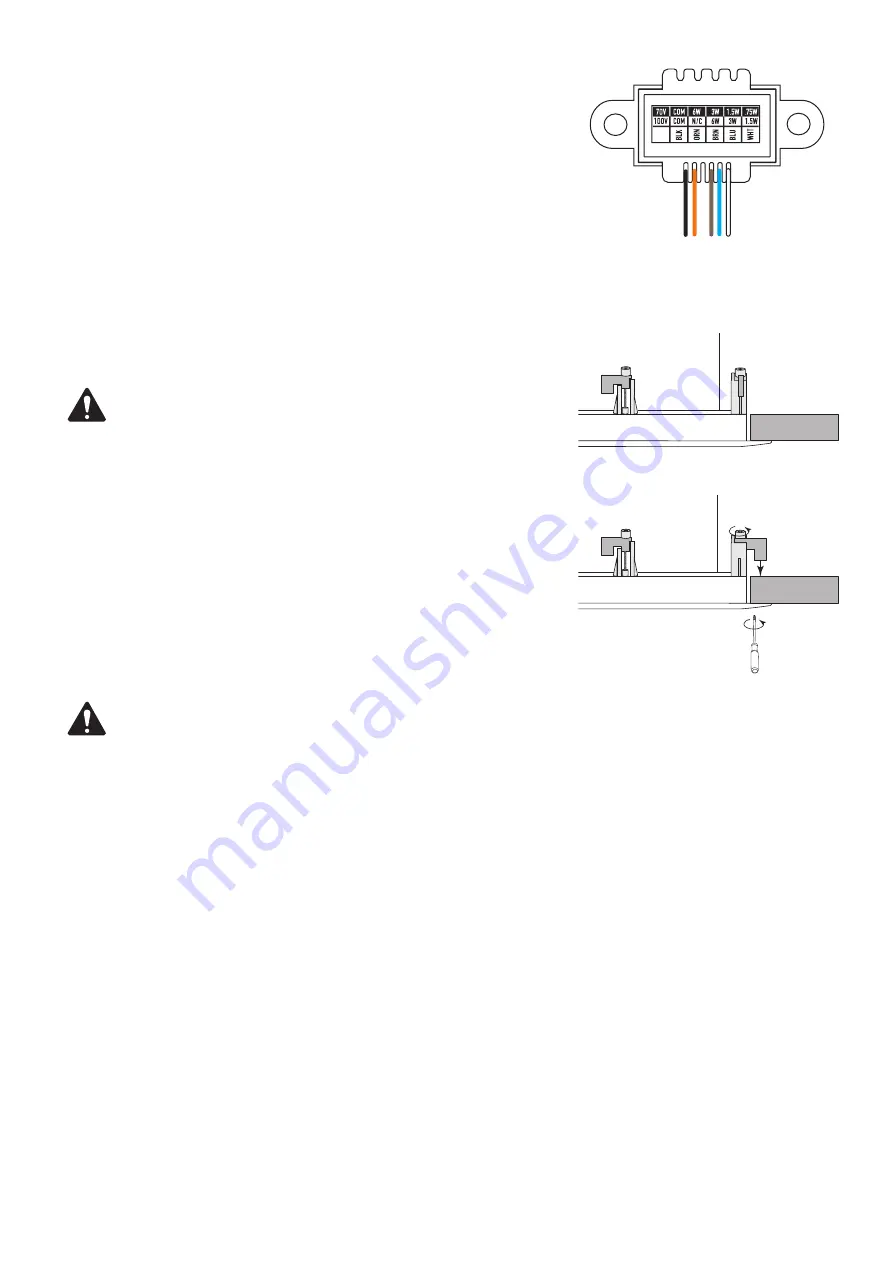
Mount the Loudspeaker
Refer to
Figure 2
.
1. Make sure all of the dog-ears are fully extended and in their non-capture position.
2. Position the loudspeaker into the hole prepared in the ceiling.
3. Use a Phillips screwdriver to tighten each of the four dog-ear screws. As you tighten the
screws, the dog-ears will swing into capture position over the ceiling. Be sure all dog-ears
are properly positioned over the ceiling.
4. Tighten the dog-ears until firm contact is made with the ceiling surface.
CAUTION!:
Do not overtighten the dog-ear screws!
5. Install the loudspeaker grill.
Prepare Ceiling
1. Use the template provided to mark and cut a hole in the ceiling where the loudspeaker is
to be installed.
Wire the Loudspeakers
Refer to
Figure 1.
1. On the loudspeaker transformer, identify the common (black) and the appropriate color
coded wire for the desired wattage tap.
2. Trim the ends of the non used color coded tap wires to ensure no bare ends come into
contact with other tap wires or metal surfaces.
3. Using wire nuts or crimps, attach the speaker supply wire negative to the common (black)
lead of the transformer. Attach the speaker supply wire positive to the selected color
coded transformer lead.
CAOTONN!:
Do not attach more than one color coded transformer tap
lead. This may result in transformer saturation and possibly damage the
loudspeaker.
- Figure 1. -
- Figure 2. -
Dog-ears against loudspeaker
1
Turn the screw clockwise to engage the
dog-ear with the ceiling.
2


