background image


Step 2-Set the feeding time and number of feedings per day  

1.


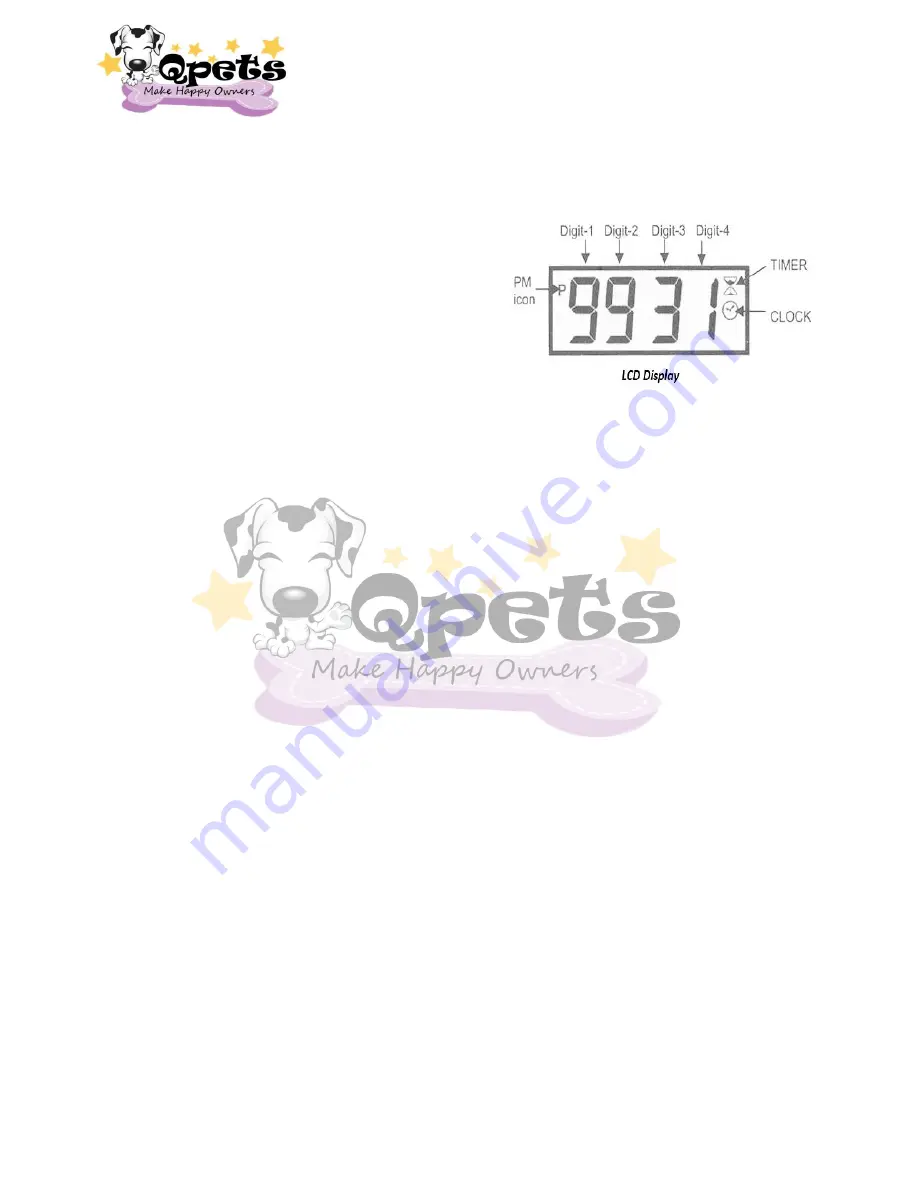
‘1 07’ will be flashing now. The first digit-
1 represents either the 1

st

, 2

nd

, 3

rd

, or 4

th


daily  feeding.  Digit-3  and  digit-4  are  the 
feeding time (in hour increments). 

2.


The  LCD  display  show  the  1

st

  feeding 

time (1 07) represent ( 1

st

 feeding at 7am) 

3.


With (1 07) Flashing, press and hold  the 

SET

 key for 2 seconds until digit-3 & digit-

4 start flashing(07). 

4.


Press  the 

TIMER 

key  to  set  the  desired 

hour for feeding.


Notice the (P) on the top left corner stands for PM when using 

12 hour time. 

5.


Press 

SET

 key ONLY if you want to continue to set another feeding time.  

If you do not wish to continue setting another one, then just press 

START

 to save 

and exit.    

6.


Repeat 4-5 to set the desired hour for another feeding time. 

The feeder allows 

MAX. 4 feeding times to be scheduled per day.


7.


If  you  want  to  change  the  previous  feeding  schedule,  press  the 

Timer

  key  and 

then press the 

SET

 key and hold it for 2 seconds. This will allow you to go back to 

the 4-5 for setting the feeding time again. 

Note:

 Feeding times must be set in ascending order for the feeder to work properly. 

LCD displays the next feeding time. Press CLOCK to see current time.


Step 3-Set the feeding volume/portion size 

1.


Press the 

VOL

 key to display feeding volume/portion size 

2.


Press and Hold the 

SET

 key for 2 seconds until the digit-4 blinks 

3.


Press the 

VOL

 key to set the desired volume 

4.


Press the 

START

 key to confirm the volume/portion size 

Note:

 A Feeding volume of 1 equals ¼  cup of food, 2 equal ½  cup of food, and 3 equal 

¾   cup  of  food  and  so  on.  Setting  the  volume/portion  size  to  0  represents  the 
maximum portion size which is equal to 10 portions/2.5 cups of food 


Summary of Contents for AF 100

Page 1: ...Large Capacity Automatic Pet Feeder Please read this guide before programming the feeder...

Page 2: ...feeding time and number of feedings daily 4 Step 3 set the feeding volume portion size 4 GENERAL OPERATION 5 How to review the settings 5 How to change a scheduled feeding time 5 How to change a pre s...

Page 3: ...Feeder lid top 1 x Food Tray 1 x User Manual Quick Start Guide Function of Control Panel Keys ON SWITCH Turn the feeder on off Turn off only when not using for long periods as this will RESET clock an...

Page 4: ...y please turn off the power and wait for 1 minute then switch back on 6 Follow the steps 1 3 to set up the feeding schedule and portion size Step 1 Set the current time 1 All digits should be flashing...

Page 5: ...or another feeding time The feeder allows MAX 4 feeding times to be scheduled per day 7 If you want to change the previous feeding schedule press the Timer key and then press the SET key and hold it f...

Page 6: ...sed How to change a scheduled feeding time 1 Press the Timer key and then press the SET key and hold it for 2 seconds This will allow you to go back to set the feeding time again 2 Press the TIMER key...

Page 7: ...eding volume You can erase the preset feeding time and feeding volume by pressing the SET and START keys at the same time Then just reset the feeder from the beginning How to record voice message to b...

Page 8: ...Lock Care and Cleaning When the food tank starts getting dirty and there is a lot of loose food at the bottom of the food tank you can remove the lid and food tank for cleaning Use a soft damp cloth t...

Page 9: ...ed up with your fingers The locks are spring tensed Please be careful with the spring tensed locks when they snap back you might get injury To reconnect the food tank from the base Use your thumbs to...

Page 10: ...to start your original program setting again 5 If the timer icon is OFF and all numbers are flashing then no feeding schedule has been set and need to set up again 6 Only when CLOCK is pressed and th...

Page 11: ...AM 5 00 PM Pacific Time Email qpets lavasat com Add LAVA Electronics Inc 2580 E Philadelphia ST D Ontario CA 91761 This product has a limited Manufacturer Warranty Details of the warranty can be found...

Page 12: ...LAVA Electronics Inc 2580 E Philadelphia St D Ontario CA 91761 USA 1 909 923 8743 www lavasat com Email qpets lavasat com Copyright LAVA Electronics Inc 2011 All rights reserved...

Reviews: