866.990.QOMO | 46950 Magellan Dr, Wixom, MI 48393 | [email protected]
1
2
1.
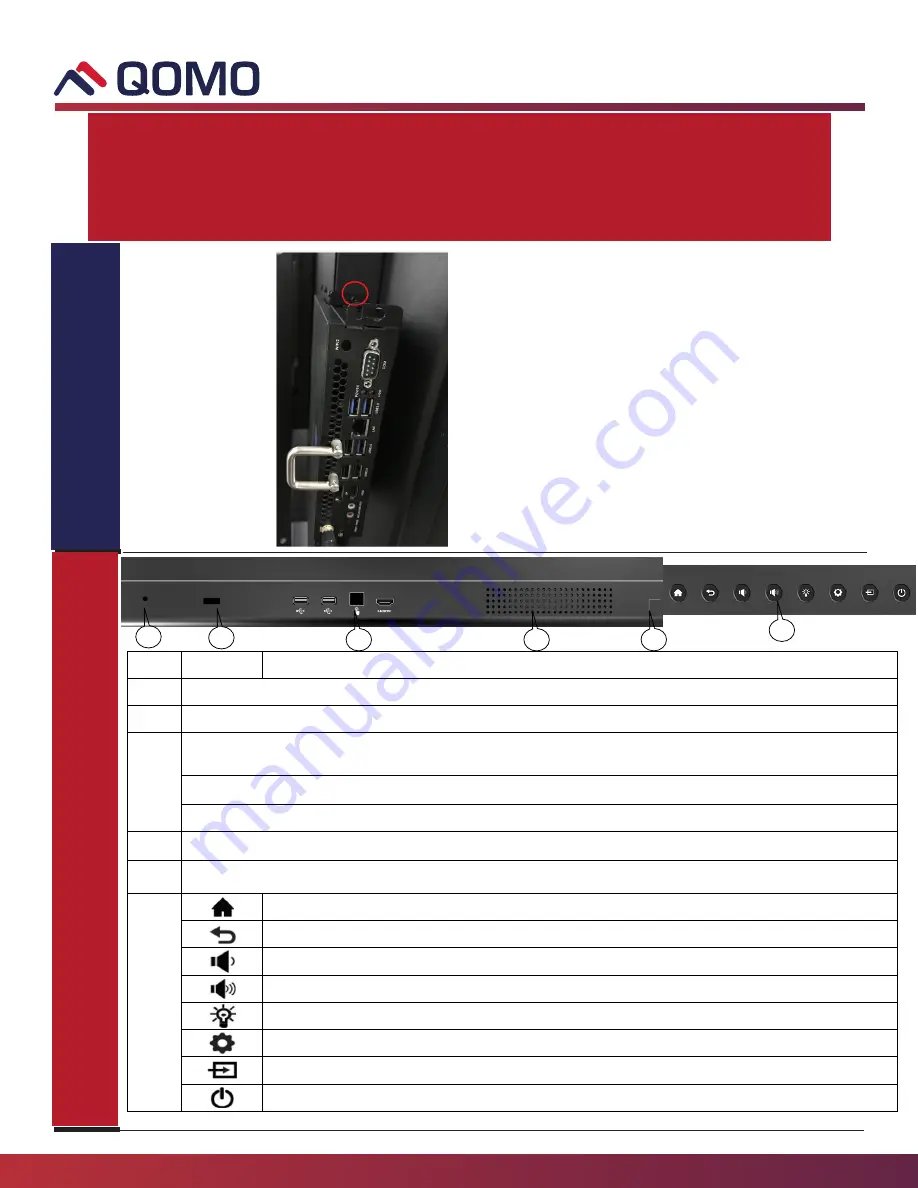
Insert the OPS into the special slot on the rear of the
interactive panel.
2.
Tighten the screws.
3.
Confirm that the OPS is installed correctly.
Note: The OPS does not support hot-plugging. Please
insert the plug of the OPS after the interactive panel is
disconnected from the power.
OPS
Installation
Item
Icon
Function Description
1
Brightness sensor: Auto adjust brightness according to the environment
2
Remote control receiving, effective receiving area
≈
3m
≤
30°, or
≤
5m vertical.
3
Android/PC USB port*2 auto switch
(
Do not switch the signal source if the usb
flash drive is writing.
)
Touch Port, designated for Front HDMI port
HDMI port used to connect an external display device
4
Front Speakers
5
Magnetic pen holder
6
Enter/Return to
Android
home page
Return to previous interface
Decrease volume
Increase volume
Enter ECO mode to turn off the display
Enter/Exit Setting menu
Enter/Exit signal source menu
Power button: On or standby mode
2
3
1
4
5
6
JOURNEY 14 PANEL
QUICK START GUIDE
(If you do not have
an
OPS, you may skip the following step)
Install the OPS by the following steps:


