


4. Adjust the width of the guides to the width of the label paper.
5. Close the print head by pulling the cover with both hands down. Make sure the print head is completely
closed.
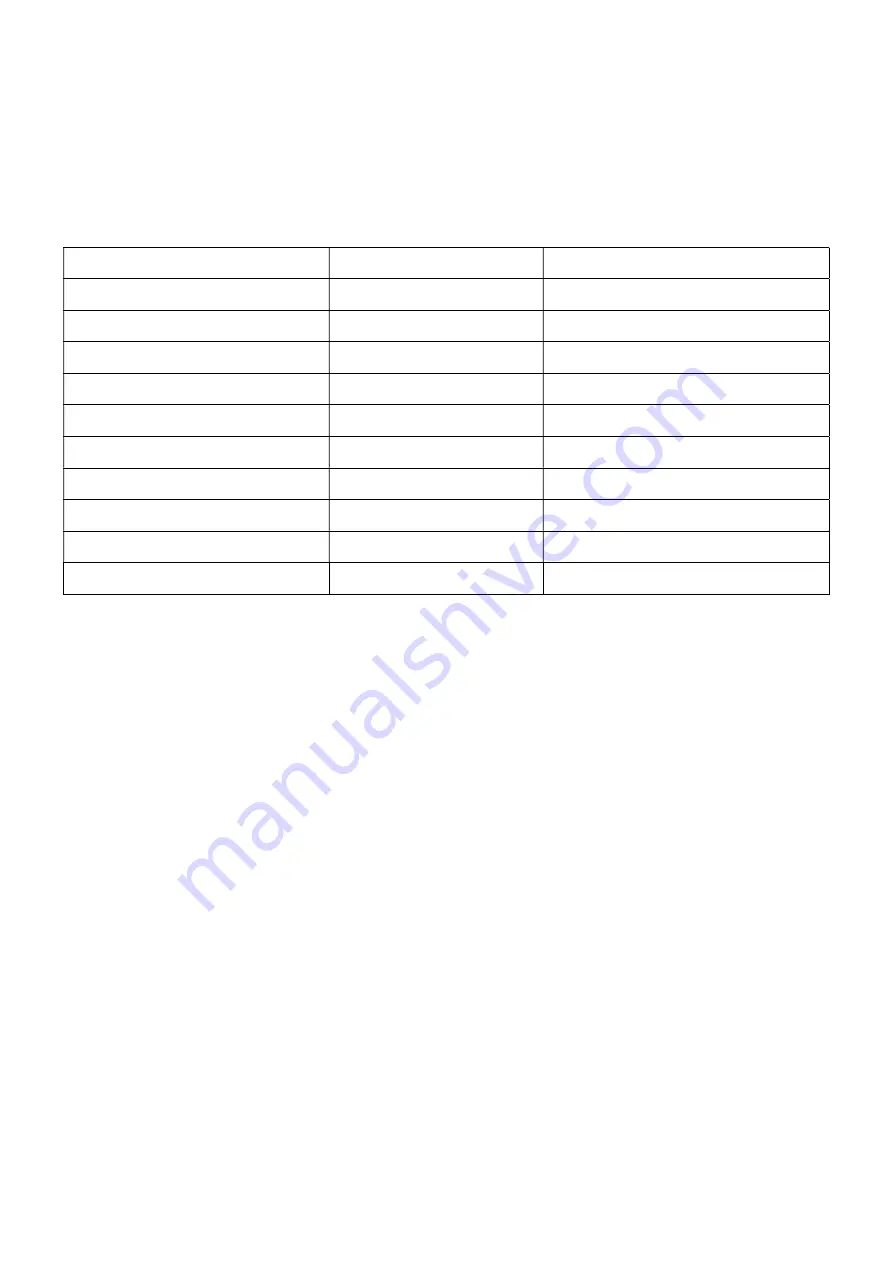
LED functions
LED
Sound signal
Problem
Flashes 2 times
2 times
Mechanism error
Flashes 3 times
3 times
No paper
Flashes 4 times
4 times
Error cutting paper
Flashes 5 times
5 times
Overheating
Flashes 6 times
6 times
Error opening printer
Flashes 7 times
7 times
Character error
Flashes 8 times
8 times
Black mark error
Flashes 9 times
9 times
Failure SDRAM
Flashes 10 times
10 times
LED faults
Flashes 11 times
11 times
Ribbon error
Key Functions
1. Loading paper
When the printer is ready to work (the LED is lighting on blue) - Press the button to load the label paper.
2. Pause printing
While printing, press the FEED button gently to pause the printing. Pressing the FEED button again will allow
you to continue printing.
Power on functions
The printer has three power-on features available to enable you to test or set up your hardware. Pressing or
releasing a button when the printer starts up will activate these features.


