background image

Loading the

500-Sheet

Cassette

2-3

Consumables

n

Store media away from moisture and humidity. They may cause 
media to turn up at the edges or wrinkles to occur. The recom-
mended relative humidity during operation is 15%-85%.

n

Load media printing side up. The printing side of paper is indi-
cated on the paper wrapping.

Loading the 500-Sheet

Cassette

The QMS 1060E Print System comes standard with one 500-sheet 
letter/A4 cassette. The printer automatically pulls media from the cas-
sette, if the cassette is selected. You may purchase an optional cas-
sette from your QMS vendor.

»

Note: 

You should ensure that the media size matches the cassette 

size. Otherwise, the printed image will not be correctly placed on the 
page.

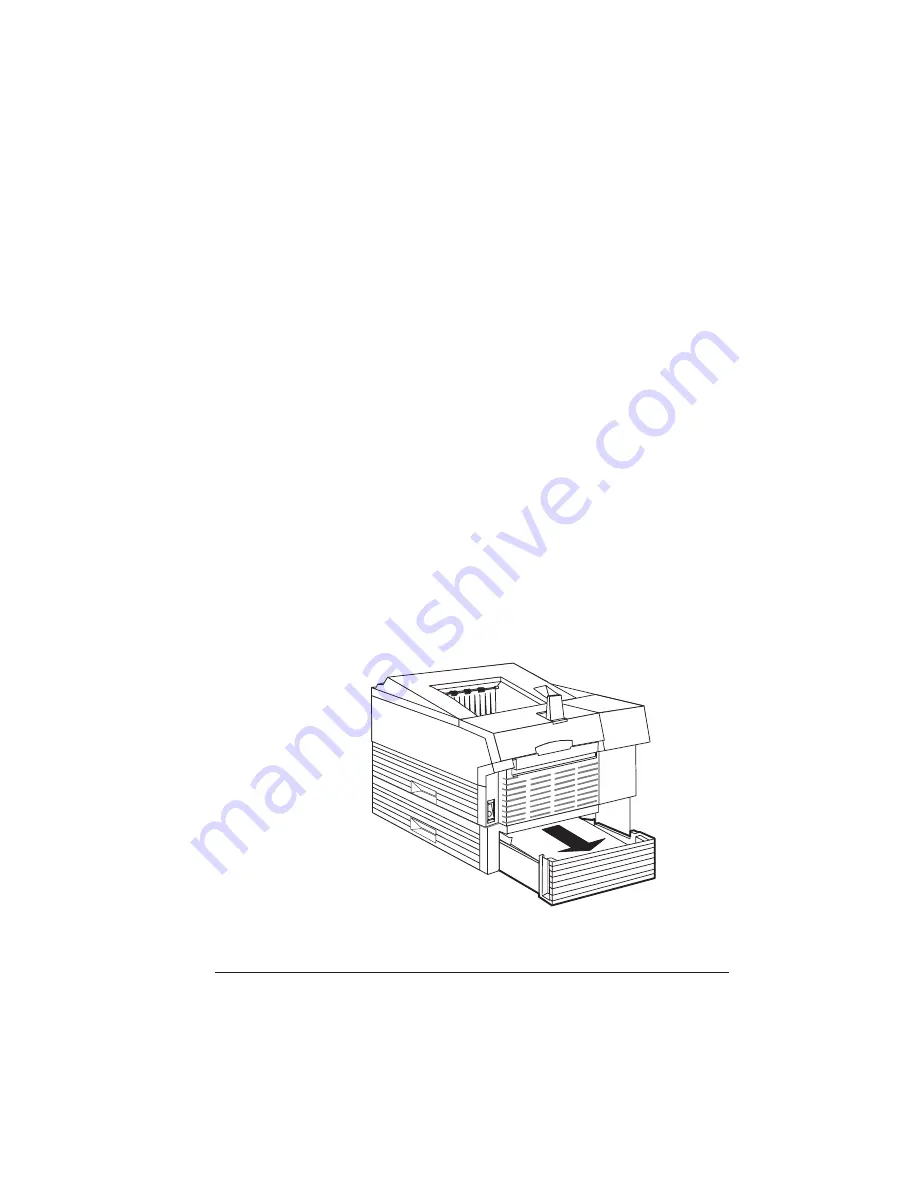
1

Slide the cassette out of the printer.

Summary of Contents for 1060E

Page 1: ...QMS 1060E Print System Operation 1800380 001B...

Page 2: ...Computer Inc Centronics Centronics Data Computer corporation DEC DECnet VMS Digital Equipment Corporation Hewlett Packard HP PCL HP GL LaserJet Hewlett Packard Co IBM PC AT PC XT Token Ring Internati...

Page 3: ...Contents 1 Introduction Introduction 1 2 About This Manual 1 2 Typographic Conventions 1 3 2 Consumables Introduction 2 2 Preventing Print Media Jams 2 2 Loading the 500 Sheet Cassette 2 3...

Page 4: ...ife 2 19 Replacing a Toner Cartridge 2 20 3 Advanced Printing Features Introduction 3 2 Chaining Cassettes 3 2 How to Chain Cassettes 3 2 Collating Output 3 3 Chunk Collation 3 5 Advantages of Collati...

Page 5: ...ting Print Media Jams 6 2 Clearing Inside Upper Unit Area Jams 6 3 Clearing Cassette Area Jams 6 5 Clearing Multipurpose Tray Area Jams 6 6 Clearing Output Tray Jams 6 7 Status Messages 6 7 Service Me...

Page 6: ...l Pages Print 6 20 Orientation Problem 6 20 PostScript Error with Error Handler Enabled 6 20 General Printer Problems 6 21 No Start up Page 6 21 Advanced Status Page Won t Print 6 21 Printer Resets 6...

Page 7: ...of Support A 2 Your QMS Vendor A 2 Your Application Vendor A 2 Q FAX A 2 The QMS Corporate Bulletin Board System A 3 CompuServe A 3 Internet A 3 QMS Customer Response Center CRC A 4 QMS National Servi...

Page 8: ......

Page 9: ...1 Introduction In This Chapter n About this manual n Typographic conventions...

Page 10: ...vides an overview of the manual 2 Consumables Describes how to load paper in the 500 sheet cassettes and multipurpose tray how to load labels and transparencies and how to replace the toner cartridge...

Page 11: ...ers and describes how to communicate with QMS through the QMS Bulletin Board CompuServe the Internet and Q FAX Mixed Case Courier Text you type and messages and information displayed on the screen Mix...

Page 12: ...ns present information that you need to know to avoid equipment damage process failure or extreme annoyance M WARNING Warnings indicate the possibility of personal injury if a specific procedure is no...

Page 13: ...2 Consumables In This Chapter n Preventing media jams n Loading and using media in the 500 sheet cassette n Loading and using media in the multipurpose tray n Replacing the toner cartridge...

Page 14: ...tock and labels that meet the guidelines set for the printer See the Consumable Supplies section of appendix B Technical Specifications in the Reference for more complete information n Make sure the m...

Page 15: ...per is indi cated on the paper wrapping Loading the 500 Sheet Cassette The QMS 1060E Print System comes standard with one 500 sheet letter A4 cassette The printer automatically pulls media from the ca...

Page 16: ...reams of 500 sheets Do not unpack the paper above the printer as this might cause particles to fall into the printer components Note the arrows on the wrapper They show which side of the paper should...

Page 17: ...te 2 5 Consumables 2 Grip each end of the stack firmly 3 Straighten the stack and then roll the fanned sheets from side to side to get air through the sheets and prevent static buildup Grip Straighten...

Page 18: ...n the cassette The cassette has a spring in the bottom that provides some resis tance when print media is placed on it Lay the cassette flat on a hard surface and using your left hand push down on the...

Page 19: ...mit mark b Halfway to the top limit mark c Up to the top limit mark 7 Ensure that the media stack lies flat does not exceed the top limit mark and is positioned under the retaining clips 8 Slide the c...

Page 20: ...aight into the cassette slot on the feeder until it s firmly seated 9 Adjust the media stop to fit the media size The printer delivers your output print side down to the output tray at the top of the...

Page 21: ...The multipurpose tray is especially useful if you want to print on a single sheet of letterhead or colored paper without changing the media in the cassette Load media in the multipurpose tray as follo...

Page 22: ...and insert it print side up between the media guides sliding it as far as it will go in the printer Make sure it doesn t exceed the limit mark and it fits firmly between the media guides The multipur...

Page 23: ...onal media until all the sheets in the multipurpose tray have been fed through the printer Adjust the media stop to the correct media size Envelopes Special Considerations The QMS 1060E Print System s...

Page 24: ...front side only Some parts of the envelope consist of three layers of paper the front back and flap Print in these layered regions may be lost or faded See your application documentation for specific...

Page 25: ...the usual manner The use of envelopes with emulsion based glue avoids this problem Printing Envelopes from the Optional Envelope Cassette To load up to 50 Com 9 Com 10 Monarch C5 DL or custom enve lo...

Page 26: ...1 5161 1 x 4 n Avery 5262 5162 1 x 4 n Avery 5163 2 x 4 n Avery 5164 3 x 4 n Avery 5165 uncut sheet Format the information that is to print on the label from within your application Try printing the f...

Page 27: ...tted information on a plain sheet of paper first to check placement See your application documentation for specific information on print ing Printing a Letter or Memo Load the letterhead or memo paper...

Page 28: ...chnical Specifications of the Reference Format the information that is to print on the transparencies from within your application Try printing the formatted information on a plain sheet of paper firs...

Page 29: ...ing a larger num ber of transparencies at a time may cause static buildup n Keep the paper path clean Transparencies are especially sensi tive to a dirty paper path If there are shadows on either the...

Page 30: ...acters and images are created through a process that applies toner made of carbon particles to the page in the printer s fusing unit When an image is formed a positive electrical charge is applied to...

Page 31: ...ut 5 coverage or 12 months after opening which ever comes first Using the Administration Engine Conserve Toner option can further extend the toner cartridge life see Conserving Toner in the next secti...

Page 32: ...tion Replacing a Toner Cartridge You may purchase additional toner cartridges from your QMS vendor See the Print Engine Specifications section of appendix B Techni cal Specifications in the Reference...

Page 33: ...l the release lever forward and open the printer s top cover 2 Remove the empty toner cartridge Grasping the empty toner cartridge with one hand in the grooved area remove the cartridge by lifting it...

Page 34: ...ver or installing the toner cartridge ACHTUNG Sowohl die Fixiereinheit als auch die Papierf hrung werden im Druckbetrieb extrem hei Um Verletzungen zu vermeiden sollten diese Druckerpartien z B wenn S...

Page 35: ...ear part of the tape seal and pull it straight out Discard both the green tab and the tape seal 3 Distribute the toner in the cartridge Holding the cartridge with both hands gently rock it from side t...

Page 36: ...ooved area on the toner cartridge with your right hand with the arrow on the toner cartridge facing away from you angle the cartridge down in the printer Place the cartridge on the rails inside the up...

Page 37: ...3 Advanced Printing Features In This Chapter n Chaining cassettes n Collating output n Printing a status page n Cancelling a print job n Ending a print job...

Page 38: ...to have the printer automatically draw from another cassette when the default cassette is empty There are three ways to do this n Use your application if it includes a procedure for using a dual casse...

Page 39: ...rint System is collation capable It can deliver multiple copies of your document in collated or uncollated order to the output tray The following illustration shows the collated and uncollated stackin...

Page 40: ...ption could cause your system to operate incorrectly n If your printer has an optional hard disk and if Administration Memory Enable Disk Swap is set to On then any extra memory is distributed to all...

Page 41: ...y 1 a copy 2 a copy 3 a copy 4 a copy 1 b copy 2 b copy 3 b and copy 4 b Advantages of Collation The main advantages of collation are user convenience and the time savings derived from not having to s...

Page 42: ...ng order 1 1 1 2 3 3 n With collation turned on the pages print in the following order 1 2 3 1 2 3 1 2 3 Working with Status Pages Printing a status page is a two step procedure Identify the type of s...

Page 43: ...Series Utilities See its online help for more information on printing a status page Cancelling Ending Print Jobs The Cancel key has two functions n It cancels or ends all jobs with a printing interpr...

Page 44: ...f job indicator in the Administration Communications Parallel and Administration Communications Serial menu See chapter 4 Printer Configuration in the Reference for more information Also see chapter 5...

Page 45: ...nel keys in the order shown in the following instructions to end a print job v Press this key to For 1 5 seconds the message window reads and then it reads Cancel Access the Cancelling Job menu CANCEL...

Page 46: ......

Page 47: ...4 Printer Maintenance In This Chapter n Handling the printer n Cleaning the printer...

Page 48: ...t the media being used for printing n Do not leave the printer open for any length of time especially in well lit places light may damage the toner cartridge n Wait until the printer has cooled down b...

Page 49: ...utzen Sie unbedingt die Griffmulden am Drucker wenn Sie ihn transportieren wollen n Keep media in the output tray at minimum level If the media stacks too high your printer may experience media jams a...

Page 50: ...NG Unplug the printer s power cord before cleaning the printer ACHTUNG Ziehen Sie den Netzstecker aus der Steckdose bevor Sie den Drucker reinigen In addition to unplugging the printer follow these gu...

Page 51: ...g the printer s power cord before cleaning the printer and ensure that the fusing unit has cooled down ACHTUNG Entferne Sie den Netzstecker und lassen Sie die Heizung abk hlen bevor Sie den Drucker re...

Page 52: ...reinstall the toner cartridge put it back in its aluminum bag or a desk drawer or cover it with a thick cloth while cleaning the interior of the printer The toner cartridge can be damaged by exposure...

Page 53: ...r the black rubber Pick up Roll ers are located in the center bottom of the printer n In the cassettes the rollers are white plastic and are located at the center top of the cassette Caution Clean onl...

Page 54: ...print head using a soft cloth You can see the window glass if you face the printer from its rear If the glass is especially dirty use a cloth dampened with ethyl alcohol 5 Replace the toner cartridge...

Page 55: ...5 Print Quality In This Chapter n Adjusting print quality n Setting gamma correction and halftone type n High resolution printing...

Page 56: ...ooks and the higher the contrast is on the page Note Remember that the print may also appear lighter on the page if Conserve Toner Administration Engine Conserve Toner is set to On Print density is se...

Page 57: ...istration Emulations PostScript Gamma Correction Choices No Disables gamma correction Yes Enables gamma correction Default No Notes Gamma correction is automatically adjusted when you change your prin...

Page 58: ...utput especially those containing detailed graphics or varying background shades you ll want to set the printer resolution to 600 dpi Setting the Resolution You can select 300 or 600 dpi from the foll...

Page 59: ...console session How Much Memory Do You Need Your 1060E printer comes with 8 MB of memory more than enough to print all supported page sizes at 300 dpi and all page sizes except legal at 600 dpi You m...

Page 60: ......

Page 61: ...6 Troubleshooting In This Chapter n Preventing media jams n Removing media jams n Responding to status messages n Problem checklist n Print quality problems n Placing a service call...

Page 62: ...a media jam occurs when the Page Recovery option is set to On remove the jammed media and the printing automatically resumes from the page the printer stopped at when the jam occurred Note For automa...

Page 63: ...from a cassette check for the media jam in the cas sette area When printing from the multipurpose tray check for the media jam in the multipurpose tray area Clearing Inside Upper Unit Area Jams M WARN...

Page 64: ...ration 6 4 n If the edge of the paper has not been fed in the fusing unit remove the paper by pulling it in the following direction n If the edge of the paper has been fed in the fusing unit remove th...

Page 65: ...tipurpose tray cover if opened The printer resets itself and continues operation Clearing Cassette Area Jams 1 Determine which cassette is currently being used and remove it 2 Check the cassette pick...

Page 66: ...e tray can cause the print media position to shift during removal of the jam This may result in a media feed failure and another jam when printing is restarted 1 Open the multipurpose tray cover 2 Rem...

Page 67: ...the window Status messages are not displayed while the printer is off line The following status messages may appear in the message window Note Shaded table cells indicate that the message scrolls x A...

Page 68: ...being pulled from the input bin passing through the printer or exiting from the printer into the output bin PRINTING STATUS Indicates that a status page is printing The message clears after the status...

Page 69: ...ntil the print job is finished Wait until the print job is finished and the printer goes idle WAITING ON INPUT END JOB Indicates that the compiler is waiting on incoming data for the first job in the...

Page 70: ...calls should be placed to the vendor from whom you pur chased the printer If you cannot get service from your vendor see appendix A QMS Customer Support for more information Note Shaded table cells in...

Page 71: ...ou have correctly followed the steps outlined in the Getting Started HP GL Error Code Description PCL Error Codes Description 0 Not enough memory for job 0 Not enough memory for job 1 Too many transfo...

Page 72: ...Techni cal Specifications in the Reference guide 2 Can you print a status page The status page is printed using the Status Page key on the control panel or through the PS Exec utive Series Utilities Y...

Page 73: ...our QMS vendor 4 Is the printer printing codes or not printing at all when in ESP mode n Reconfigure the port to the specific printer language of the file you are trying to print See chapter 4 Printer...

Page 74: ...that doesn t work check your serial interface cable See the Cable Pinouts section of appendix B Technical Specifications in the Reference for information on cable pinouts You may also want to try sett...

Page 75: ...aserWriter 7 x driver that came with your Macintosh if available or call Customer Technical Assurance See appendix A QMS Customer Support for the list of telephone num bers QMS Windows Driver Printing...

Page 76: ...tallation instructions n On the optional AppleTalk network Macintosh computers some times interfere with each other If this happens often reinstall the LaserWriter and Laser Prep files to reset the pr...

Page 77: ...at 300x300 dpi Administration Engine Def Resolution menu you may need addi tional memory allocated to the frame buffer or you may need to add additional RAM SIMMs To allocate the correct amount of mem...

Page 78: ...appropriate protocol or protocols enabled n Are all printer and protocol addresses configured correctly Blank Page n If a blank start up page ejects or blank pages come out during a printing job chec...

Page 79: ...pending on your environment Check that the end job mode on the printer s control panel and the EOD command in your file or network job separator depending on your environment match Check with your sys...

Page 80: ...Problem If you have manually set the orientation landscape or portrait through the control panel and your image doesn t print correctly you may be experiencing an orientation problem The preferred me...

Page 81: ...ck for a media jam 6 Make sure a toner cartridge is installed If you have not solved the problem open the front cover of the printer Hold your hand just close enough to the fixing assembly to tell whe...

Page 82: ...pgrades See chapter 6 Printer Options of the Reference guide If the printer resets in other circumstances call your QMS vendor for service Disk Problems IDE Internal Hard Disk Not On Line n If DISK ON...

Page 83: ...vice on the SCSI chain has a unique address n Did you terminate a hard disk in the middle of the chain There should be only one terminated disk in the chain and it should physically be the last disk i...

Page 84: ...ase 2 0 or later firmware on your QMS 1060E Print System and are now unable to access your downloaded fonts When you perform a system software upgrade release 2 0 or later firmware on your QMS 1060E P...

Page 85: ...rinting another page n If the TONER OUT message is on and the printer continues to print try distributing the toner to improve print quality If the print quality does not improve replace the toner car...

Page 86: ...efective Remove it and install a new toner cartridge if needed 2 Your printer may need a service check Contact your QMS ven dor 1 Decrease print density by adjust ing the print den sity through the co...

Page 87: ...rm steps 1 and 2 1 Distribute the toner 2 Check to make sure the toner is not defective 3 If steps 1 and 2 above do not solve the problem install a new toner car tridge If toner smudges are also on th...

Page 88: ...ncrease the print density by adjusting the print density through the con trol panel via the Admin istration Engine Print Density option 3 Remove the toner cartridge and rock it as you would when insta...

Page 89: ...g Blurred Background Offset Double Image The toner cartridge may be defective Install a new toner cartridge if needed The photoconductive drum inside the toner cartridge may be dirty Open the printer...

Page 90: ...ner inside the cartridge Reinstall the cartridge 2 If step 1 does not solve the problem install a new toner cartridge The paper being used may have absorbed moisture per haps due to high humidity or h...

Page 91: ...Bands 1 The window glass of the Print Head may be dirty Clean the glass as described in chapter 4 Printer Care of this manual 2 The toner cartridge may be defective Install a new toner cartridge if ne...

Page 92: ...estions your QMS vendor is unable to answer you may call QMS Customer Technical Assurance See appendix A QMS Customer Support for information v 1 The photoconductive drum inside the toner cartridge ma...

Page 93: ...A QMS Customer Support In This Chapter n Sources of customer support n QMS world wide offices...

Page 94: ...er is the best source of help Q FAX Q FAX a QMS information retrieval service provides application notes technical support notes on common printing problems and information about printer specification...

Page 95: ...rough CompuServe you ask general non technical questions share information with other users and access printing information and programs When you use CompuServe type go qmsprint to go directly to the...

Page 96: ...call for assistance have the following information ready so our technicians can help you more quickly n Your phone number fax number and shipping address n A description of the problem n The printer m...

Page 97: ...E ENGINE ERROR Phone Numbers 800 762 8894 Service information and maintenance pricing for QMS and other manufacturers printer s 800 858 1597 On site service and depot repair information 7 a m to 7 p m...

Page 98: ...Fax 334 639 3347 Asia Pacific QMS Asia Pacific Melbourne 61 3 899 5777 Sydney 61 2 901 3235 Tokyo 81 3 3437 4030 Canada QMS Canada Inc 9630 Rte Trans Canadienne Saint Laurent Qu bec H4S 1V9 Telephones...

Page 99: ...A A3 Selecting size R 4 70 A5 Selecting size R 4 70 A6 Selecting size R 4 70 Accessing the configuration menu R 4 5 Accessing the Kanji fonts R 6 26 Accessories See printer options Active Jobs Status...

Page 100: ...sh R 6 51 R 6 52 Notes QMS GS 3 12 PC GS 3 12 ASCII R G 1 Automatic jam recovery GS 1 13 Avant Garde Gothic ITC Avant Garde Gothic R 3 3 B B4 Selecting size R 4 70 B5 Selecting size R 4 70 B6 Selectin...

Page 101: ...ages O 3 5 Chunk O 3 5 PCL 5 files R 4 19 Colophon R D 5 Communication Modes R 5 2 Testing Macintosh R 6 52 Testing parallel port GS 3 6 Testing serial port GS 3 7 CompuServe QMS GS A 3 O A 3 R A 3 Co...

Page 102: ...CrownNet Manager software Installation OS 2 GS 4 6 Customer support See support QMS D Dark image O 6 26 Data indicator Stays lit O 6 16 Troubleshooting O 6 13 Data light GS 5 3 Default R G 4 Density...

Page 103: ...blems O 6 17 End Job Mode R 5 21 Ending a print job O 3 7 End of Document command R 5 21 Energy star GS 1 13 GS 2 4 Compliance statement R D 4 Environmental requirements R B 5 EOD command R 5 23 Addin...

Page 104: ...6 17 R 6 22 Intellifonts R 6 22 Optional GS 1 15 Optional card R 6 14 PCMCIA card GS 1 14 PostScript R 3 10 PostScript emulation R B 4 Removing optional R 6 74 Resident GS 1 10 Scalable R 3 5 Screen...

Page 105: ...nal Reference Version R 3 10 ISO Italian R 3 10 ISO Norway Version 1 R 3 10 ISO Norway Version 2 R 3 10 ISO Spanish R 3 10 ISO Swedish R 3 10 ISO Swedish For Names R 3 10 ISO United Kingdom R 3 10 JIS...

Page 106: ...n line O 6 22 International Reference Version See ISO IRV Internet QMS GS A 3 O A 3 R A 3 Irregular print O 6 30 IRV ISO See HP GL symbol sets ISO French symbol set HP GL R 3 10 ISO German symbol set...

Page 107: ...R 6 45 Cabling R 6 46 Pinouts cable R B 14 See also AppleTalk Location requirements GS 2 2 M Macintosh Application R 6 51 R 6 52 Cabling R 6 46 CrownAdmin software GS 4 5 Driver print R 6 47 Laser Pr...

Page 108: ...4 World wide GS A 6 R A 6 NetWare Configuration Ethernet port GS 4 12 Configuration network GS 4 17 Netware banner page doesn t print O 6 20 Network Interface R 6 38 R 6 42 Network 2 R 4 54 Network j...

Page 109: ...unication GS 3 6 Parallel protocol R 5 22 Passwords R 4 79 PC Application GS 3 12 Driver GS 3 11 Printer description file GS 3 14 PS Executive Series Utilities GS 3 11 Software GS 3 12 Software printi...

Page 110: ...49 Print problems O 4 2 Print quality Distortions O 6 25 Gamma correction O 5 2 Halftone R 5 3 Problems O 6 25 Screen angles R 5 6 Uneven blacks O 6 25 White lines O 6 25 Wrinkled pages O 2 3 Print qu...

Page 111: ...oblem checklist Print quality O 6 25 Proportional spacing R 3 4 Protocol O 6 14 Troubleshooting O 6 14 PS Executive Series Utilities GS 3 11 R 2 3 R 6 47 PS protocol R 5 30 Advantages R 5 33 Implement...

Page 112: ...ing GS 3 9 Testing communication GS 3 7 Serial protocol R 5 22 Serif typefaces R 3 3 Service See national service Service call Placing O 6 32 Service message O 6 10 Error 1 O 6 10 Error 11 O 6 10 Erro...

Page 113: ...l panel O 6 7 Idle O 6 8 Idle input printing O 6 8 Initializing O 6 8 Message window O 6 7 Paper jam O 6 8 Printing status O 6 8 Put size paper in input bin O 6 8 O 6 9 Toner out O 6 9 Waiting for idl...

Page 114: ...3 2 Tray assembly R 6 9 Tray select key GS 5 5 Trouble printing PostScript files O 6 17 Troubleshooting O 6 31 Apple Macintosh checklist O 6 14 AppleTalk O 6 14 Blank pages O 6 18 Data indicator O 6 1...

Page 115: ...ion GS 1 5 Unpacking GS 2 6 Feeder R 6 4 Printer GS 2 6 Updating system software R 4 20 Upgradable memory GS 1 15 Using Emulation card R 6 14 EOD command R 5 23 Font card R 6 14 V Vendor Labels R B 10...

Page 116: ......

Reviews: