background image


QHY367C


10 


05 Use QHY367C in EZCAP_QT 

EZCAP_QT is the software developed by QHYCCD. This software has the basic capture function 
for QHYCCD deep sky cameras.   
 
1.


Download and install 

EZCAP_QT


2.


Connect your QHY367C to 12V power supply. Connect your QHY367C to your computer with 
USB3.0 cable. 


3.


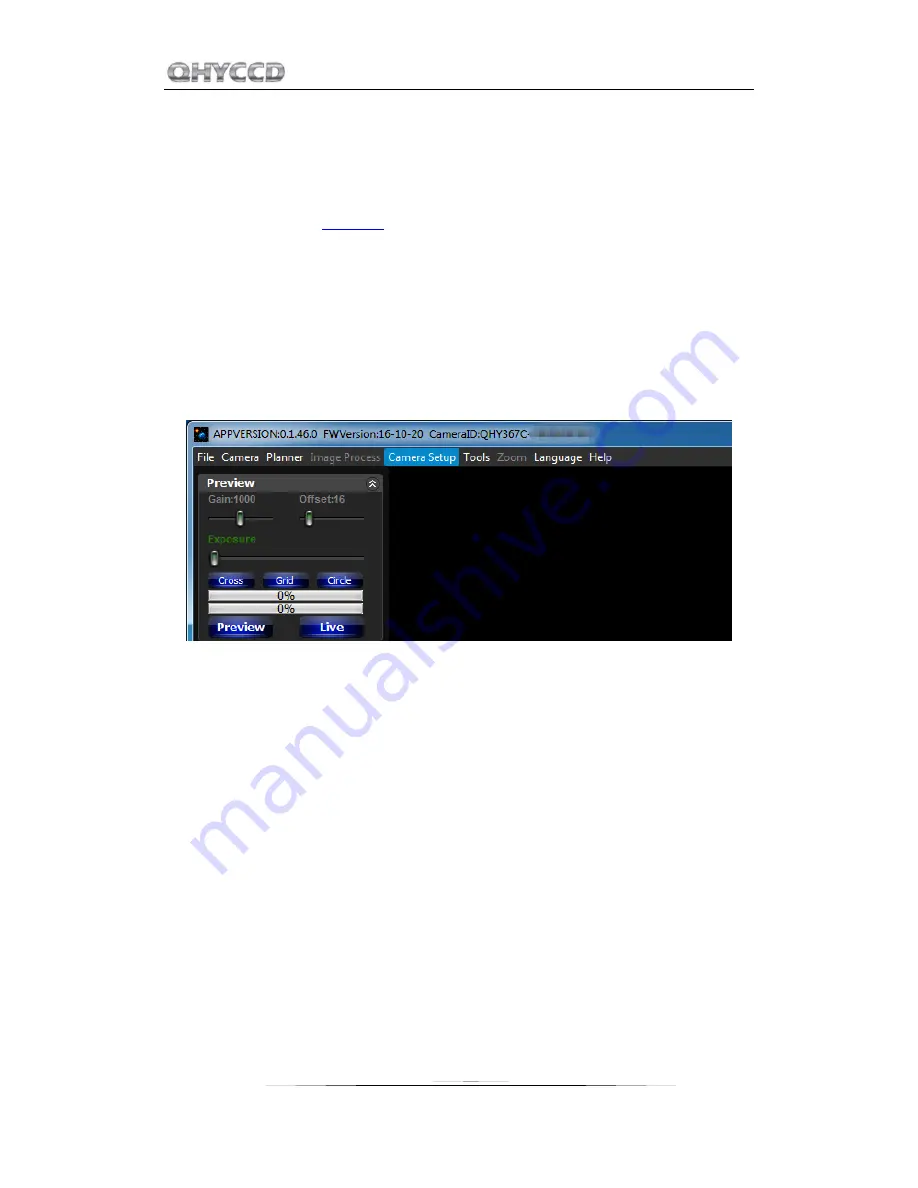
Run EZCAP_QT. Select “Connect” in Menu->Camera. If the camera is successfully connected. 
The title of EZCAP_QT will display the camera firmware version and the camera ID as shown 
below. 


4.


In Menu->Camera Setup, Click “Temp Control” and set the CMOS sensor temperature. You 
can enable the “Auto Control” and set the target temperature. For example here we set the 
temperature to -10C. The CMOS temperature will come to -10C very fast (in about 2-
3minute). If you want to close the TEC, you can select “TEC OFF”. If you just want to set the 
TEC power but not the temperature. You can select “Manual” and then set the percent of 
the TEC power. 

Summary of Contents for QHY367C

Page 1: ...QHY367C User s Manual Rev 1 3...

Page 2: ...ng items USB3 0 cable 1 5m 1 Self locking power cable 1 Car power adapter 1 Drying tube 1 Desiccant 1 Angle adjustment adapter ring 1 5mm Spacer to convert M54 to 2 inches 1 Inspection report 1 Driver...

Page 3: ...ation 02 Use QHY367C in SharpCap 03 White Balance Adjustment 04 Use QHY367C on ASCOM platform 05 Use QHY367C in EZCAP_QT 06 Use BroadCast Video Streaming 07 FAQ 08 Camera Maintenance 09 Specifications...

Page 4: ...C requires the latest qhyccd dll for the new version of SharpCap and QHYCCD has already developed a software named SharpCap Patch for it You should download and install it prior to using SharpCap 5 Co...

Page 5: ...y download its update package in this software freeing you from the inconvenience of looking for and downloading it from our website Take QHY367C for example you can see the drivers we need are the la...

Page 6: ...ts webpage Now you can try to get the most out of it by changing several settings First you can try to set the exposure time to 1ms then try to reduce the USB traffic value For modern computer with i7...

Page 7: ...ignificantly Note that it s impossible to reduce the glow in the corner thoroughly and it s normal to see a very small amount of glow in the corner when you do long exposure A typical long exposure im...

Page 8: ...y either adjusting Cooler Power or clicking Auto and adjusting Target Temperature You can also see the CMOS temperature at lower left corner of the software Before use this function you should read th...

Page 9: ...d Blue For example in the image above the blue is 1199 and red is 1112 green is 612 It looks the image is well white balanced If you need more blue since it has limit of 2027 In this condition you can...

Page 10: ...of 2 to R R 2R G so we get R G When a bias exist The bias is a constant added to each pixel So the image you see is R R bias G G bias 2R bias Now the ratio R G R bias 2R bias and it is not equal to 1...

Page 11: ...maximum bit depth by ASCOM to make the best DSO imaging performance The image format is 16bit width and patch zero on low bit MaxIM DL 1 First you have to make sure that both ASCOM Platform and ASCOM...

Page 12: ...you can set the gain 1 and offset 10 to start Keep clicking Okay to return to Camera Control window Keep clicking OK to return to the Camera Control window Click Connect before clicking start button...

Page 13: ...uccessfully connected The title of EZCAP_QT will display the camera firmware version and the camera ID as shown below 4 In Menu Camera Setup Click Temp Control and set the CMOS sensor temperature You...

Page 14: ...use the preview tab to do preview And use the focus tools to do focus Then use the capture tab to capture image 6 In EZCAP_QT there is a planner for image tasking You can capture a series images by u...

Page 15: ...same time the video appearing on the SharpCap will be sent to any of software that support the WDM camera like the HandyAvi Adobe video encoder online chat software etc This function is very useful f...

Page 16: ...QHY367C 13...

Page 17: ...leak may cause the leak current transfer from computer to the camera via the GND This may affect the USB transfer and causes the data packet lost and cause it hang You need to make sure the computer...

Page 18: ...camera DDR buffer and what is benefit for The QHY367C has the on camera 128MB DDRII image buffer It brings two advantages It can buffer whole image and avoid it lost during USB transfer Because CMOS...

Page 19: ...een told by our users that the FPS of their cameras sometimes suddenly drops to zero under DDR mode on SharpCap It is caused by the fact that the receiving speed of computer is relatively slower than...

Page 20: ...dew The QHY367C has the build in heat board on this optic window to heat the optic window to avoid it In most conditions it can take effect If the optic window still get dew please try the following...

Page 21: ...rame Rate on 8bit TBD ROI Support Yes Any Area ROI Exposure Time 50us 1800sec AD Sample Depth 14bit On Camera Image Buffer Yes 128MB DDRII Buffer Cooling 2 stage TEC Typical 40 below Ambient Temperatu...

Page 22: ...hout angle adjustment adapter ring The back focal length of QHY367C with angle adjustment adapter ring is about 18 50mm Drawing of QHY367C with angle adjustment adapter ring The back focal length of Q...

Page 23: ...QHY367C 20 Drawing of angle adjustment adapter ring Drawing of Spacer to convert M54 to 2 inches...

Page 24: ...ember 20th 2016 1 1 Added solution to the problem that cameras halt under DDR mode in the FAQ section January 5th 2017 1 2 Added introduction about broadcast application Section 6 Added notes about 12...

Reviews: