background image


Preparaci

ó

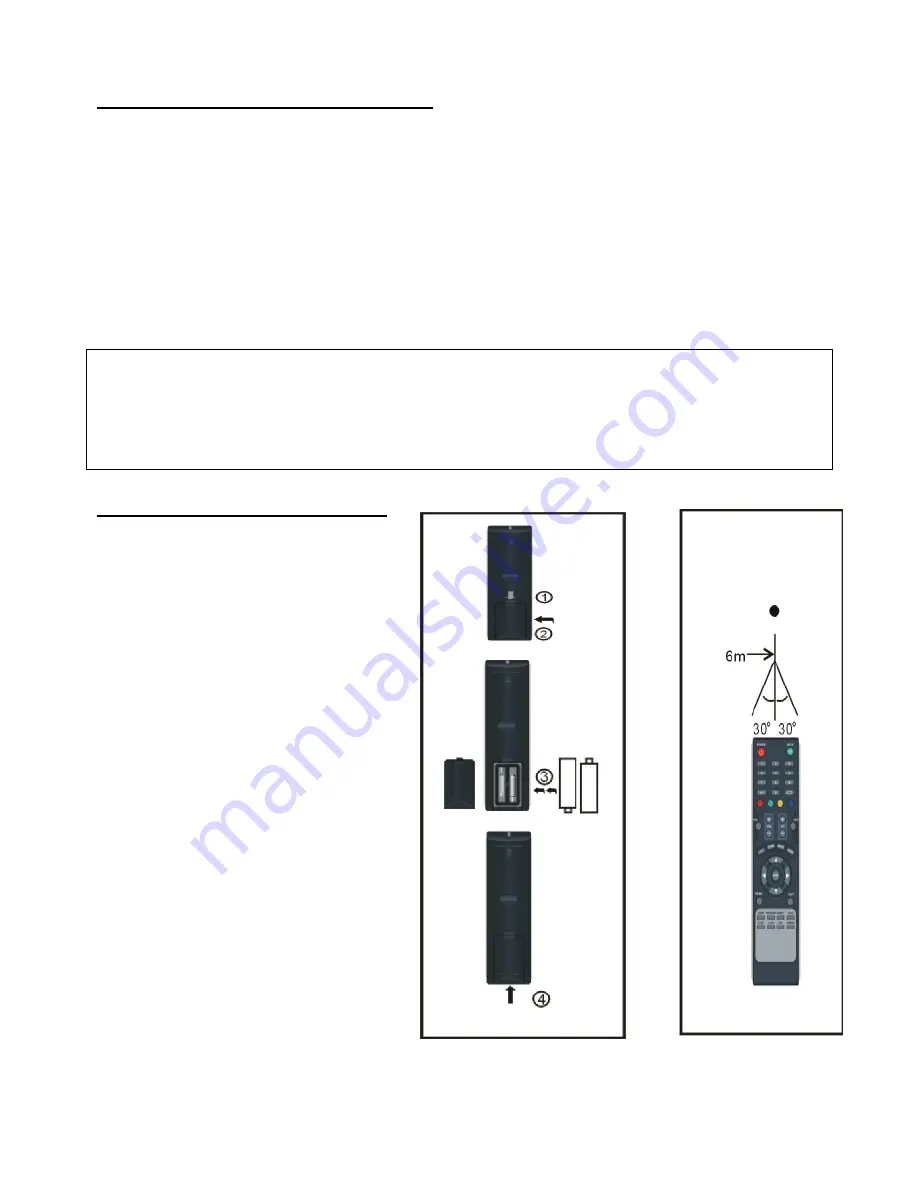
n del Control Remoto 


Instalaci

ó

n de la Bater

í

Instale las bater

í

as como se muestra en las siguientes im

á

genes. Aseg

ú

rese de que las 

term y 

 est

é

n posicionadas como se indica en el compartimiento para bater

í

as (Fig. 1) 


Vida de las bater

í

as 

- Las bater

í

as normalmente duran por un a

ñ

o, esto depender

á

 de que tan frecuente sea el 

uso del control remoto. 
- Si el control remoto falta aun cuando se utiliza cerca del reproductor, reemplace las 
bater

í

as. 

- Utilice 2 bater

í

as AAA. 

NOTA: 

 No pise ni deje caer el control remoto, tampoco permita que sufra ning

ú

n otro impacto. 

Esto podr

í

a da

ñ

ar partes del control y causar mal funcionamiento del mismo. 

 Si el control remoto no se utilizar

á

 por un largo periodo de tiempo, remueva las bater

í

as. 


Operaci

ó

n del Control Remoto 


Apunte el control remoto por no m

á

de 6m aproximadamente del sensor 
de control remoto y dentro de 60

°

 del 

frente del reproductor (Fig.2) 
 

NOTAS: 

- La distancia de operaci

ó

n puede 

variar de acuerdo al brillo del cuarto. 
- No apunte con luz brillante al sensor 
del control remoto. 
- No coloque objetos entre el control 
remoto y el sensor de control remoto. 


Fig1                                    Fig2 

Oprima 

Abra 

Presione 

Sensor de 

Control Remoto 

Summary of Contents for TV-LED1911

Page 1: ...19 Full Color LED TV MODEL NO TV LED1911 INSTRUCTION MANUAL BEFORE USING THIS PRODUCT READ UNDERSTAND AND FOLLOW THESE INSTRUCTIONS Save this booklet for future reference...

Page 2: ...adapter Route power cords so they are not likely to be walked on or pinched by items placed upon or against them paying particular attention to plugs convenience receptacles and the point where they e...

Page 3: ...ratures or lengthy periods or direct sunlight Keep the product away from magnetic objects motors and transformers Do not use outdoors in inclement weather Do not use the TV while driving this is dange...

Page 4: ...es in this instruction manual are just for your reference specification should refer to actual accessories ACCESSORIES Instruction manual 1 Remote control with battery 1 Car cord 1 Desktop AC adaptor...

Page 5: ...1 2 ACCESSORIES 3 FEATURES 5 GENERAL PARTS 6 REMOTE CONTROL 7 8 REMOTE CONTROL PREPARATION 9 BASIC CONNECTION 10 12 OPERATIONS BASIC OPERATIONS 13 17 MAIN MENU 18 28 TV MODE 18 27 PC MODE 27 28 FOR RE...

Page 6: ...SUPPORT ELECTRONIC PROGRAM GUIDE SUPPORT USB MULTIMEDIA PLAYBACK SUPPORT MULTI LANGUAGES ON SCREEN DISPLAY SUPPORT FULL FUNCTION REMOTE CONTROL SUPPORT PC AUDIO ANT VGA VIDEO AUDIO R L HDMI AND YPBPR...

Page 7: ...r move down 8 CH button To select next channel or move up 9 VOL button To decrease the volume level or move left 10 VOL button To increase the volume level or move right 11 POWER button To switch ON O...

Page 8: ...ton to increase the volume or press VOL button to decrease the volume 7 EPG To display electronic program guide information 8 PICTURE To switch the picture mode 9 CC To set CC function On or Off in TV...

Page 9: ...21 INFO To display current program information 22 SOURCE To switch the input source 23 SOUND To switch the sound mode in TV mode 24 ENTER To confirm a selection 25 EXIT To exit menu page 26 AUTO To a...

Page 10: ...impact the remote control This may damage the parts or lead to malfunction If the remote control is not going to be used for a long time remove the batteries REMOTE CONTROL OPERATION Point the remote...

Page 11: ...ions before connecting other equipments CONNECTING TO AC POWER SOURCE CONNECT EXTERNAL ANTENNA TO UNIT Install external antenna into antenna jack for best picture BASIC CONNECTION Main unit To DC 12V...

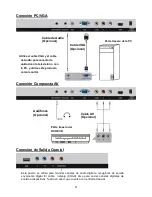
Page 12: ...Optional AV cable Optional Back of PC VGA cable Optional Audio cable Optional Use VGA cable and Audio cable to connect the unit with TV or PC and use this product as a monitor Use coaxial cable to co...

Page 13: ...ING TO USB MEMORY DEVICE Back of DVD VCR HDMI cable Optional Use HDMI cable to connect the unit with other devices to receive high definition multimedia signal For software updating and music photo pl...

Page 14: ...three seconds later it will turn to track 9 automatically or press ENTER button to confirm directly Track 12 press 1 and 2 three seconds later it will turn to track 12 automatically or press ENTER bu...

Page 15: ...TTING Press ASPECT button on remote control repeatedly to select desired video size Available options Normal Wide Cinema Zoom MTS AUDIO SETTING Press MTS AUDIO button on remote control to enter Sound...

Page 16: ...one or not CHANNEL LIST Press C LIST button on remote control to enter CHANNEL LIST menu page Press navigation buttons to select desired channel Press ENTER button to confirm selection FREEZE FUNCTION...

Page 17: ...select which photo to play Press ENTER button to play the selected photo then press UP DOWN navigation buttons to rotate the photo clockwise counterclockwise 90 180 270 degrees press LEFT RIGHT navig...

Page 18: ...in Left Slide in Up Slide in Down 3 Slideshow Repeat Available options On Off 4 Music Play Mode Available options Once Play All Random 5 Music Play Repeat Available options On Off 6 Music Auto Play Av...

Page 19: ...nt to adjust Press LEFT or RIGHT navigation button to adjust selected option to desired value Then press ENTER button to confirm the selection Press MENU button to return to previous menu page Press E...

Page 20: ...ed from 0 100 1 15 Tint The value of Tint can be adjusted from 50 to 50 Only available for certain TV system 1 16 Sharpness The value of Sharpness can be adjusted from 0 100 NOTE If the value of Brigh...

Page 21: ...High 1 52 Film Mode This item is used to set the Film Mode function On or Off 1 53 Noise Reduction Available options Off Low Medium High 1 54 MPEG Noise Reduction Available options Off Low Medium High...

Page 22: ...s set as User 2 2 Surround Mode Press ENTER button to enable or disable this item 2 3 AVL Press ENTER button to enable or disable this item 2 4 Analog Sound Available options Mono Stereo SAP 2 5 Digit...

Page 23: ...FAVORITE LIST menu page Press navigation buttons to select desired channel Press ENTER button to confirm selection 3 3 Channel Settings Press navigation buttons to move the cursor on a certain item P...

Page 24: ...s UP or DOWN navigation button to select wanted item Press ENTER or RIGHT navigation button to enter submenu page Press ENTER button to lock or unlock selected rating 4 12 Canada Program Control Press...

Page 25: ...tem NOTES Once an item has been finished the cursor will turn to next item automatically When all of Old PIN New PIN and Confirm have been input the unit will save the new password automatically and r...

Page 26: ...TEXT1 TEXT2 TEXT3 TEXT4 5 13 Digital Caption Type Available options Service1 Service2 Service3 Service4 Service5 Service6 5 14 Digital CC Preset Available options Default Custom 5 15 Digital CC Style...

Page 27: ...Magenta Cyan 5 2 Menu Language Available options English French Spanish 5 3 Clock 5 31 Time Zone Press LEFT or RIGHT navigation button to select wanted option 5 32 Auto Clock Press ENTER button to en...

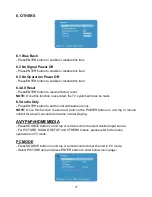
Page 28: ...et 6 5 Audio Only Press ENTER button to set the unit with audio on only NOTE Once this function is executed hold on the POWER button on unit top or remote control for about 3 seconds to resume normal...

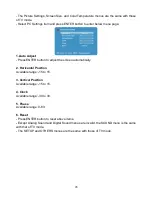
Page 29: ...to adjust the screen automatically 2 Horizontal Position Available range 15 to 15 3 Vertical Position Available range 15 to 15 4 Clock Available range 30 to 30 5 Phase Available range 0 63 6 Reset Pr...

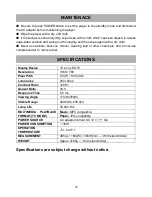
Page 30: ...d do not use compressed air to remove dust Display Device 19 inch LED TV Resolution 1366 768 Pixel Pitch 0 3 H 0 3 V mm Luminance 250 cd m2 Contrast Ratio 1000 1 Aspect Ratio 16 9 Response Time 5 5 ms...

Page 31: ...n or thesignal is too weak Poor reception TV antenna is not correctly adjusted or TV channel is not right Dark or blurred picture The bright contrast is too low Unclear or unstable Picture TV antenna...

Page 32: ...levisi n LED Completamente a Color Modelo TV LED1911 Manual de instrucciones ANTES DE UTILIZAR ESTE PRODUCTO LEA COMPRENDA Y SIGA LAS INTRUCCIONES EN ESTE MANUAL Guarde este manual para futuras refere...

Page 33: ...de limpiarlo Desconectar el adaptador ca cc del tomacorriente y del producto cuando este no va ser usado por un periodo largo de tiempo No introducir o dejar caer objetos de cualquier tipo dentro de e...

Page 34: ...etos magn ticos motores y transformadores No utilice en exteriores en temperaturas o tiempos inclementes No use la TV mientras maneja esto es peligro e ilegal en algunas localidades Manejo y Uso de la...

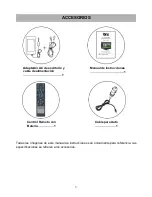
Page 35: ...de instrucciones son nicamente para referencia las especificaciones se refieren a los accesorios ACCESORIOS Manual de Instrucciones 1 Control Remoto con Bater a 1 Cable para Auto 1 Adaptador AC de es...
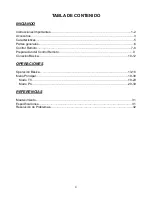
Page 36: ...3 Caracter sticas 5 Partes generales 6 Control Remoto 7 8 Preparaci n del Control Remoto 9 Conexi n B sica 10 12 OPERACIONES Operaci n B sica 13 18 Men Principal 19 30 Modo TV 19 29 Modo PC 29 30 REFE...
Page 37: ...gu a electr nica de programas Soporta reproducci n multimedia de USB Soporta m ltiples idiomas en pantalla Soporta completamente las funciones del control remoto Soporta entradas de Audio PC ANT VGA V...

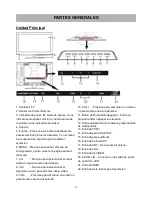
Page 38: ...para moverse hacia abajo 8 CH Presione para seleccionar el siguiente canal o para moverse hacia arriba 9 VOL Presione para disminuir el volumen o para moverse hacia la izquierda 10 VOL Presione para a...

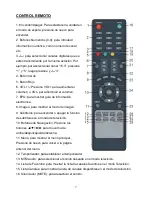
Page 39: ...a de informaci n electr nica 8 Imagen para mostrar al modo de imagen 9 Subt tulos para encender o apagar la funci n de subt tulos en el modo de televisi n 10 Botones de Navegaci n Presione los botone...

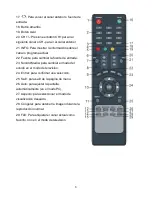
Page 40: ...a cambiar la fuente de entrada 23 Sonido Media para cambiar el modo del sonido en el modo de televisi n 24 Entrar para confirmar una selecci n 25 Salir para salir de la p gina de men 26 Auto para ajus...

Page 41: ...OTA No pise ni deje caer el control remoto tampoco permita que sufra ning n otro impacto Esto podr a da ar partes del control y causar mal funcionamiento del mismo Si el control remoto no se utilizar...

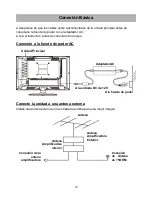
Page 42: ...equipo Conexi n a la fuente de poder AC Conecte la unidad a una antena externa Instale una antena externa en la entrada de antena para una mejor imagen Conexi n B sica Unidad Principal A la entrada D...

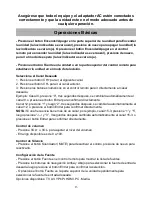
Page 43: ...conectar la unidad con la televisi n o con la PC y utilice este producto como monitor Parte trasera del DVD VCR Aud fonos Opcional Cable AV Opcional Este puerto se utiliza para mandar se ales de audio...

Page 44: ...a Parte trasera del DVD VCR Cable HDMI Opcional Utilice el cable HDMI para conectar la unidad con otros equipos para recibir se al multimedia de alta definici n Cable YPbPr Opcional Parte trasera del...

Page 45: ...s se cambiar autom ticamente al canal 9 o presione el bot n Entrar para confirmar directamente Canal 12 presione 1 y luego 2 tres segundos despu s se cambiar autom ticamente al canal 12 o presione el...

Page 46: ...tiempo deseado Opciones disponibles Apagado 15min 30min 60min 90min 120min Configuraci n de Tama o de Video Presione el bot n Aspecto en el control remoto repetidamente para seleccionar el tama o des...

Page 47: ...onar el canal deseado Presione el bot n Entrar para confirmar la selecci n NOTA Durante la reproducci n normal presione el bot n FAV en el control remoto para etiquetar el programa como favorito o des...

Page 48: ...Izquierdo y Derecho para seleccionar el elemento Imagen 2 Presione el bot n Entrar para confirmar luego utilice los botones de navegaci n para seleccionar el archivo de imagen que desea reproducir 3...

Page 49: ...Media Presione los botones de navegaci n izquierda o derecha para seleccionar el elemento Configuraci n de Media 1 Intervalos de Presentaci n Opciones disponibles 1 segundo 5 segundos 10 segundos 2 Ef...

Page 50: ...e los botones de navegaci n Izquierdo o Derecho para seleccionar el elemento Reproducci n Actual Presione el bot n Entrar para entrar al men Presione los botones de navegaci n Izquierdo o Derecho para...

Page 51: ...esione los botones de navegaci n Arriba Abajo para seleccionar la opci n que desea ajustar Presione los botones de navegaci n Izquierdo o Derecho para ajustar la opci n seleccionada al valor deseado L...

Page 52: ...ot n Entrar para iniciar la b squeda de canales 1 IMAGEN 1 1 Configuraci n de Imagen 1 11 Modo de Imagen Opciones disponibles usuario din mico est ndar pel cula 1 12 Brillo El valor del brillo puede a...

Page 53: ...uraci n de PC NOTA Este sistema est disponible nicamente en el modo PC 1 4 Temperatura del Color Opciones disponibles Normal C lido Fresco 1 5 Configuraci n Avanzada de Im genes 1 51 Contraste Din mic...

Page 54: ...e 25 a 25 NOTA los valores de bajos agudos y balance solo pueden ajustarse cuando el modo de Sonido est establecido como Usuario 2 2 Modo Envolvente Presione el bot n Entrar para activar o desactivar...

Page 55: ...los botones de navegaci n para seleccionar el canal deseado Presione el bot n Entrar para confirmar la selecci n 3 2 Lista de Favoritos Presione el bot n Entrar para entrar al men de Lista de Favorito...

Page 56: ...Control de Programaci n introduzca la contrase a para entrar al men de Control de Programaci n NOTA la contrase a de f brica es 0000 4 1 Control de Programaci n 4 11 Control de Programaci n EUA Presi...

Page 57: ...orrar Datos Descargables Este elemento se utiliza para borrar las nuevas clasificaciones descargables NOTA Los elementos Clasificaciones descargables y Borrar Datos Descargables est n disponibles nica...

Page 58: ...uente de entrada que se ha bloqueado el siguiente mensaje aparecer en la pantalla NOTA Luego presione el bot n Entrar para entrar al men de Desbloqueo Temporal e introduzca la contrase a presionando l...

Page 59: ...ciones disponibles Predeterminado peque o est ndar grande Fuente de Subt tulos Opciones disponibles Predeterminado Estilo0 Estilo1 Estilo2 Estilo3 Estilo4 Estilo5 Estilo6 Estilo7 Opacidad de Subt tulo...

Page 60: ...mover el cursor en A o Mes D a Hora Minuto Segundo Presione los botones de navegaci n izquierdo o derecho para ajustar el elemento 5 34 D a de la Semana Este elemento no es ajustable por el usuario 5...

Page 61: ...ad o en el control remoto por aproximadamente 3 segundos para volver a la reproducci n normal Modo AV YPbPr HDMI MEDIA Presione el bot n Fuente en la parte superior de la unidad o en el control remoto...

Page 62: ...ponible 15 a 15 3 Posici n Vertical Rango disponible 15 a 15 4 Reloj Rango disponible 30 a 30 5 Fase Rango disponible 0 63 6 Restablecer Presione el bot n Entrar para restablecer los elementos mencion...

Page 63: ...ido para remover el polvo Dispositivo de Visualizaci n Televisi n a color de 19 pulgadas Resoluci n 1366 768 Pixeles 0 3 H 0 3 V mm Iluminaci n 250 cd m2 Proporci n de Contraste 1000 1 Proporci n de A...

Page 64: ...de TV no son los correctos Imagen obscura o con manchas El brillo y contraste est n ajustados a un nivel bajo Imagen poco clara o inestable La antena de TV no esta ajustada correctamente o esta cerca...

Reviews: