


2
SAFETY INFORMATION
IMPORTANT SAFETY INSTRUCTIONS - READ CAREFULLY BEFORE USE.
!!
Keep these instructions
Do not use this unit near water.
Clean only with as lightly damp cloth.
Do not block any ventilation openings.
Install in accordance with the supplied instruction manual.
Protect the power cord from being walked on or pinched, particularly at plugs,
and the point where it exits from the unit.
Do not allow the power cord to overhang the edge of a table.
Unplug this unit when unused for long periods of time.
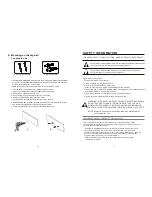
This symbol indicates that there are important operating maintenance
instructions in the literature accompanying this unit.
This symbol indicates that dangerous voltage constituting a risk
of electric shock is present within this unit.
WARNING! TO REDUCE THE RISK OF FIRE OR ELECTRICAL SHOCK,
DO NOT EXPOSE THIS UNIT TO RAIN OR MOISTURE. THE UNIT
MUST NOT BE EXPOSED TO DRIPPING AND SPLASHING AND NO
OBJECTS FILLED WITH LIQUIDS SHOULD BE PLACED ON TOP OF IT.
!!
NOTE: No naked flames such as candles should be placed near or
underneath the unit.
IMPORTANT SAFETY INSTRUCTION(Continued)
This unit has been produced according to all current safety regulations.
The following safety tips should safeguard users against careless use and the
dangers connected with such use.
Although this appliance has been carefully manufactured and rigorously
checked prior leaving the factory, as with all electrical appliances it is
possible for problems to develop. If you notice smoke, anexcessive build up
of heat or any other unexpected phenomena, youshould disconnect the
plug from the mains power socket immediately.
Ensure that the unit is sufficiently ventilated! Never place next to or
underneath curtains!
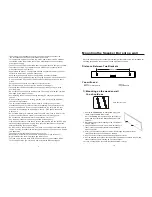
You should use
2 pieces of short screws
2 pcs plastic tubes
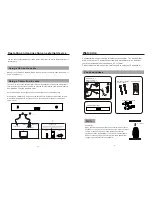
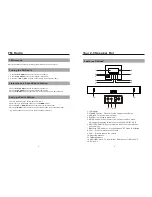
2/. Mounting on the dry wall
1. Use the TAPE MEASURE to decide how high you'd like to hang the Speaker Bar
on the wall. The SOUND Bar must be hung within 5 feet of an AC power outlet
for the attached AC power cord to reach.
2. Mark the position of the mounting screws on the wall using a pencil.
3. Line the LEVEL up on both of your mark sure they are level.
If they're not, adjust the marks as needed to make them level.
4. Drill a hole by a powerful electric drill.
5. Use a hammer gently nail 2 plastic tubs into the holes.
6. Drill through the screws directly into the holes.
7. Use the LEVEL to check that the mounting screws are level.
8. Put the SOUND Bar onto the mounting brackets, and make sure there is a firm
and stable connection before letting go of the Sound Bar.
9. Finally, use the LEVEL to confirm that the Sound Bar is level.
(1)
(2)
13


