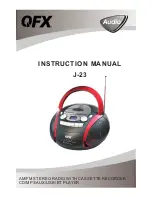
QFX J-23 Instruction Manual Download Page 5

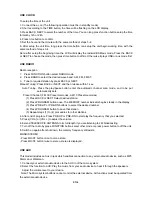
USE CLOCK 


To setup the time of the unit 

1. Connect the ac on (The following operation must be in standby mode). 

2. Short according to the TIME button, the time will be flashing on the LCD display. 

3.Press BACK

NEXT to select the number of the time. You can long press function button setup the time 

format by 12h or 24h.   

4. Press time button to confirm. 

5. Set the hour and the minute with the same method of steps 3-4. 

6. After setup the unit time, long press the time button can setup the unit begin working time, with the 

same method of steps 3-4. 

Note: after setup the beginning time, the LCD will display the radio/cd/USB/aux mode, Press the BACK 

or NEXT to choose the mode, then press time button to affirm, Other wise it plays USB or aux mode first. 


USE RADIO 

 
Radio reception 

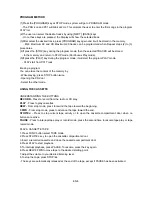
1.  Press FUNCTION button select RADIO mode. 

2.  Press BAND to select the desired wave band: AM, FM, FM ST. 

3.    Tune to required station by press BACK or NEXT. 

Manual Tuning: Press BACK or NEXT and then release within 1 sec. 

Auto Tuning: Press the play/pause button enter the automatic channel scan mode, and to be put 

automatically sets. 

      Preset Channel:( FM 30 Preset memories, AM 10 Preset memories) 

     (1) Press BACK or NEXT Select desired station.   

          (2) Press PROGRAM button once, The MEMORY number indicator begins steady in the display. 

          (3) Press PRE-UP or PRE-DN buttons to select the desired number.   

     (4) Press PROGRAM button to save that station. 

(5) Repeat steps (1) to (4) procedures for other stations. 

4. After end of program. Press PRE-UP or PRE-DN to start play the frequency that you selected. 

5. Press [VOL-] or [VOL +] to adjust the volume.         

6. Extend TELESCOPIC ANTENNA to its full length if you are listening to FM broadcasting. 

7. Turn off the radio by press FUNCTION button select other mode or press power button to off the unit. 

8. Switch on again after shut down, the memory frequency still exists.   

 
MONO/STEREO 

- Press MO/ST button once to mono state; 

- Press MO/ST button twice to stereo, stereo is displayed. 


USE AUX 


This model includes an Aux in jack which enables connection to any external audio device such as MP3, 

Discman or Walkman. 

1. Connect your external audio device to the AUX in of the micro system.   

2. Select the function to AUX. Play the music from your audio device to hear it through the speakers.   

    Adjust the volume level to your desire.     

  Note: The Micro system buttons cannot control the external device. All functions must be operated from 

the external audio device.


EN-4 

Summary of Contents for J-23

Page 1: ...INSTRUCTION MANUAL J 23 AM FM STEREO RADIO WITH CASSETTE RECORDER CD MP3 AUX USB BT PLAYER...

Page 2: ...d on the bottom of the set corresponds to your local AC power supply If it does not consult your dealer or service center 2 Connect the power cord to the AC socket inlet and the wall outlet the power...

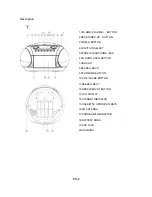
Page 3: ...ECT 5 STEREO HEADPHONE JACK 6 CD DOOR OPEN BUTTON 7 USB SLOT 8 SEARCH BACK 9 STOP BAND BUTTON 10 PLAY PAUSE BUTTON 11 SEARCH NEXT 12 REPEAT MO ST BUTTON 13 LCD DISPLAY 14 STANDBY INDICATOR 15 CASSETTE...

Page 4: ...SEARCH NEXT NEXT track selection Press and Hold more than 1 5 sec Forward Search intra track 12 REPEAT MO ST BUTTON Repeat a track CD MP3 USB program Repeat mode repeat repeat all repeat album normal...

Page 5: ...l FM 30 Preset memories AM 10 Preset memories 1 Press BACK or NEXT Select desired station 2 Press PROGRAM button once The MEMORY number indicator begins steady in the display 3 Press PRE UP or PRE DN...

Page 6: ...button twice Opening the CD door Select the other mode USING THE CASSETTE UNDERSTANDING THE BUTTONS RECORD Press to record from the radio or CD play PLAY Press to play cassettes REW From stop mode pr...

Page 7: ...d C shown in the diagram below after approx 50 hours of operation or on average once a month use a cotton bud slightly moistened with alcohol or a special head cleaning fluid to clean the deck 1 Open...

Page 8: ...or pause position press play to start playback Press next once briefly for the next track or press repeatedly until the desired track number appears on the display Press back once briefly to return to...

Page 9: ...not use any cleaning agents containing alcohol ammonia benzene or abrasives as these may harm the cabinet CD player and CD handling The lens of the CD player should never be touched Sudden changes in...

Page 10: ...r cord properly Batteries dead incorrectly inserted Insert new batteries correctly Display does not function properly No reaction to operation of any of the controls Electrostatic discharge Switch off...

Page 11: ...m W x156 mm H Operation temperature 5 35 RECEIVER SECTION Receiving Bands AM FM Tuning Range AM 530 1710KHz FM 87 5 108MHz COMPACT DISC SECTION Optical Pickup 3 Beam Laser Frequency Response 100Hz 16K...

Page 12: ...installed and used in accordance with the instructions may cause harmful interference to radio communications However there is no guarantee that interference will not accor in a particular installati...

Reviews: