background image

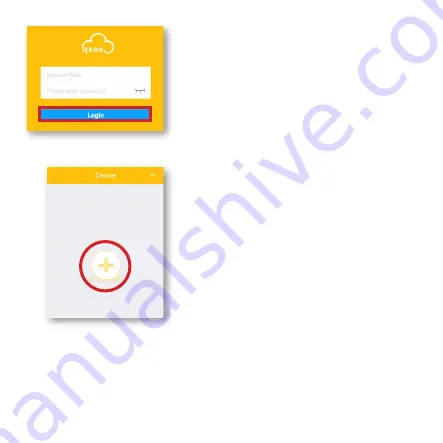
PASO 8

Ingrese su dirección de correo electrónico nuevamente y 
la nueva contraseña. Haga clic en 

Iniciar sesión

 (

Login

para continuar.

PASO 9

Haga clic en el 

Símbolo +

 para continuar. En la siguiente 

pantalla, seleccione 

Cámara Wi-Fi

 “Wi-Fi Camera” para 

el tipo de dispositivo. Luego, usando la cámara de su 
dispositivo electrónico, escanee el código QR ubicado en 
la parte posterior de la cámara Wi-Fi.

Summary of Contents for QCW4MP1PT

Page 1: ...4MP WI FI PAN TILT CAMERA QUICK START GUIDE ENGLISH ESPA OL C MARA CON PANEO HORIZONTAL E INCLINACI N VERTICAL WI FI 4MP GU A DE INICIO R PIDO...

Page 2: ...critical updates and support for your system Registering will also help us to assist you with any technical or warranty issues if ever necessary Please be sure to keep a record of your model number s...

Page 3: ...s to setup and test your system before mounting your camera Visit www q see com support to find the most recent guides and up to date support for your Q See products STEP 3 Download the Q See Plus app...

Page 4: ...ill have two minutes to enter the verification code so be sure you will have quick access to the email address used Tap Send verification code to mail STEP 7 Create a password for your account You wil...

Page 5: ...again and the new password Tap Login to continue STEP 9 Tap the symbol to continue In the following screen select Wi Fi Camera for device type Next using your mobile device s camera scan the QR code...

Page 6: ...12 You should then see the confirmation screen Tap Start Live Preview and follow the on screen prompt to finalize the setup If the camera is unable to connect try temporarily moving the camera closer...

Page 7: ...ce RESETTING YOUR CAMERA Your camera s reset button is also its LED indicator light Press and hold the reset button for 15 seconds in order to reset the camera to its original factory settings The LED...

Page 8: ......

Page 9: ...ta informaci n la necesitar si requiere soporte t cnico o de garant a NOTA EL NOMBRE DE USUARIO Y LA CONTRASE A UTILIZADOS PARA REGISTRAR SU DIS POSITIVO NO SON LOS MISMOS QUE LOS UTILIZADOS PARA INIC...

Page 10: ...os los pasos de instalaci n y pruebe el sistema Visite www q see com support y ah encontrar los manuales m s recientes e informaci n actualizada para sus productos Q See PASO 3 Desde App Store descarg...

Page 11: ...aci n por eso aseg rese de tener acceso r pido a la direcci n de correo electr nico que use Haga clic en Enviarme c digo de verificaci n Send verification code to mail PASO 7 Cree una contrase a para...

Page 12: ...Iniciar sesi n Login para continuar PASO 9 Haga clic en el S mbolo para continuar En la siguiente pantalla seleccione C mara Wi Fi Wi Fi Camera para el tipo de dispositivo Luego usando la c mara de s...

Page 13: ...ew y siga las indicaciones que aparecer n en pantalla para finalizar la configuraci n Si la c mara no puede conectarse intente llevar temporalmente la c mara m s cerca del router de su Wi Fi para term...

Page 14: ...derecha paneo y graduar la c mara de arriba a abajo inclinaci n vertical El micr fono y parlante de la c mara le permitir n escuchar y hablar a trav s de la c mara para fines de audio bidireccional El...

Page 15: ...inales de f brica La luz indicadora LED confirma que su c mara est conectada a Wi Fi Cuando la luz es verde y parpadea quiere decir que la c mara est lista para conectarse Una luz verde s lida signifi...

Page 16: ...la semana DISCLAIMER Although Q See has made every effort to ensure that the information in this guide was correct at the time of printing Q See does not assume any liability to any party for any los...

Reviews: