Q-See QC444-403 Quick Installation Manual Download Page 4

Q-SEE QUICK INSTALLATION GUIDE 

M

M

O

O

D

D

E

E

L

L


N

N

U

U

M

M

B

B

E

E

R

R


Q

Q

C

C

4

4

4

4

4

4

-

-

4

4

0

0

3

3


3 | 

P a g e


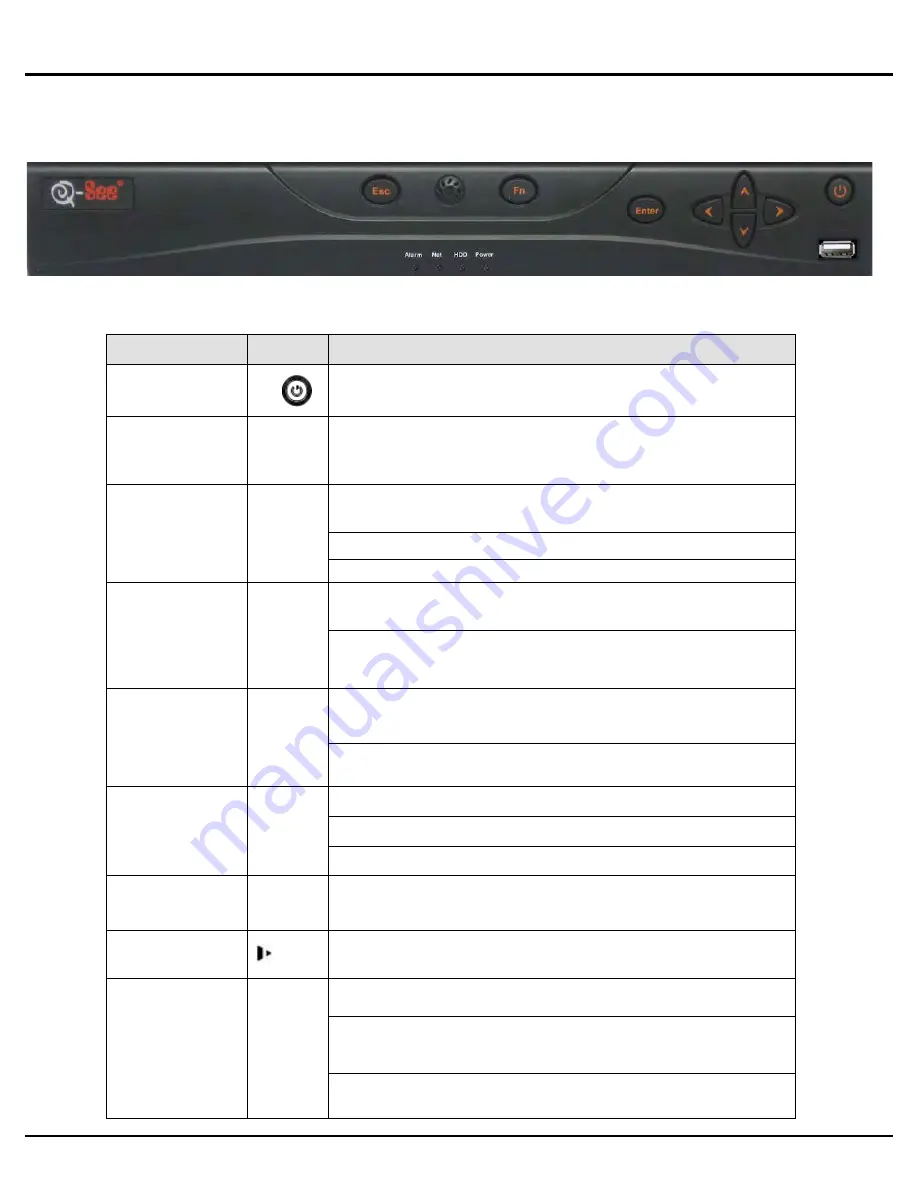
Part 3 – DVR Controls: Front Panel 


Please refer to the following chart for front panel button information: 
 

Name 

Icon 

Function 

Power button 


Power button, press  and hold  this button for three seconds 
to boot up or shut down DVR. 

Shift 

Shift 

In textbox, click this button to switch between numbers, 
letters (Small/Capitalized), and symbols. 

Up/1 
Down/4  


Activate current control, modify setup, and  then move up 
and down. 


Increase/decrease numbers. 


In text mode, input number 1/4 (letters G/H/I) 
 

Left/2 
Right/3 


Shift current activated control, 

In playback, click these buttons to control playback bar. 
In text mode, input number 2 (letters A/B/C) 
/3(letters D/E/F) 


ESC 

ESC 

Go to previous menu, or cancel current operation. 

In playback, click it to restore real-time monitor mode.  

Enter 

ENTER 

Confirm current operation 

Go to default button 

Go to menu  

Record 

REC 

Manually stop/start recording, working with direction keys  
or numeral keys to select the recording channel. 

Slow play/8 


Multiple slow play speeds or normal playback. 
In text mode, input number 8 (letters T/U/V). 

Assistant 

Fn 

One-window monitoring  mode, click this button to display 
assistant function: image color. 
 Backspace function: in numeral control or text control, press 
and hold it for 1.5 seconds to delete the previous character 
before the cursor. 
In motion detection setup, working with Fn and direction 
keys to realize setup. 


Summary of Contents for QC444-403

Page 1: ...Quick Installation Guide 4 Channel H 264 Compression DVR and 4 Color CCD Camera Kits M MO OD DE EL L Q QC C4 44 44 4 4 40 03 3...

Page 2: ...r CCD Cameras with Stands 2 QSDS14273 6mm 2 QSDS14273W 3 6mm Remote Control USB 2 0 Mouse Ethernet Cable BNC M RCA F Adapter Camera Cables 2 Included Power Supply For DVR Pre Installed Hard Drive Soft...

Page 3: ...4 44 44 4 4 40 03 3 PART 2 DVR CAMERA AND POWER CONNECTIONS Please note that it is STRONGLY recommended to use a surge protector that is UL 1449 rated Look for a clamping voltage of 330 or lower a Jou...

Page 4: ...playback click these buttons to control playback bar In text mode input number 2 letters A B C 3 letters D E F ESC ESC Go to previous menu or cancel current operation In playback click it to restore r...

Page 5: ...ward of the dropdown list In text mode input number 9 letters W X Y Z Play Pause 5 In normal playback click this button to pause playback In pause mode click this button to resume playback In text mod...

Page 6: ...ression frame rate bit rate audio and sub stream Schedule setup RS232 setup Network setup Alarm setup motion detection setup PTZ setup Display setup and Load Default setup The Advanced option is used...

Page 7: ...e were some the cameras are set to record all the time between 8 and 10am record on motion detection between 12am and 8am and 12pm to 8pm and then on external alarm from 10am to 12pm and 8pm to 12am T...

Page 8: ...not sensitive to motion Click the Fn button on the remote control to adjust the sensitivity of your mouse as you move the cursor After you have finished the setup click the Enter button on the remote...

Page 9: ...kup The bottom of the window will show the space required to back up the files and how much space is left on the backup media Click on the Backup button and the window will display a progress bar and...

Page 10: ...mments Contact Us Mailing Address Customer Service DPS Inc Phone 877 998 3440 x 538 8015 E Crystal Dr Email cs dpsi usa com Anaheim CA 92807 Live Chat from our Website Website Tech Support http www q...

Reviews: