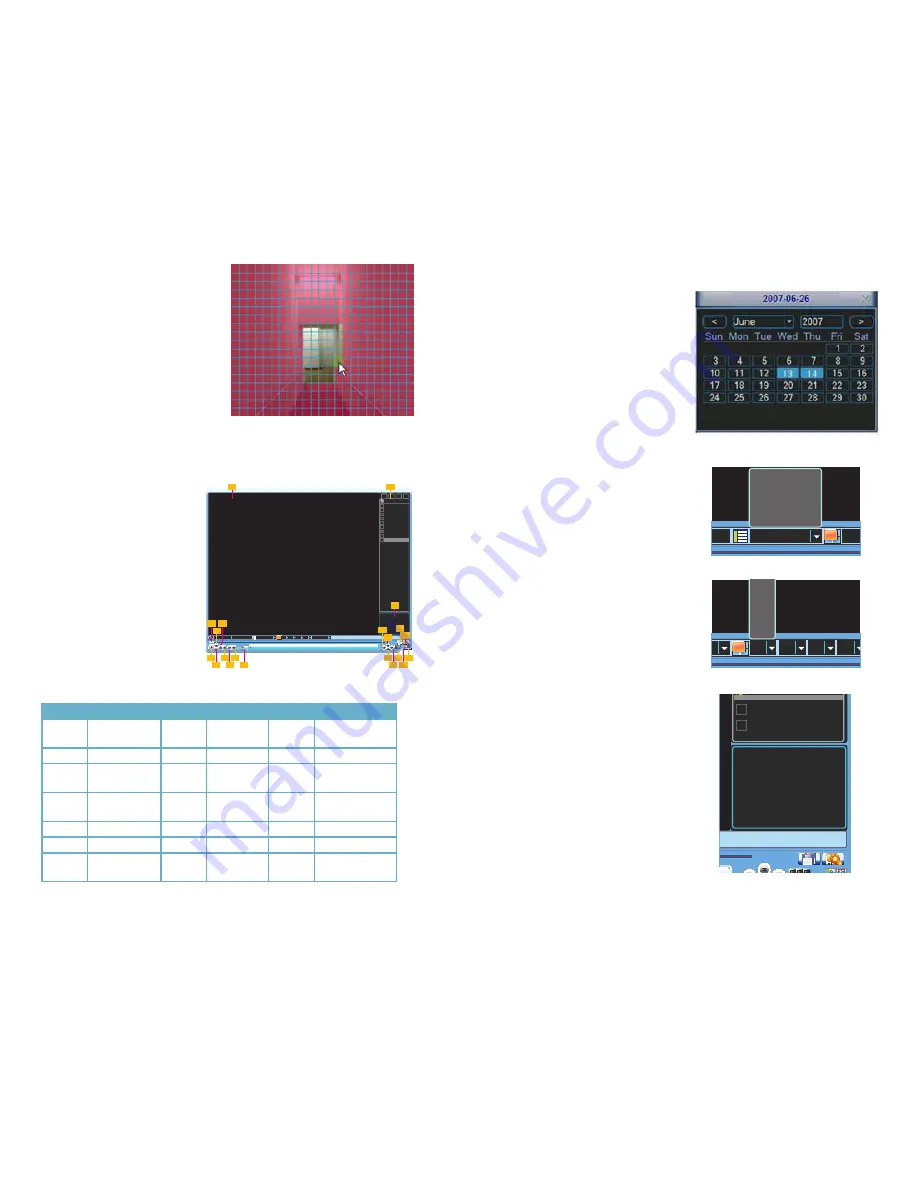
PICTURE 6-7
Next under
Region
click the
Select
button to
set up the area of the camera display that you
want to be sensitive to motion.
You will then see the camera’s view overlaid
with a grid. The green box is the current loca-
tion of the cursor. The red area is the sensi-
tive area and the clear area is not sensitive
to motion. Click the Fn button on the remote
control to adjust the sensitivity of your mouse
as you move the cursor. After you have finished
the setup click the Enter button on the remote
control to exit. Next set your sensitivity level
from 1 to 6 (6 being the most sensitive), then
click the Save button on the Detect screen to
save the setting.
PART 7 - PLAYING BACK FILES
PICTURE 7-1
The
Search and Playback
window
can be accessed through the
Shortcut
menu
. You can view the playback from
any camera that was activate during the
recording session.
Number Function
Number Function
Number Function
1
Playback
Window
8
Reverse
15
Backup
2
File List
9
Fast Play
16
Search
3
File Information
10
Previous
Frame
17
Next Channel
4
Playback
Progress Bar
11
Next Frame
18
Next File
5
Stop
12
Volume
19
Video Clip
6
Slow Play
13
Previous File
20
Repeat Playback
7
Play
14
Previous
Channel
21
Full Screen
08-19-2010 00: 00: 00
All
1
ALL
2
3
4
CH
11:37:22 M
11:48:00 R
11:54:00 A
12:10:00 M
13:00:00 R
14:00:00 R
15:00:00 R
16:00:00 R
17:00:00 R
StartTime Type
Start Time
08-19-10 13:20:00
End Time
08-19-10 13:26:00
Size(KB)
52736
1p 2p 3p 4p
1
4 6
5
13
14
15
16
3
2
7
9 11
8 10 12
17
18
19 21
20
The playback screen can be set to display the recordings from one camera or as many channels as
you have.
SEARCH
To begin a search for an event:
STEP 1.
Enter the date to be searched.
You can also click on the clock icon
to open the Calendar. Highlighted
dates have recorded files.
PICTURE 7-2
PICTURE 7-3
PICTURE 7-4
PICTURE 7-5
STEP 2.
Enter the start time (if known) or
skip this field to search the entire day.
Select the type of event;
All
,
Alarm
,
Motion Detection (MD)
or both
Alarm
and Motion Detection
.
STEP 3.
Select which channels you wish
to view. Each of the four slots is a pull-
down which allows you to select a
specific channel. You can leave these
empty to view 1-3 channels. You can
also choose to view four, eight or 16
channels simultaneously.
STEP 4.
Click on the Search icon and any
records fitting your criteria will be listed
in the column to the right of the screen.
Up to 128 files can be displayed and
multiple tabs (pages) may be displayed
in the search results depending on the
number of cameras you have as well
as how you configured your playback
display. In the event that a camera is set
to manually record, the events will be
broken up by hour.
All
1
CH
All
Alarm
MD
Alarm/MD
CH
13
14
15
16
1
2
3
4
11:37:22 M
11:48:00 R
11:54:00 A
12:10:00 M
13:00:00 R
14:00:00 R
15:00:00 R
16:00:00 R
17:00:00 R
Start Time
08-19-10 15:00:00
End Time
08-19-10 15:59:00
Size(KB)
52736


