background image

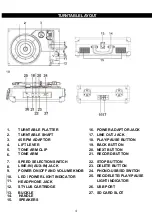
TURNTABLE LAYOUT


4


1.


TURNTABLE PLATTER


16.


POWER ADAPTOR JACK


2.


TURNTABLE SHAFT


17.


LINE OUT JACK


3.


45 RPM ADAPTOR


18.


PLAY/PAUSE BUTTON


4.


LIFT LEVER


19.


BACK BUTTON


5.


TONE ARM CLIP


20.


NEXT BUTTON


6.


TONE ARM


21.


RECORD BUTTON


7.


SPEED SELECTION SWITCH


22.


STOP BUTTON


8.


LINE-IN (AUX-IN) JACK


23.


DELETE BUTTON


9.


POWER ON/OFF AND VOLUME KNOB


24.


PHONO-USB/SD SWITCH


10.


11.


LED / POWER LIGHT INDICATOR 
HEADPHONE JACK


25.


REC/DELETE/PLAY/PAUSE 
LIGHT INDICATOR


12.


STYLUS CARTRIDGE


26.


USB PORT


13.


BUCKLE


27.


SD CARD SLOT


14.       HANDLE 
15.       SPEAKERS 


19 


Summary of Contents for Vintage PVTTBT9BK

Page 1: ......

Page 2: ...2 SPECIFICATIONS 3 TURNTABLE LAYOUT 4 TURNTABLE OPERATION 5 POWER SUPPLY 5 BASIC OPERATION 5 TURNTABLE NEEDLE REPLACEMENT 6 LINE IN AUX IN OPERATION 7 BLUETOOTH 7 HEADPHONE OPERATION 7 AUX OUT OPERAT...

Page 3: ...ring lightning storms or when unused for long periods of time 7 Refer all servicing to qualified personnel Servicing is required when the apparatus has been damaged in any way such as power supply cor...

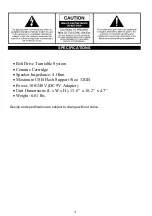
Page 4: ...tion are subject to change without notice Belt Drive Turntable System Ceramic Cartridge Speaker Impedance 4 Ohm Maximum USB Flash Support Size 32GB Power 100 240V DC 9V Adapter Unit Dimensions L x W x...

Page 5: ...TONE ARM CLIP 20 NEXT BUTTON 6 TONE ARM 21 RECORD BUTTON 7 SPEED SELECTION SWITCH 22 STOP BUTTON 8 LINE IN AUX IN JACK 23 DELETE BUTTON 9 POWER ON OFF AND VOLUME KNOB 24 PHONO USB SD SWITCH 10 11 LED...

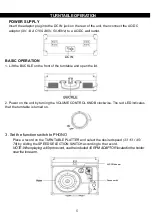
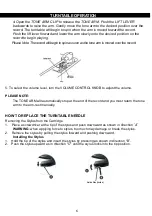
Page 6: ...open the lid 2 Power on the unit by turning the VOLUME CONTROL KNOB clockwise The red LED indicates that the turntable is turned on 3 Set the function switch to PHONO Place a record on the TURNTABLE P...

Page 7: ...UME CONTROL KNOB to adjust the volume PLEASE NOTE The TONE ARM will automatically stop at the end of the record and you must return the tone arm to the arm rest manually HOW TO REPLACE THE TURNTABLE N...

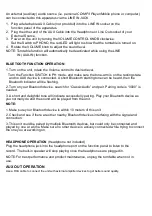
Page 8: ...ard then the Bluetooth indicator will be flashing 2 Turn on your Bluetooth device search for ClassicAudio and pair Pairing code is 0000 is needed 3 A short and delightful tone will indicate successful...

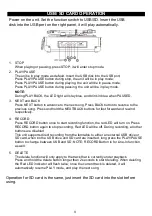
Page 9: ...old the NEXT BACK buttons for fast forward and rewind respectively 4 RECORD Press RECORD button once to start recording function the red LED will turn on Press RECORD button again to stop recording Re...

Reviews: