background image

-2-

-7-

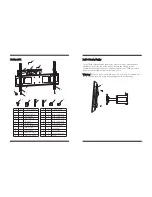
Hardware Kit:

Hardware Kit:

1

3

2

4

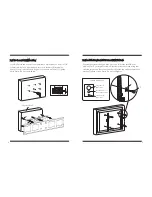
Warning: Some TV require two people to lift, as we are not responsible
for any personal injur y or product damage due to mishandling.

Warning:

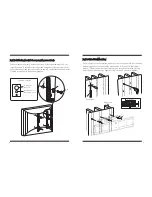
Part 3- Hanging display

Firstly lift the bracket mounted display over the mount. And then hook
the brackets over the top of the mount. Rotate the display let the
bottom of the brackets hook over the bottom of mount. Then put safety
bolts into the bottom of the brackets and lock it.

Part 3- Hanging display

2,3

1

5

6

7

8

9

4
4

4
4

I
J

K

L

M

Square washer
Long bolt

Wall anchor

Long bolt washer
Spacer

ID

Description

1

2

A

3

4

B

C

Wall plate

M4

mm

×12

bolt

M4

mm

×16

bolt

M5×

mm

16

bolt

M6×

mm

16

bolt

M8×16mm bolt
M ×36mm

5

bolt

M6×36mm bolt

M ×36mm

8

bolt

D

4

4

4

4

4

E

F

G

H

ID

Description

Qty

A-H

L

I

K

J

M

5
6

1
1
1

4

4

4

Qty

4

1

1

2

Safety bolt

Left Bracket

Right Bracket

Cantilever Arm

TV plate

7

3

Cord management wrap
6x6 Wrench

5x5 Wrench

8

1

9

1

Summary of Contents for PSW772

Page 1: ...ssional installer for assistance 2 The wall or mounting surface must be capable of supporting the combined weight of the mount and the display otherwise the structure must be reinforced 3 Safety gear and proper tools must be used A minimum of two people are required for this installation Failure to use safety gear can result in property damage serious injury or death Warning Item No PSW772 Item No...

Page 2: ...hook over the bottom of mount Then put safety bolts into the bottom of the brackets and lock it Part 3 Hanging display 2 3 1 5 6 7 8 9 4 4 4 4 I J K L M Square washer Long bolt Wall anchor Long bolt washer Spacer ID Description 1 2 A 3 4 B C Wall plate M4 mm 12 bolt M4 mm 16 bolt M5 mm 16 bolt M6 mm 16 bolt M8 16mm bolt M 36mm 5 bolt M6 36mm bolt M 36mm 8 bolt D 4 4 4 4 4 E F G H ID Description Qt...

Page 3: ...ews four square washers I and four spacers M at the top and bottom of each bracket Tighten screws firmly Do not overtighten Part 2b Attaching brackets to screen with recessed back Part 1a Wood Stud Mounting Use wall plate 1 as a template make sure it is level and mark mounting holes along the center lines of the wood studs Drill six 3 16 six 5mm dia holes 2 50mm deep Level wall plate 1 and attach ...

Page 4: ... 2 50mm Φ3 8 10mm Concrete Wall K L I A E J Square washer I Small hole for M4 screws Medium hole for M5 and M6 screws Large hole for M8 screws Part 2a Attaching Brackets To Screen With Flat Back Center brackets vertically on back of screen Select the small A or B medium C or D or large E screws Attach brackets to screen using four selected screws and four square washers I at the top and bottom of ...

Reviews: