
3. SAFETY INSTRUCTIONS
•
Read and understand all of the instructions and warnings both on the machine
and manual.
•
Follow all warnings and instructions marked on the unit.
•
This product should be operated only from the type of the power source
indicated in the user's guide. If you are not sure of the type of power supply in
your location, consult your dealer or local power company.
•
Only use the cable provided with the unit. The use of other cable may result in
electric shock, fire or cause serious damage to the unit.
•
Never push objects of any kind into the unit through case slots, since they may
touch dangerous voltage points or shortcut parts, resulting in a risk of fire or
electric shock.
•
Unplug this product from the wall outlet and refer servicing to qualified service
personnel under the following conditions:
a.
When the power supply cord or plug is damaged or frayed.
b.
If the liquid has been spilled into the unit.
c.
If the unit has been exposed to rain or water.
d.
If the machine has been dropped or the case has been damaged.
e.
If the product shows a noticeable change in performance.
•
To reduce the risk of electric shock, do not disassemble this product. Take it to
qualified service personnel when service or repair work is required. Opening
or removing covers may expose you to dangerous voltages or other risks.
Incorrect reassembly can cause electric shock when the appliance is
subsequently used.
•
Do not use the unit if the power cord is damaged or if the plug socket contact
is loose. Don’t follow these instructions may occur in electric shock , fire or
other hazards.
•
When unplugging the power plug, do not pull it by the cord but rather grip
the plug and pull it out, don’t follow those instruction may occur electric shock,
fire or damage to the unit.
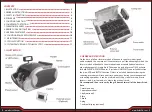
4. POWER UP
Connect the power cord to the machine (power outlet), then plug it to power
source and turn the switch on; the unit will conduct a self-check by spanning
the feeding roller while the MG and/or UV/IR functions will be automatically
turned on by default. The counting display will show when the unit is ready
<the machine is in its normal working condition>.
5.COUNTING FUNCTION
1. Counting Function
•
Once the bills are correctly placed in the hopper, the machine will start
counting automatically (except in the manual counting mode). The number
of counted bills will be shown on the counting display. Moreover, once the
bills are removed from the stacker, the counting display will be clear and the
batch display in turn will show the number of counted bills Instead.
•
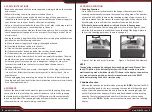
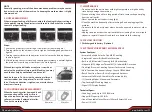
Bills should be correctly placed as indicated in the following steps:
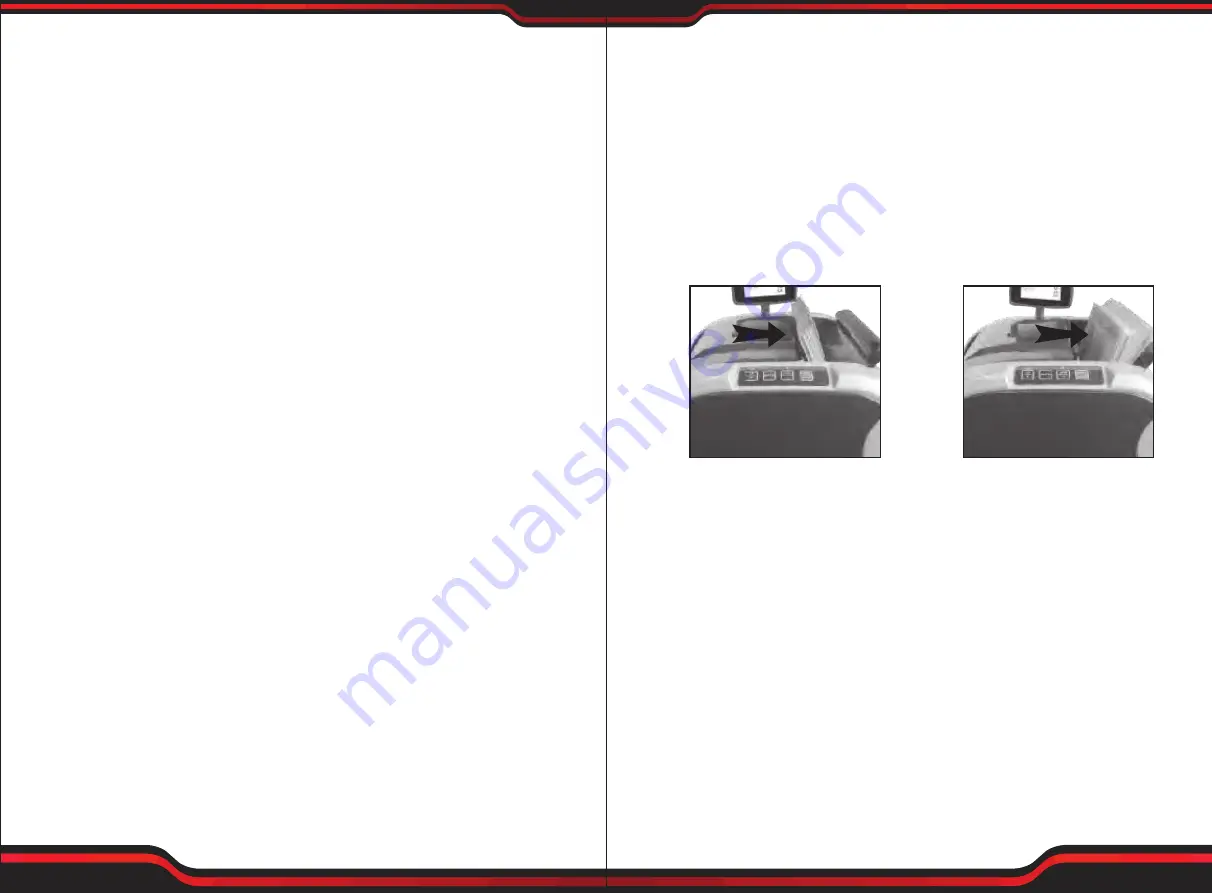
Place the bills between the counting guides as shown in the figure 1, then
push the bills backward to make them lay on the top of the hopper plate, in
the correct counting position as shown in the figure 2.
NOTE
The counting mode can be changed between Automatic and Manual. Press
the AUTO button, if the batch display shows AUTO the machine is in auto-
matic counting mode; if without the AUTO shown in the display, the machine
is in manual counting mode, under this manual mode, press the RESET
button after placing the bills to start counting.
2. Addition Function
Addition function can be performed by pressing the “
ADD/-
” button (the ADD
indicator will appear). In this case, removing the counted bills from the stack
will not clear the quantity counted and shown on the counting display. The
next bills placed in the hopper will be counted and added to the preceding
quantity. The total amount of added bills will be shown on the counting
screen. Press the “
ADD/-
” button to close the function and clear the counting
display.
www.PyleUSA.com
4
www.PyleUSA.com
5
Figure 1. Put the bills by this direction
Figure 2. Push the bills backward