OWNER'S MANUAL
Shipboard Audio System
•
PLL Synthesizer Stereo Radio
Digital Compact Disc Player
Automatically Memory Storing
Direct Track Access
Program CD Tracks
Electronic Shockproof (ESP) Function
PLCD22MRP
www.pyleaudio.com
Page 1: ...AL Shipboard Audio System PLL Synthesizer Stereo Radio Digital Compact Disc Player Automatically Memory Storing Direct Track Access Program CD Tracks Electronic Shockproof ESP Function PLCD22MRP www p...
Page 2: ...ial value 12 Radio operation 12 Switching to radio mode 12 Selecting the frequency band 12 Selecting station 12 Automatically memory storing preset scan 12 Station storing 12 Scan 12 CD operation 13 S...
Page 3: ...osition also according to the mounting paper 3 Use the glue paper to stick the two mounting bracket to the back of the dashboard The screw holes of the brackets must respectively aim at the mounting h...
Page 4: ...ANTENNA IGNITION SWITCH ACC MEMORY BACK UP B GROUND B FRONT Lch SPEAKER REAR Lch SPEAKER WHITE WHITE BLACK GREEN GREEN BLACK FRONT Rch SPEAKER REAR Rch SPEAKER GREY GREY BLACK VIOLET VIOLET BLACK FUSE...
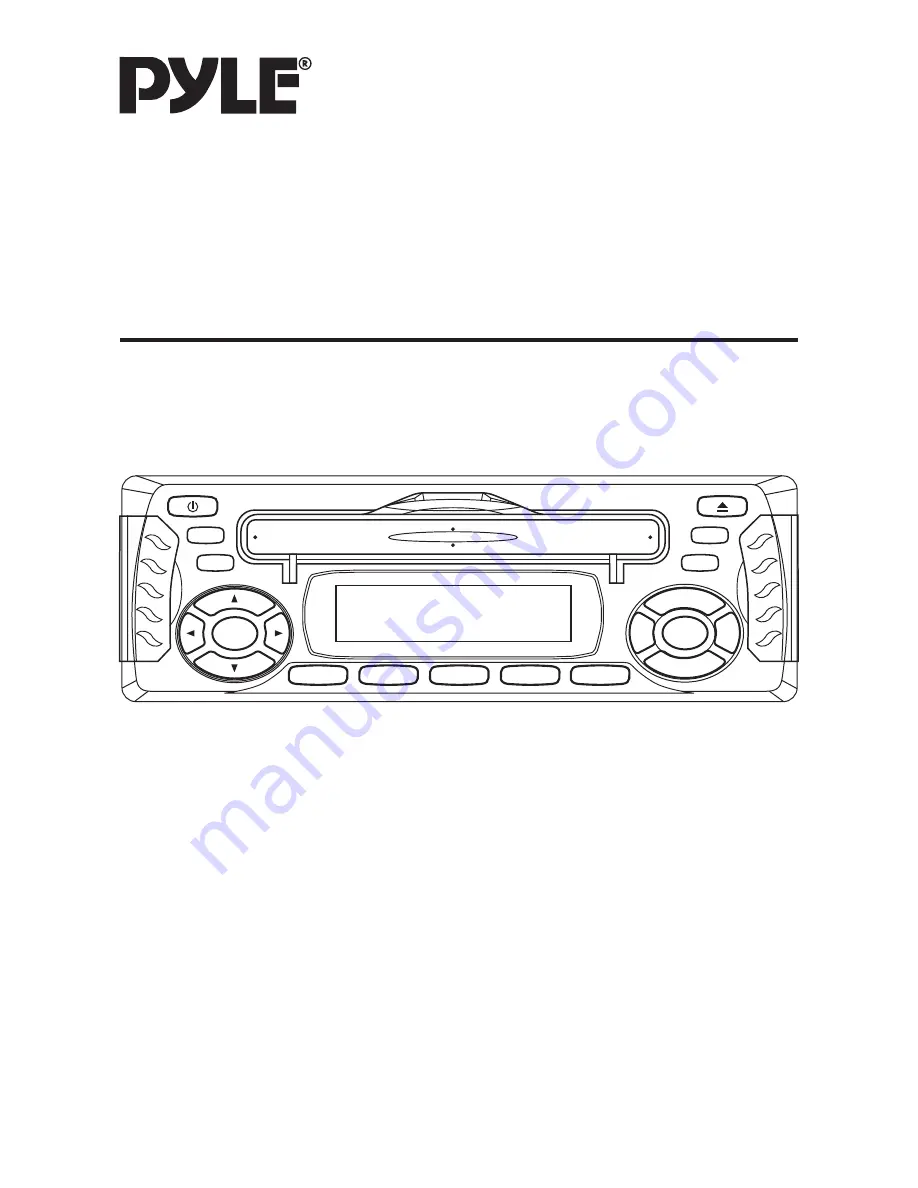
Page 5: ...5 OPERATION When pull open the disc cover 12 7 10 18 23 21 22 11 9 1 13 3 25 19 24 14 20 6 15 16 8 2 4 17 5 26...
Page 6: ...button Press the button 1 shortly to turn on off the head unit Press button 1 for more than 3 seconds the button is operated to initial volume control button When system power turns on the volume is s...
Page 7: ...ress buttons 6 shortly to select channel forward or backward The range of selecting forward or backward is CH1 CH7 Channels CASSETTE REWIND FORWARD FOR CASSETTE OPERATION Press buttons 6 to activate t...
Page 8: ...install the base to the holder 2 Select the proper object then place the remote mounting bracket on the base and let the object go through the base and the mounting bracket INSTALLATION HARDWARE HOLDE...
Page 9: ...ase and the screw holes on the bracket then use the two screws 4X50 and nuts to fix the bracket the base and holder to the proper location 4 Last install the remote control to the holder See below ali...
Page 10: ...etween left and right speakers by VOLUME button 11 or VOLUME button 12 Fader Press SEL MENU button 10 five times Adjust sound balance between front and rear speakers by VOLUME button 11 or VOLUME butt...
Page 11: ...information 12hours 24hours Hold press SEL MENU button 10 for several seconds when BEEP ON OFF appears press SEL MENU button 10 shortly five times to select 12hours 24hours mode And then you can pres...
Page 12: ...e not been pressed for several seconds they will return to seek tuning mode and AUTO appears on the display FOR WEATHER BAND OPERATION Press TUNE button 16 or TUNE button 17 shortly to choose channel...
Page 13: ...number that doesn t belong to the current disc NO TR will appear on the display REPEAT THE SAME TRACK Hold press RPT button 22 for several seconds to continuously repeat the same track Press it for s...
Page 14: ...CAN MP3 BUTTON Searching track directly Searching Directory or File Name searching from root by VOLUME buttons 11 12 searching from current directory by VOLUME buttons 11 12 1 SEARCHING TRACK DIRECTLY...
Page 15: ...irectory or file in the directory by VOLUME buttons 11 12 The selected file can be played by pressing BAND ENTER button 18 PAUSE Press MUTE button 3 to pause MP3 player Press it again to resume play R...
Page 16: ...the unit to play 2 The unit cannot play a CD R and CD RW that is not finalized Please refer to the manual of your CD R CD RW recorder or CD R CD RW software for more information on finalization proces...
Page 17: ...um Output Power 4 x 50 Watts Current Drain 15 Ampere max CD PLAYER Signal to Noise Ratio More than 60 dB Channel Separation More than 50 dB Frequency Response 40 Hz 18 KHz RADIO FM Frequency Coverage...
Page 18: ...disc new one Temperature inside the ship Cool off or until the ambient is too high temperature return to normal Condensation Leave the player off for an hour or so then try again No sound Volume is i...