E E E E E E E E E
E E E E E E E E E E E
E E E E E E E E E E E E E E E E E
F
Q
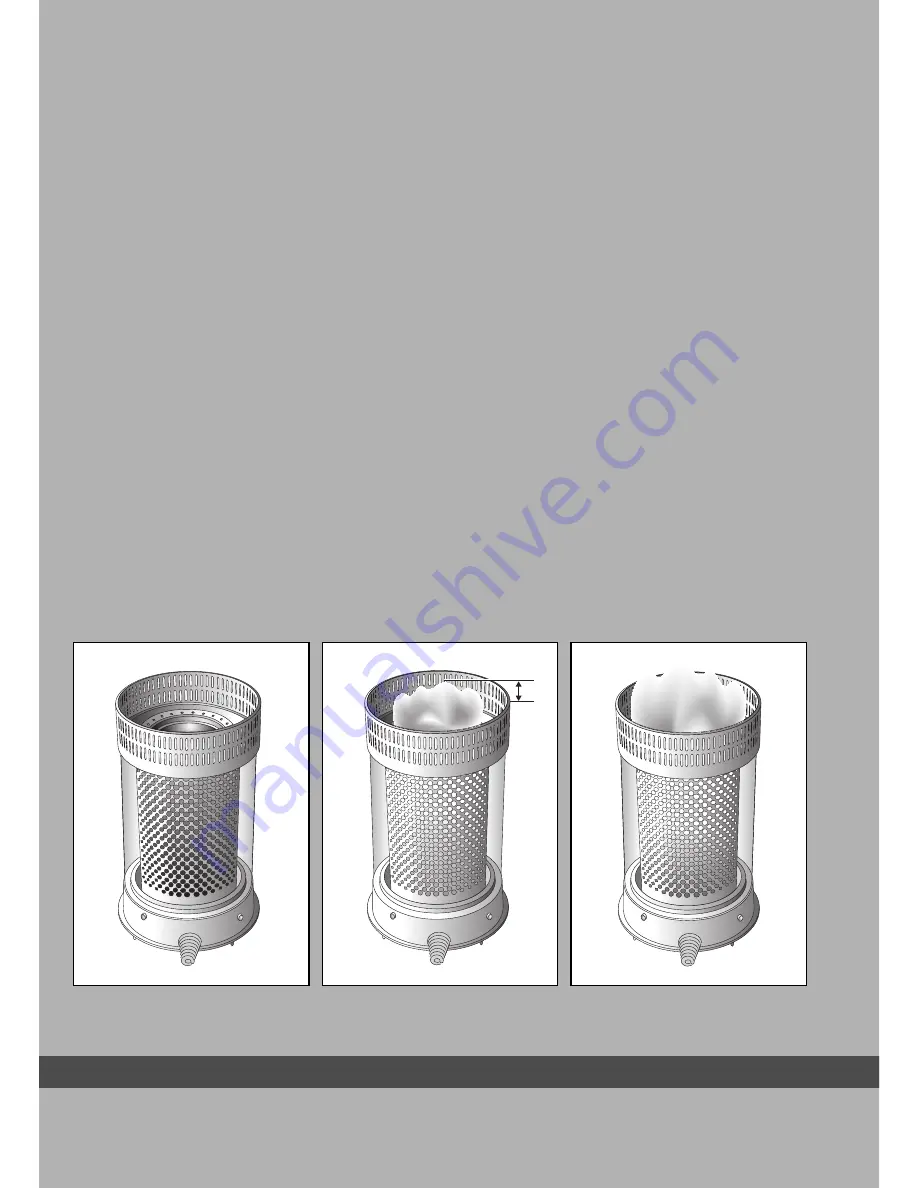
✗
1-3 cm.
✓
Page 1: ...2 14 26 38 50 62 74 MANUEL D UTILISATION GEBRAUCHSANWEISUNG BRUGSANVISNING INSTRUCCIONES DE USO OPERATING MANUAL ISTRUZIONI D USO GEBRUIKSAANWIJZING 3 2 6 5 4 1 R 22x C ...
Page 2: ...Use first to ensure the maximum lifetime for your heater This appliance comes with a 24 month manufacturer s warranty on all defects in material or workmanship We wish you much warmth and comfort from your heater Yours sincerely PVG International b v Customer Service Department 1 READ THE DIRECTIONS FOR USE FIRST 2 IN CASE OF ANY DOUBT CONTACT YOUR DEALER 3 BEFORE YOU START READING FOLD OUT THE LA...
Page 3: ...ndle Fuel indicator Grill Lid for removable tank Removable tank Fuel gauge removable tank Ignition coil Battery holder Air quality control system A B C 4 E F G H I J K L M E E E E E E E E E E E E E E E E E E E E E E E Remove all packaging materials refer to Section A Fig A Fill the removable tank I and wait 30 minutes before you ignite the heater refer to Section B Fig I Insert the batteries into ...
Page 4: ... and or at altitudes above 1 500 metres Do not use your heater in cellars or other underground areas SAFE TOP The heater is supplied with a safe top This application decreases the temperature of the top plate In this way the risk of harmful accidents at accidentally touching the top plate is considerably decreased However be aware that the top plate still becomes hot Avoid any contact with the top...
Page 5: ... H and remove the piece of cardboard If the left side of the grill has been removed first insert the flattened upper left end of the grill into the upper left slot and then insert the other flattened end into the lower left slot Fig E Fill the removable tank as indicated in Section B Insert the batteries into their holder L at the back of the heater Fig G Ensure that the positive and negative pole...
Page 6: ... a short while when it is used for the first time You should therefore provide extra ventilation or ignite the heater outside the living room When you use the heater for the first time first put the filled removable tank into place and then wait approximately 30 minutes before you ignite the heater This allows the glass fibre wick to soak up the fuel Follow the same procedure when you have complet...
Page 7: ...the wick contact your dealer or replace the wick refer to section L When there is insufficient ventilation in the room the heater shuts off automati cally After improving the ventilation of the room e g by opening a door or win dow a little more the heater can be ignited again This heater is equipped with a safety mechanism which switches off the heater when the removable fuel tank is taken out of...
Page 8: ... You are using fuel which is past its use by date Start every heating season with fresh fuel THE HEATER REMAINS BURNING LOW E Wick position too low Contact your dealer E Before you refilled the tank the heater had burnt up almost all the fuel After having refilled and replaced the removable tank wait for 30 minutes before igniting the heater E You are using the incorrect type of fuel Refer to THE ...
Page 9: ... your dealer for repairs Let the heater cool down first before you start any maintenance or service work H STORAGE END OF THE HEATING SEASON We recommend that you burn up all the fuel in the fuel tank at the end of the heating season and store the heater properly Follow the procedure on the next page Ignite the heater outside the living room and let it burn until all fuel is used Let the heater co...
Page 10: ...tilation air renewal Weight kg 7 5 Direct measurement of the CO2 level NDIR CO2 sensor E Guard M At maximum setting Specified values are indicative K WARRANTY PROVISIONS Your heater comes with a 24 month warranty starting on the date of purchase Within this period all defects in material or workmanship will be repaired without any charge The following provisions shall apply regarding this warranty...
Page 11: ...n dioxide or powder extinguisher 10 TIPS FOR SAFE USE 1 Make sure that children are always aware of the presence of a burning heater 2 Do not move the heater when it is burning or still hot Do not refill nor service the heater when it is burning or still hot 3 Position the front of the heater at a minimum distance of 1 5 metres from walls curtains and furniture 4 Do not use the heater in dusty roo...
Page 12: ...g nuts from the wick holder Lift the wick holder chassis up until the wick is visible Place the burner bed next to the heater Ensure that the wiring does not become disconnected Remove the screw on the stem holding the bracket and remove the bracket Turn right the stem to the end and remove the wick sleeve with wick Lift the wick sleeve up and remove it from the primary air tube Squeeze the wick t...
Page 13: ... If this is the case repeat the procedure from No 12 Pull the knurled wick adjust ment knob off the heater Put the cabinet back into position and tighten the three screws Put the knurled wick adjustment knob back into position Now put the combustion chamber back into position Check that it is level by sliding it slightly to the left and the right by its handle Close the grill Put the filled remova...
Page 14: ...E E E E E E E E E E E E E E E E E E E E E E E E F Q 1 3 cm ...
Page 15: ... F L K H I M 100 cm 150 cm 50 cm 50 cm 20 cm 50 cm R 22x C Stover R 222 C Tectro R 223 C 3 Sous réserve de modification 2 Ändrungen vorbehalten 6 Ændringer forbeholdes 5 Nos reservamos el derecho de hacer modificaciones 4 Subject to modifications Sogetti a modifiche 1 Wijzigingen voorbehouden ...
Page 16: ...e zibro com SUOMI Appliance Finland Oy Piispantilankuja 6C 02240 ESPOO tel 358 9 4390 030 fax 358 9 4390 0320 email appliance appliance group com F FI IN N 4 UNITED KINGDOM Scott Brothers Ltd The Old Barn Holly House Estate Cranage Middlewich CW10 9LT UK tel 44 1606 837787 fax 44 1606 837757 email sales scottmail co uk ITALIA PVG Italy SRL Via Niccolò Copernico 5 50051 CASTELFIORENTINO FI tel 39 5...