7
MODEL# 9003MT
ASSEMBLY INSTRUCTIONS
1
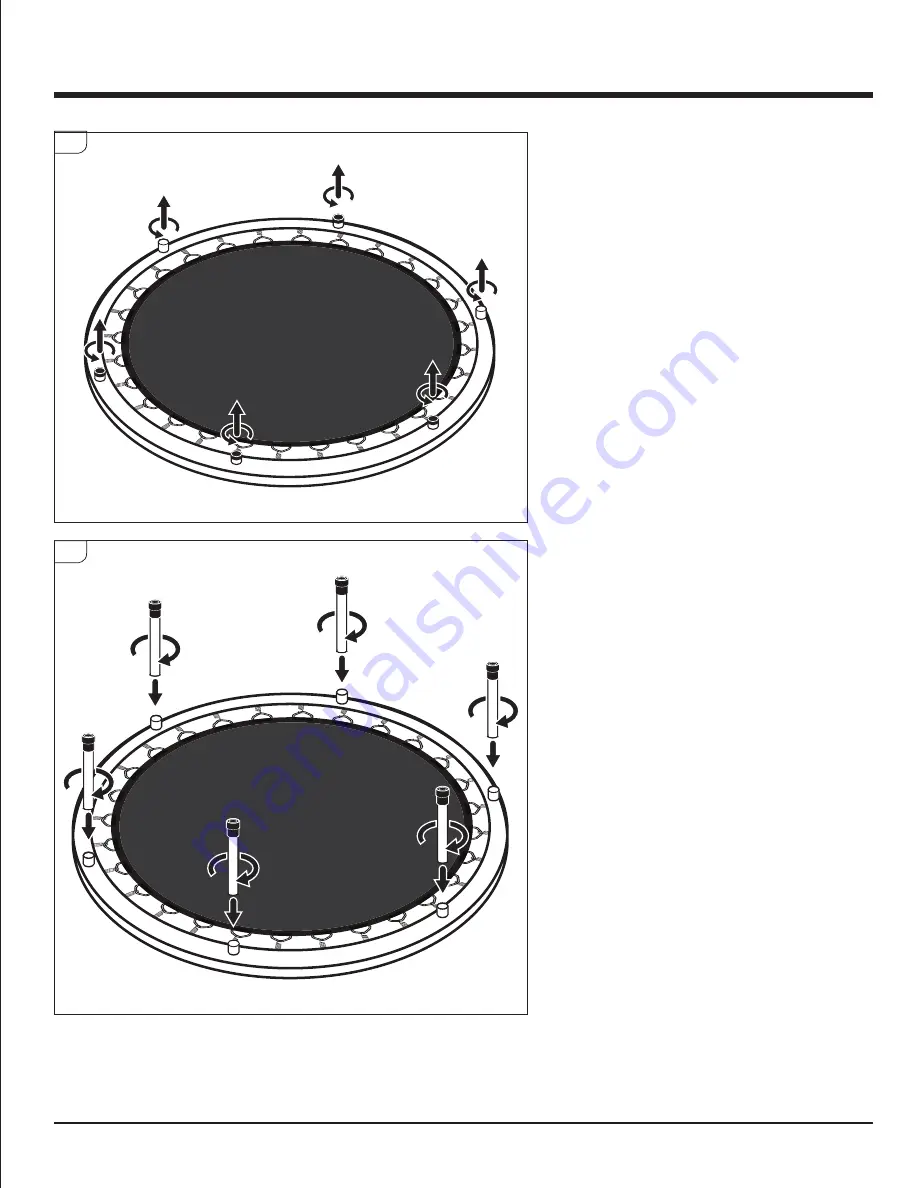
STEP 1
:
Remove the Rubber Caps from leg base
before placing legs onto trampoline
STEP 2
Twist Legs onto the threaded grooves on
the Mini-trampoline until they are secure.
DO NOT over tighten.
2
Page 1: ...8 5269 4401 Samuell Blvd Ste 150 Mesquite TX 75149 40 INCH EXERCISE TRAMPOLINE MODEL 9003MT PRODUCT MANUAL VERSION 5 20 01 FOR AGES 13 1 X WEIGHT LIMIT 250Lbs 114 Kgs TO BUILD TOOLS NEEDED Manual en e...
Page 2: ...se Please keep in mind that for select damaged part replacement requests we will require a photo for submission If you request replacement parts please be sure to include the following information in...
Page 3: ...ater or ice weather damage damage caused by unauthorized repair work or damage caused by improper use of the products are not covered by the product warranty No other warranty beyond that specifically...
Page 4: ...ZARD Small Parts NOT for children under 3 years of age WARNING While every attempt is made to ensure the highest degree of protection in all equipment we cannot guarantee freedom from injury The user...
Page 5: ...ition so that there is 8 feet of distance between the trampoline and foreign objects Outdoor use position well away from water on flat firm ground ideally grass Never position on or near hard surfaces...
Page 6: ...ous injury The recommended overhead clearance is a minimum of 8 feet from any and all ceilings overhead cables ceiling fixtures or hard surfaces In terms of horizontal clearance ensure that potentiall...
Page 7: ...ASSEMBLY INSTRUCTIONS 1 STEP 1 Remove the Rubber Caps from leg base before placing legs onto trampoline STEP 2 Twist Legs onto the threaded grooves on the Mini trampoline until they are secure DO NOT...
Page 8: ...ssing from my box or something was damaged during assembly can you send it to me Answer If it has been 30 days or less from the date of your initial purchase you can contact customer service for a rep...