ENGLISH
•
Tighten the locking screw
(14)
as far as it will go.
•
Turn on the thermal imaging module by briefly pressing the
ON
button
(6)
.
•
Turn on the device and align the image center on the PROTON XQ30 display
with the image center of the daylight optical device by carefully tilting the
thermal imaging module.
•
Align the top and bottom display boundaries of the PROTON XQ30 parallel to
the horizontal line of the daylight optical device’s reticle.
•
Having reached the best possible position of the thermal imaging module,
tighten the two screws
(13)
until stop. The clamping force should be 6.5-7.5
N·m (use a torque screwdriver to check).
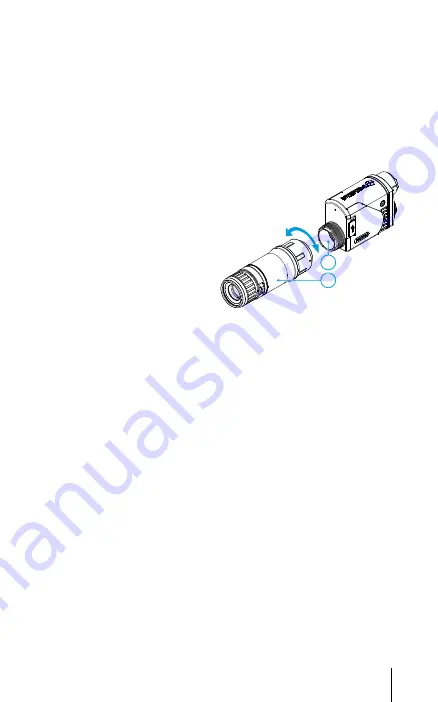
Installing Pulsar 5x30 B Monocular on to the PROTON XQ30
The Pulsar 5x30 B monocular
(18)
allows you to transform the
PROTON XQ30 into a hand-held thermal imager with 5x
magnification.
•
Align the tabs on the monocular with the slots of
the mount
(17)
.
•
Turn the monocular clockwise to secure it on
the thermal imaging module.
•
To remove the monocular, turn it
counterclockwise and disconnect
from the thermal imaging module.
Note:
the monocular can be installed
on a thermal imaging module with
an Adapter already installed. The Ring Adaptor must be mounted onto the
mounting area of the thermal imaging module until it stops.
Powering on and image setup
•
Remove the lens cover
(1)
.
•
Press the
ON
button
(6)
to turn on the thermal imager.
•
Adjust the eyepiece diopter ring of your daylight optical device until the
symbols in the display are sharp. In future, it will not be necessary to adjust
the eyepiece diopter, regardless of the distance and other conditions.
•
Enter the main menu with a long press of the controller button
(8)
and select
the desired calibration mode: manual
(M)
, semi-automatic
(SA)
or automatic
(A)
.
•
Calibrate the image by briefly pressing the
ON
button
(6)
. Close the lens
cover before manual calibration.
•
Select the desired observation mode (
Forest
,
Rocks
,
Identification
or
User
)
in the main menu.
User
mode allows you to change and save user brightness
and contrast settings in the quick menu.
•
Enter the main menu with a long press of the controller
(8)
button and select
the desired color palette (see the
Main Menu Functions
section of the full
version manual for details).
•
Activate the quick menu by briefly pressing the controller button
(8)
to
adjust the brightness and contrast of the display (see the
Quick Menu
Functions
section of the full version manual for details).
•
Upon completion of use turn the device off by a long press of the
ON
button
(6)
.
18
17
6


