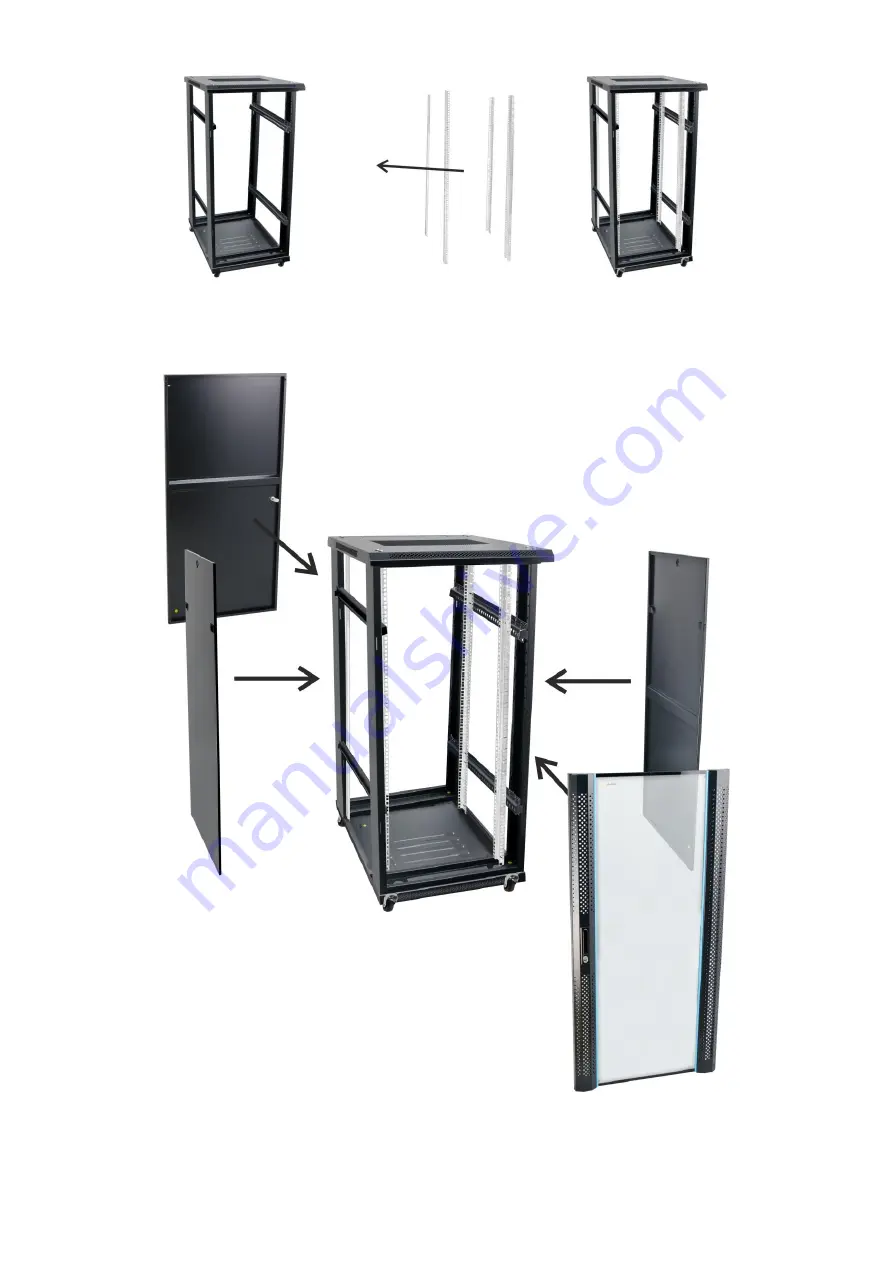
4.7)
Mount the
RACK rails
from the inside, as in Fig.7.
Fig.7
4.8)
side panels, front
and
rear doors
- Fig.8.
Fig.8
Page 1: ...led steel SPCC 1 2mm RAL 9004 welded front door 5mm toughened glass SPCC 1 2mm RAL 9004 hinged side panels cold rolled steel SPCC 1 2mm RAL 9004 removable rear door cold rolled steel SPCC 1 2mm RAL 9004 hinged Static load 800 kg with leveling feet Use inside IP20 Notes adjustable distance between front and rear RACK rails ventilation holes in the front door top and bottom panel possible mounting o...
Page 2: ...s of the RACK cabinet package 2 5 and 3 5 Fig 1 4 2 Attach the bottom panel to the cabinet s frames from the left and the top panel from the right package 1 5 Bolt with screws with nuts 16pcs package 1 5 Bolt the casters and the leveling feet into the bottom panel of the cabinet package 1 5 Fig 2 4 3 Stand the RACK cabinet Fig 3 ...
Page 3: ...mount two cage nuts on and of cabinet s height accordingly to the figure below Fig 4 4 5 In horizontal rails package 1 5 mount two cage nuts at front and back as shown in Fig 4 back front Fig 5 4 6 Mount the horizontal rails from the inside as shown in Fig 6 Fig 6 ...
Page 4: ...4 7 Mount the RACK rails from the inside as in Fig 7 Fig 7 4 8 Mount the side panels front and rear doors Fig 8 Fig 8 ...
Page 5: ......
Page 6: ...iedlec 150 32 744 Łapczyca Tel 14 610 19 40 Fax 14 610 19 50 e mail biuro pulsar pl www pulsar pl www zasilacze pl WARRANTY 12 months from the date of purchase THE WARRANTY IS VALID only upon presentation of the item s proof of purchase ...