


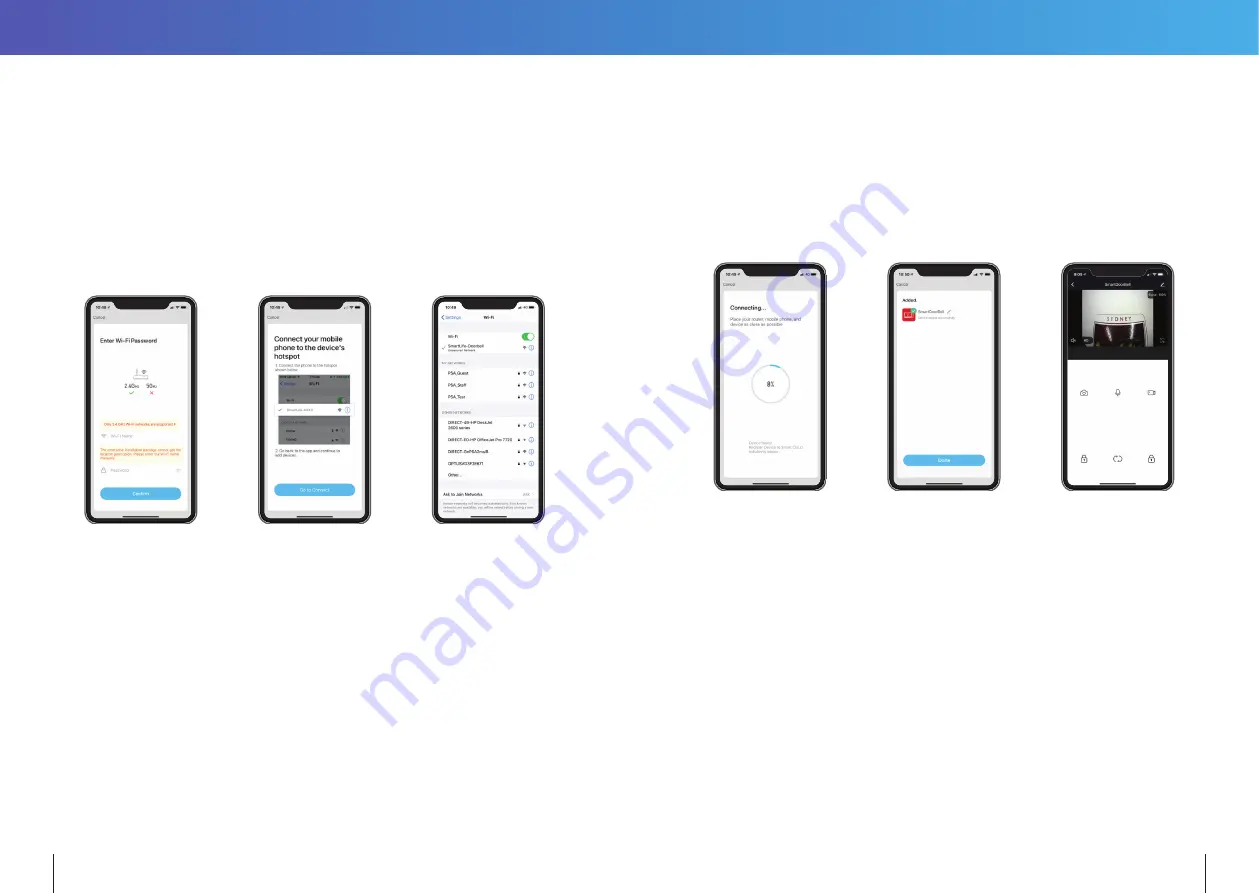
4. Enter the login details of your local WiFi network, together with its password.
Tap “Confirm” to save the Wi-Fi setting. (
see Fig 4
)
(This Wi-Fi information will be stored in the Intercom only, so that it can access the Internet
through your Wi-Fi network. This is necessary for remote App access to your Door Station)
5. When prompted, go to the iPhone Settings, and select the Intercom’s hotspot
(“SmartLife-xxxxx”) as your Wi-Fi connection. Once successful, a green check mark
appears against the SmartLife (Intercom) in the WiFi menu. (
See Fig 5 & 6
)
Figure 4.
Figure 5.
Figure 6.
6. Switch back to the previous IntelLink App screen, and the App should automatically start
connecting with the IntelLink Intercom (and register the device online).(
See Fig 7
)
7. If successful, the App will report “Device added successfully”. Tap “Done” to acknowledge.
Congratulations, your phone is now paired with the IntelLink Intercom. (
See Fig 8
)
8. Tap on the Smart Doorbell icon to test the connection. This should lead you to a control
menu, which provides a Live View from the Door Station, plus other control options
(e.g. to operate the door relay remotely). (
See Fig 9
)
Figure 7.
Figure 8.
Figure 9.
34
35


