background image

Downloaded from Projector.com

3

SAFETY INSTRUCTIONS

All the safety and operating instructions should be read before
the product is operated.

Read all of the instructions given here and retain them for later
use.  Unplug this projector from AC power supply before
cleaning.  Do not use liquid or aerosol cleaners.  Use a damp
cloth for cleaning.

Follow all warnings and instructions marked on the projector.

For added protection to the projector during a lightning storm,
or when it is left unattended and unused for long periods of
time, unplug it from the wall outlet.  This will prevent damage
due to lightning and power line surges.

Do not expose this unit to rain or use near water... for
example, in a wet basement, near a swimming pool, etc...

Do not use attachments not recommended by the
manufacturer as they may cause hazards.

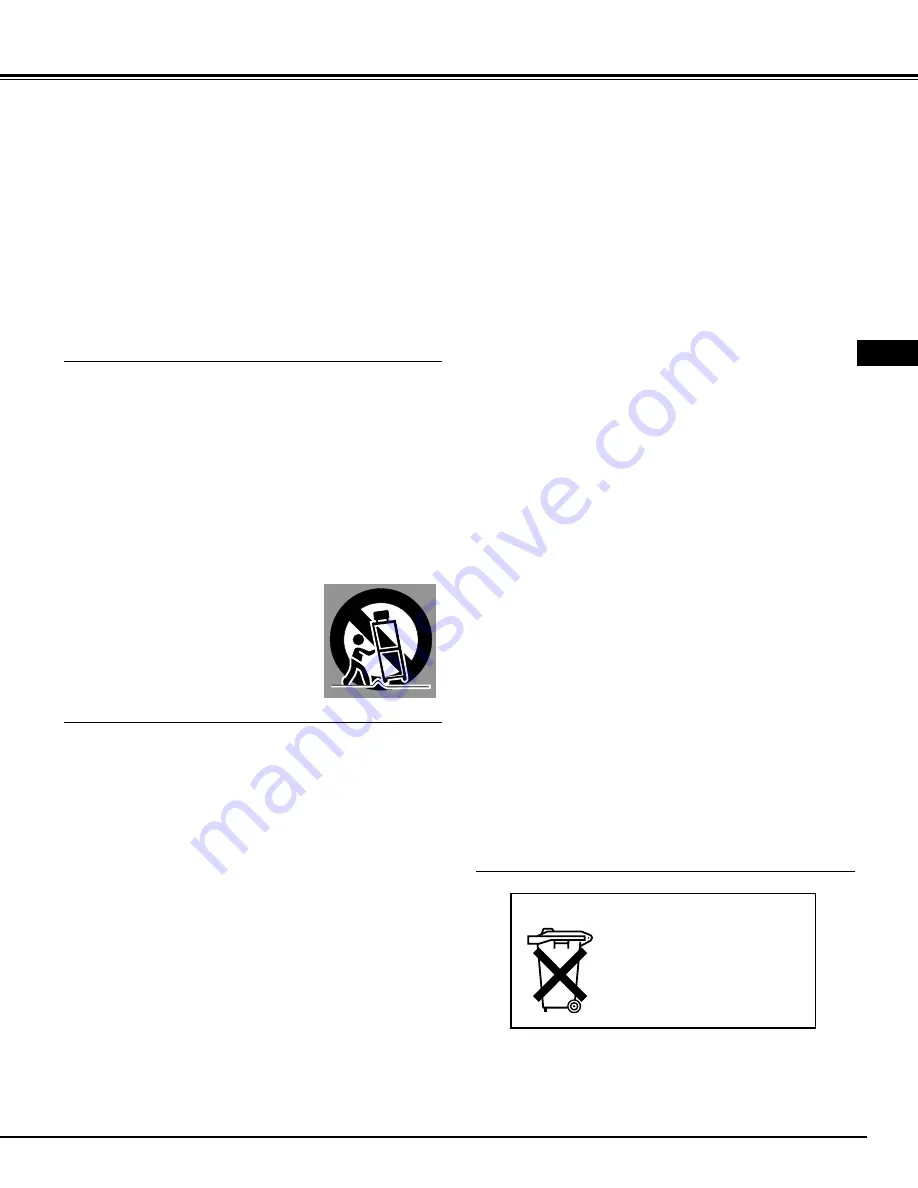
Do not place this projector on an unstable cart, stand, or table.
The projector may fall, causing serious injury to a child or
adult, and serious damage to the projector.  Use only with a
cart or stand recommended by the manufacturer, or sold with
the projector.  Wall or shelf mounting should follow the
manufacturer's instructions, and should use a mounting kit
approved by the manufacturers.

An appliance and cart combination should
be moved with care.  Quick stops,
excessive force, and uneven surfaces
may cause the appliance and cart
combination to overturn.

Slots and openings in the back and bottom of the cabinet are
provided for ventilation, to insure reliable operation of the
equipment and to protect it from overheating.

The openings should never be covered with cloth or other
materials, and the bottom opening should not be blocked by
placing the projector on a bed, sofa, rug, or other similar
surface.  This projector should never be placed near or over a
radiator or heat register.

This projector should not be placed in a built-in installation
such as a book case unless proper ventilation is provided.

Never push objects of any kind into this projector through
cabinet slots as they may touch dangerous voltage points or
short out parts that could result in a fire or electric shock.
Never spill liquid of any kind on the projector.

This projector should be operated only from the type of power
source indicated on the marking label.  If you are not sure of
the type of power supplied, consult your authorized dealer or
local power company.

Do not overload wall outlets and extension cords as this can
result in fire or electric shock.  Do not allow anything to rest on
the power cord.  Do not locate this projector where the cord
may be damaged by persons walking on it.

Do not attempt to service this projector yourself as opening or
removing covers may expose you to dangerous voltage or
other hazards.  Refer all servicing to qualified service
personnel.

Unplug this projector from wall outlet and refer servicing to
qualified service personnel under the following conditions:
a. When the power cord or plug is damaged or frayed.
b. If liquid has been spilled into the projector.
c. If the projector has been exposed to rain or water.
d. If the projector does not operate normally by following the

operating instructions.  Adjust only those controls that are
covered by the operating instructions as improper
adjustment of other controls may result in damage and will
often require extensive work by a qualified technician to
restore the projector to normal operation.

e. If the projector has been dropped or the cabinet has been

damaged.

f. When the projector exhibits a distinct change in

performance-this indicates a need for service.

When replacement parts are required, be sure the service
technician has used replacement parts specified by the
manufacturer that have the same characteristics as the
original part.  Unauthorized substitutions may result in fire,
electric shock, or injury to persons.

Upon completion of any service or repairs to this projector, ask
the service technician to perform routine safety checks to
determine that the projector is in safe operating condition.

Voor de klanten in Nederland

Bij dit product zijn batterijen
geleverd.  
Wanneer deze leeg zijn,
moet u ze niet weggooien
maar inleveren als KCA.

E

Summary of Contents for DP9295

Page 1: ...e do not make any claim of copyright The copyright remains the property of their respective owners ABOUT PROJECTOR COM Projector com http www projector com is your review and buying guide resource for DLP and LCD video projectors Visit the site to read the latest projector news and reviews read and comment on projector specifications download user manuals and much more ...

Page 2: ...D o w n l o a d e d f r o m P r o j e c t o r c o m DP9295 PRESENTATIONS WORKING SESSIONS TRAINING MULTIMEDIA ANIMATION VIDEO ...

Page 3: ...IONS WARNING TO REDUCE THE RISK OF FIRE OR ELECTRIC SHOCK DO NOT EXPOSE THIS APPLIANCE TO RAIN OR MOISTURE This projector produces intense light from the projection lens Do not stare directly into the lens as possible Eye damage could result Be especially careful that children do not stare directly into the beam This projector should be set in the way indicated If not it may result in a fire hazar...

Page 4: ...o this projector through cabinet slots as they may touch dangerous voltage points or short out parts that could result in a fire or electric shock Never spill liquid of any kind on the projector This projector should be operated only from the type of power source indicated on the marking label If you are not sure of the type of power supplied consult your authorized dealer or local power company D...

Page 5: ...tested and found to comply with the limits for a Class A digital device pursuant to Part 15 of FCC Rules These limits are designed to provide reasonable protection against harmful interference when the equipment is operated in a commercial environment This equipment generates uses and can radiate radio frequency energy and if not installed and used in accordance with the instruction manual may cau...

Page 6: ...JUSTMENT 29 SELECTING INPUT SOURCE 30 SELECTING VIDEO SYSTEM 31 PICTURE IMAGE ADJUSTMENT 32 IMAGE LEVEL SELECT 32 IMAGE LEVEL ADJUSTMENT 33 PICTURE SCREEN ADJUSTMENT 34 SETTING MENU 35 OPERATING WIRELESS MOUSE 37 MAINTENANCE 38 WARNING TEMP INDICATOR 38 AIR FILTER CARE AND CLEANING 38 CLEANING PROJECTION LENS 38 LAMP REPLACEMENT 39 LAMP REPLACE COUNTER 39 TROUBLESHOOTING 40 TECHNICAL SPECIFICATION...

Page 7: ... Menu Display Operation menu is displayed in English German French Italian Spanish Portuguese Dutch Swedish Chinese Korean or Japanese One Touch Auto PC Adjustment Incoming computer video signals are recognized and best adjustment is automatically set by Auto PC Adjustment No complicated setup is necessary and projection is always precise Digital Zoom for Computer Digital Zoom function adjusts ima...

Page 8: ... projector is used This projector detects internal temperature and automatically controls operating power of Cooling Fans FRONT OF CABINET LAMP COVER ADJUSTABLE FEET AND FEET LOCK LATCHES This projector is equipped with cooling fans for protection from overheating Pay attention to following to ensure proper ventilation and avoid a possible risk of fire and malfunction Do not cover vent slots Keep ...

Page 9: ...to pages 11 13 for connection CAUTION For safety unplug AC Power Cord when an appliance is not used When this projector is connected to outlet with AC Power Cord an appliance is in Stand by Mode and consumes a little electric power CONNECTING AC POWER CORD Connect AC Power Cord supplied to a projector AC outlet must be near this equipment and must be easily accessible To POWER CORD CONNECTOR on a ...

Page 10: ... 231 154 77 31 ROOM LIGHT Brightness in room has a great influence on picture quality It is recommended to limit ambient lighting in order to provide best image Min Zoom Max Zoom 100 77 11 8 3 6m 150 115 17 7 5 4m 200 154 24 0 7 3m 250 192 30 2 9 2m 300 231 36 1 11 0m 400 308 48 3 14 7m 10 0 1 1 LENS SHIFT ADJUSTMENT Projection lens can be moved up and down with motor driven lens shift function Th...

Page 11: ...le when moving a Projector When moving a projector replace lens cover and retract feet to prevent damage to lens and cabinet When this projector is not in use for an extended period put it into case dust cover supplied with this projector ADJUSTABLE FEET Picture tilt and projection angle can be adjusted by rotating ADJUSTABLE FEET Projection angle can be adjusted to 10 5 degrees Lift front of a pr...

Page 12: ... output terminals on its back for connecting computers and video equipment Refer to figures on pages 11 to 13 and connect properly This projector uses a micro processor to control this unit and occasionally this micro processor may malfunction and need to be reset This can be done by pressing RESET button with a pen which will shut down and restart unit Do not use RESET function excessively RESET ...

Page 13: ...adapter is not supplied with this projector Control Cable for PS 2 Port Control Cable for ADB Port Audio Cable stereo NOTE When connecting cable power cords of both a projector and external equipment should be disconnected from AC outlet Turn a projector and peripheral equipment on before computer is switched on USB port MAC Adapter Set slide switches according to chart below VGA Cable HDB 15 pin ...

Page 14: ...1 or RCA x 3 BNC Cable S VIDEO Cable Audio Cable RCA x 2 NOTE When connecting cable power cords of both a projector and external equipment should be disconnected from AC outlet Audio Cable RCA x 2 AUDIO IN S VIDEO Y Cb Pb Cr Pr VIDEO Component video output equipment such as DVD player or high definition TV source Composite Video Output Component Video Output Y Cb Pb Cr Pr Component Video Output Y ...

Page 15: ...control LASER POINTER FUNCTION Used to select input source P22 Used to execute item selected or to expand or compress image in DIGITAL ZOOM mode P29 It is also used as a PC mouse in Wireless Mouse Operation P37 POWER ON OFF BUTTON Used to turn projector on or off P19 MENU BUTTON Used to select MENU operation P17 18 INPUT BUTTON LASER BUTTON Used to operate Laser Pointer Function Laser beam is emit...

Page 16: ...eries For correct polarity and be sure battery terminals are in contact with pins in compartment Remote Control Batteries Installation 1 2 3 Used to adjust zoom P20 MUTE BUTTON Used to mute sound P21 ZOOM BUTTON FOCUS BUTTON Used to adjust focus P20 NO SHOW BUTTON Used to turn picture into black image P21 AUTO PC ADJ BUTTON Use to operate AUTO PC Adjustment function P23 VOLUME BUTTON Used to adjus...

Page 17: ...n end P39 Flashes red when internal projector temperature is too high P38 Used to select input source P22 30 Used to select an item or adjust value in ON SCREEN MENU They are also used to pan image in DIGITAL ZOOM mode P29 POINT LEFT RIGHT buttons are also used as VOLUME buttons Used to execute item selected It is also used to expand compress image in DIGITAL ZOOM mode P29 Used to turn a projector...

Page 18: ...ON SCREEN MENU Refer to following pages to operate each adjustment on ON SCREEN MENU 2 MOVING POINTER 3 SELECT ITEM Move pointer see below or adjust value of item by pressing POINT button s on Top Control or on Remote Control Unit Select item or set selected function by pressing SELECT button OPERATING ON SCREEN MENU Pointer is icon on ON SCREEN MENU to select item See fig ures on section FLOW OF ...

Page 19: ... ADJUST MENU Used to adjust picture image Contrast Brightness Color Tint White balance R G B Sharpness Gamma Noise Reduction Progressive Refer to P33 34 FOR VIDEO SOURCE Press MENU BUTTON while connecting to VIDEO input source Same function as Menu for PC source INPUT MENU Used to select input source Input 1 Input 2 or Input 3 Refer to P30 PC ADJUST MENU Used to adjust parameters to match with inp...

Page 20: ...r flashes red projector is automatically turned off Wait at least 5 minutes before turning on projector again When WARNING TEMP Indicator continues to flash follow procedures below 1 Press POWER ON OFF button to turn a projector off and disconnect AC Power Cord from an AC outlet 2 Check Air Filters for dust accumulation 3 Clean Air Filters See AIR FILTER CARE AND CLEANING section on page 38 4 Turn...

Page 21: ...ove image up press POINT DOWN or LENS SHIFT button to move image down KEYSTONE ADJUSTMENT 1 Press KEYSTONE button on Remote Control Unit or select Keystone on SETTING menu Refer to page 35 Keystone dialog box appears 2 Correct keystone distortion by pressing POINT UP DOWN LEFT RIGHT button s Press POINT UP button to reduce the upper part of the image and press POINT DOWN button to reduce the lower...

Page 22: ...ton for decreasing Mute Press MUTE button on Remote Control Unit to cut off sound To restore sound to its previous level press MUTE button again or press Volume button s To increase volume press POINT RIGHT button and press POINT LEFT button for decreasing Press POINT LEFT RIGHT button s to cut off sound Dialog box display is changed to On and sound is cut off To restore sound to its previous leve...

Page 23: ...e a red arrow pointer to Input 1 and then press SELECT button Source Select Menu will appear 1 2 Input 1 INPUT MENU Move a pointer to either Digital or Analog and then press SELECT button 3 When your computer is connected to COMPUTER INPUT DIGITAL terminal select RGB Digital Digital When your computer is connected to COMPUTER INPUT ANALOG terminal select RGB Analog Analog MENU OPERATION Press MENU...

Page 24: ...ically selects PC system among those provided in this projector and PC system can be also selected manually PC ADJUSTMENT AUTO PC ADJUSTMENT Auto PC Adjustment function is provided to automatically adjust Fine sync Total dots and Picture Position to conform to your computer Auto PC Adjustment function can be operated as follows Press MENU button and ON SCREEN MENU will appear Press POINT LEFT RIGH...

Page 25: ...RIGHT button to move a red frame pointer to PC ADJUST Menu icon 1 2 Press POINT DOWN button to move a red frame pointer to item that you want to adjust and then press SELECT button Adjustment dialog box will appear Press POINT LEFT RIGHT button to adjust value Move a red frame icon to item and press SELECT button PC ADJUST MENU PC ADJUST Menu icon Adjusts an image as necessary to eliminate flicker...

Page 26: ...ll screen Reset Store Closes PC ADJUST MENU Quit Other icons operates as follows 3 To store adjustment parameters move a red frame pointer to Store icon and then press SELECT button Move a red arrow pointer to any of Mode 1 to 5 that you want to store and then press SELECT button Reset all adjust parameters on adjustment dialog box to previous figure Mode free Vacant Mode Shows values of Total dot...

Page 27: ...5 SXGA 3 1280 x 1024 36 00 43 59 SXGA 4 1280 x 1024 64 20 70 40 62 50 58 60 63 90 60 00 63 34 59 98 XGA 1 1024 x 768 XGA 2 1024 x 768 XGA 3 1024 x 768 XGA 4 1024 x 768 48 36 60 00 68 677 84 997 XGA 6 1024 x 768 60 023 75 03 XGA 7 1024 x 768 56 47 70 07 48 50 60 02 44 00 54 58 XGA 5 1024 x 768 60 31 74 92 VGA 7 640 x 480 43 269 85 00 RGB Interlace 15 625 25 RGB Interlace 15 734 30 SVGA 10 800 x 600...

Page 28: ...ing selected IMAGE SELECT MENU Normal picture level preset on this projector Standard Picture level with improved halftone for graphics Real User preset picture adjustment in IMAGE ADJUST Menu P28 IMAGE 1 4 IMAGE SELECT Menu icon IMAGE LEVEL SELECT DIRECT Select image level among Standard Real Image 1 Image 2 Image 3 and Image 4 by pressing IMAGE button on Top Control or on Remote Control Unit IMA...

Page 29: ...button to adjust image darker and POINT RIGHT button to adjust brighter From 0 to 63 Contrast Brightness Press either POINT LEFT button or POINT RIGHT button to obtain better balance of contrast From 0 to 15 Gamma 3 To store manually preset image move a red frame pointer to Store icon and press SELECT button Image Level Menu will appear Move a red frame pointer to Image 1 to 4 where you want to se...

Page 30: ...zoom cannot be operated when RGB 1035i HDTV or 1080i HDTV is selected on PC SYSTEM Menu P23 Wide cannot be selected when 720p HDTV 1035i HDTV or 1080i HDTV is selected on PC SYSTEM Menu P23 This projector cannot display any resolution higher than 1280 X 1024 If your computer s screen resolution is higher than 1280 X 1024 reset resolution to lower before connecting projector Image data in other tha...

Page 31: ...ut 2 INPUT MENU Move a pointer to Video or Y Pb Cb Pr Cr and press SELECT button INPUT Menu icon Move a pointer red arrow to Input 2 and press SELECT button Source Select Menu Input 3 INPUT MENU INPUT Menu icon Move a pointer red arrow to Input 3 and press SELECT button Press POINT DOWN button to move a red arrow pointer to Input 3 and then press SELECT button Source Select Menu will appear 2 When...

Page 32: ...CT button PAL SECAM NTSC NTSC4 43 PAL M PAL N Projector automatically detects incoming Video signal and adjusts itself to optimize its performance When Video System is 1035i or 1080i select system manually first If projector cannot reproduce proper video image it is necessary to select a specific component video signal format among 480i 575i 480p 575p 720p 1035i and 1080i Auto COMPONENT VIDEO SIGN...

Page 33: ...elected IMAGE SELECT MENU Normal picture level preset on this projector Standard Picture level adjusted for picture with fine tone Cinema User preset picture adjustment in IMAGE ADJUST Menu P34 IMAGE 1 4 IMAGE SELECT Menu icon IMAGE LEVEL SELECT DIRECT Select image level among Standard Cinema Image 1 Image 2 Image 3 and Image 4 by pressing IMAGE button on Top Control or on Remote Control Unit Norm...

Page 34: ...o 63 Color Tint Press POINT LEFT button to soften image and POINT RIGHT button to sharpen image From 0 to 15 Sharpness Press POINT LEFT button to lighten red tone and POINT RIGHT button to deeper tone From 0 to 63 White balance Red Press POINT LEFT button to lighten green tone and POINT RIGHT button to deeper tone From 0 to 63 White balance Green Press POINT LEFT button to lighten blue tone and PO...

Page 35: ...be operated when 720p 1035i or 1080i is selected on AV SYSTEM Menu P31 Move red frame to function and press SELECT button SCREEN MENU SCREEN Menu icon Provides image at a wide screen ratio of 16 9 Wide Provides image at a normal video aspect ratio of 4 3 Normal 3 To store adjustment data move a red frame pointer to Store icon and press SELECT button Image Level Menu will appear Move a red frame po...

Page 36: ... item that you want to set and then press SELECT button Setting dialog box appears Blue back When this function is On this projector will produce a blue image instead of video noise on screen when any input source is unplugged or turned off Logo When this function is On projector displays our logo when starting up When pressing SELECT button at Language Language Menu appears Move a pointer to item...

Page 37: ...On projector is automatically turned on just by connecting AC Power cord to a wall outlet Note Be sure to turn projector off properly refer to section TURNING OFF PROJECTOR on P19 If projector is turned off in wrong steps On Start function does not operate properly Move pointer to item and then press POINT LEFT RIGHT button s Press SELECT button at this icon to display other items Press SELECT but...

Page 38: ... mouse driver is properly installed in your computer And make sure that mouse port or USB port of a Personal Computer is activated OPERATING WIRELESS MOUSE When controlling a PC mouse pointer operate Wireless Mouse with POINT button SELECT button and RIGHT CLICK button on Wireless Remote Control Unit Used to move PC mouse pointer Pointer is moved corresponding with direction you are pressing POINT...

Page 39: ...authorized dealer or a service station 3 AIR FILTER Pull up and remove Turn off a projector and disconnect AC power cord from AC outlet Turn a projector upside down and remove Air Filter 2 used by pulling latches upward 1 2 Air Filter prevents dust from accumulating on surface of Projection Lens and Projection Mirror Should Air Filter become clogged with dust particles it will reduce Cooling Fans ...

Page 40: ... Be sure to reset Lamp Replace Counter when Lamp Assembly is replaced When Lamp Replace Counter is reset LAMP REPLACE Indicator stops lighting Turn projector on press MENU button and ON SCREEN MENU will appear Press POINT LEFT RIGHT button s to move a red frame pointer to SETTING Menu icon refer to page 37 1 Press POINT DOWN button to move a red frame pointer to Lamp counter reset and then press S...

Page 41: ...rns off 2 After 90 seconds READY indicator lights green again and a projector may be turned on by pressing Power ON OFF button Check WARNING TEMP indicator If indicator flashes red a projector cannot be turned on See TURNING ON OFF PROJECTOR section on page 19 Check Projection Lamp Refer to page 39 Image is out of focus Adjust focus of a projector Make sure a projection screen is at least 4 6 1 4m...

Page 42: ... CE Mark is a Directive conformity mark of the European Community EC If you still need help after checking the table above you should call your dealer s technical support line and explain your problem If your dealer cannot solve your problem please call InFocus Corporation s Technical Support directly at 1 800 799 9911 Support is free between 6 a m and 6 p m PST Monday through Friday Support is av...

Page 43: ...ight 0 36 lbs 165 g including batteries Laser Pointer Class II Laser Max Output 1mW Wave length 650 20nm Remote Control Transmitter 480i 480p 575i 575p 720p 1035i and 1080i High Definition TV Signal AC 100 120 V 4 8 A Max Ampere 50 60 Hz The U S A and Canada AC 200 240 V 2 4 A Max Ampere 50 60 Hz Continental Europe Voltage and Power Consumption H sync 15 100 KHz V sync 50 100 Hz Motorized Lens Shi...

Page 44: ...CONNECTOR CLK DATA GND GND R X D GND RTS CTS T X D GND GND ADB GND GND PS 2 Serial ADB 1 2 3 4 5 6 7 8 COMPUTER INPUT 1 TERMINAL DIGITAL Terminal DVI 24 pin Connect display output terminal of computer to this terminal with DVI cable for Single Link T M D S not supplied 1 9 17 2 10 18 3 11 19 4 12 20 5 13 21 6 14 22 7 15 23 8 16 24 T M D S Data2 No Connect T M D S Data2 No Connect T M D S Data2 Shi...

Page 45: ...5HSODFHPHQW ODPSV ZKLFK DUH SXUFKDVHG DW WKH WLPH RI SUR MHFWRU SXUFKDVH ZLOO KDYH D GD RU KRXU ZDUUDQW ZKLFKHYHU FRPHV ILUVW IURP WKH GDWH WKH VSDUH ODPS LV SXW LQWR XVH WARRANTY LIMITATION AND EXCLUSION 78 379 7 78 3 79 7 7 78 379 7 3 3 9 7 7 8 3 3 3 78 7 7 7 DISCLAIMER OF UNSTATED WARRANTIES 78 379 37 A 78 3 9 379 7 78 7 78 37 3 3B 7 3 7 7 7 78 37 8 37 79 3 73 7 78 3 37 78 7 7 3 9 3 78 7 3 3 78...

Page 46: ... 3 H I J J J 3 45 LIMITATION OF LIABILITY 7 3 7 3 B 78 7 3 79 8 78 3 37 7 3 7 7 3 39 379 3 3 B B 3 78 8 3 7 78 7 3 78 37 78 8 9 8 3 3 3 7 3 8 3 3 7 3 37 3 K 37 B 7 7 7 A 3 7 A 3B 78 7 7 78 7 3 7 3 3 7 3B 3 79 Limitation on Bringing Action 3 Governing Law Mandatory Arbitration C 7 3 3 7 78 3 7 7 3 3 37 3 K 37 B 78 A 7 7 3 3 9 3 7 9 7 9 78 7 379 B A 9 B B87 3 9 9 8 A 78 B87 3 3B 3 C 7 3 ...

Page 47: ... 6400 503 685 8888 Fax 503 685 8887 http www infocus com In Europe Strawinskylaan 585 1077 XX Amsterdam The Netherlands Phone 31 20 5792000 Fax 31 20 5792999 In Asia 238A Thomson Road 18 01 04 Novena Square Singapore 307684 Telephone 65 6334 9005 Fax 65 6333 4525 11 2002 610 304 0028 1AA6P1P3747 MK3F Printed in Japan Part No 010 0429 00 ...

Page 48: ...e do not make any claim of copyright The copyright remains the property of their respective owners ABOUT PROJECTOR COM Projector com http www projector com is your review and buying guide resource for DLP and LCD video projectors Visit the site to read the latest projector news and reviews read and comment on projector specifications download user manuals and much more ...

Reviews: