6
SET UP:
SET UP:
Charging the Spy Cube:
1. Plug the cord into the Spy Cube and the other end into a
USB port.
2. The LED Indicator will blink red while charging. Charging time
is 1-2 hours for 1 hour of power.
3. The indicator light will go steady once fully charged.
* Low Battery – the indicator will flash blue and red for 5 seconds
and Spy Cube will shut down. Anything recorded up until that
point will save to the memory card.
** You can use Spy Cube while charging.
Install the Memory Card (not included):
1. Spy Cube records to a standard sized memory card which
can be purchased at your local electronics retailer.
2. Push the memory card into the slot.
3. If the memory card is not installed or if it is full, the indicator
light will flash red and blue and Spy Cube will shut down.
*Pay attention to how much space is left on the card. Once the
card is full, Spy Cam will automatically start to delete the oldest
photos/videos to make room for new.
Powering On & Off:
1. Press the On/Off button and hold for 2 seconds to turn on.
2. The indicator light will turn to steady blue. This is
standby mode.
3. Press and hold the On/Off button for 6 seconds to turn off
Spy Cube.
* Spy Cube automatically turns off after 1 minute in
standby mode.
Setting The Time Stamp:
1. After inserting the memory card into the camera, turn it on and
leave it in standby for at least 10 seconds before turning off.
The camera will create a txt file called TIME.txt.
2. Connect the camera to the computer and open the drive.
3. Open TIME.txt in a text editor and format the file.
4. The format is YYYY-MM-DD-HH-MM-SS.
5. Example: To set to midnight exactly on January 1, 2019 enter
2019-01-01-00-00-00.
6. Set the current time and save the file.
7. Videos will now show the timestamp.
Mounting Spy Cube (optional):
1. Included are a mount and a clip.
2. Install the mount to a desired location using 2 screws
(not included).
3. Slide the clip onto the camera and clip to the mount.
4. Adjust to desired viewing angle.
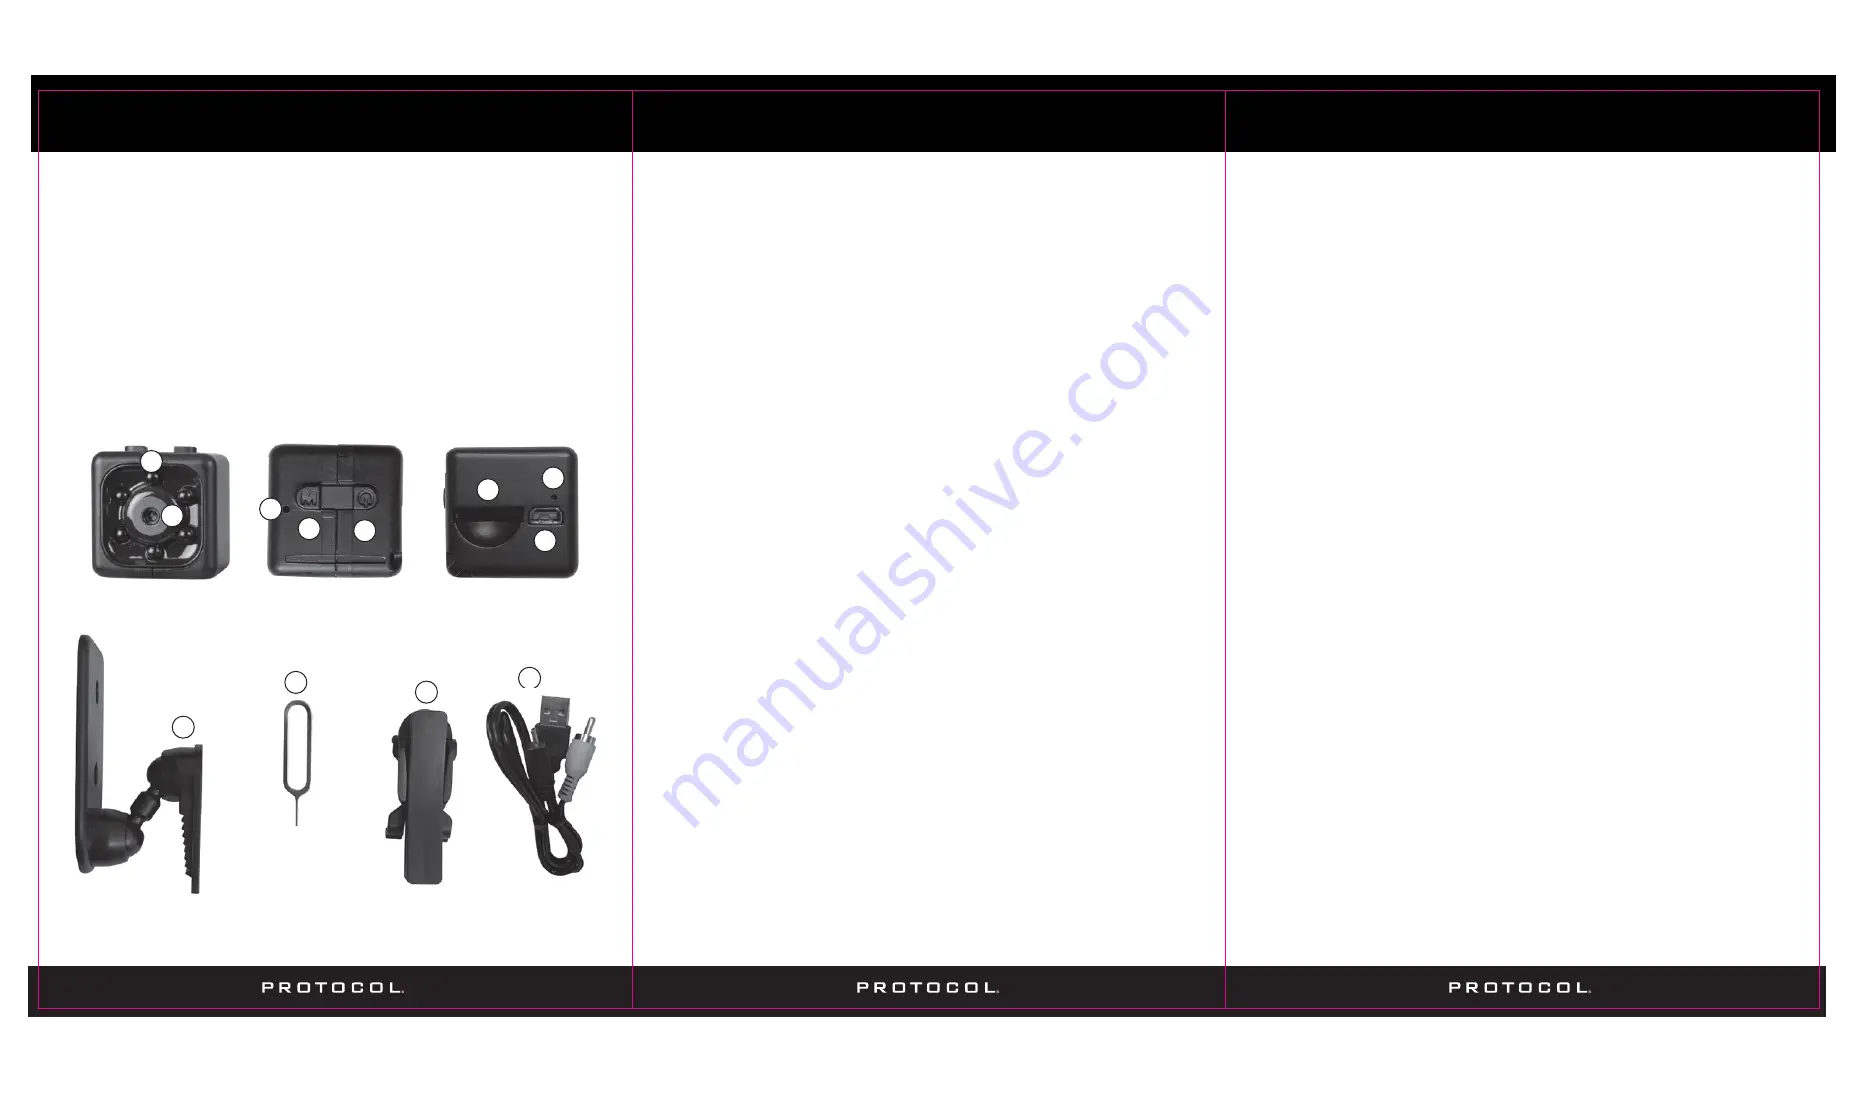
PARTS:
1. On/Off
2. Mode (Video/Picture)
3. Night Vision Light
4. LED Indicator
5. Camera
6. Memory Card Slot
7. Charging Port
8. Charging/TV Cable
9. Mount
10. Clip
11. Reset Hole
12. Reset Pin
3
1
2
5
6
7
8
9
10
11
12
4


