


- 18 -
Connection of External Equipment
The power should be turned off when you plug the connecting line in.
Please read the instruction of the equipment, which you want to connect.
Basic Connection
Before you receive different source signal programs, please enter <AV/TV> button to choose the right source of
signal.
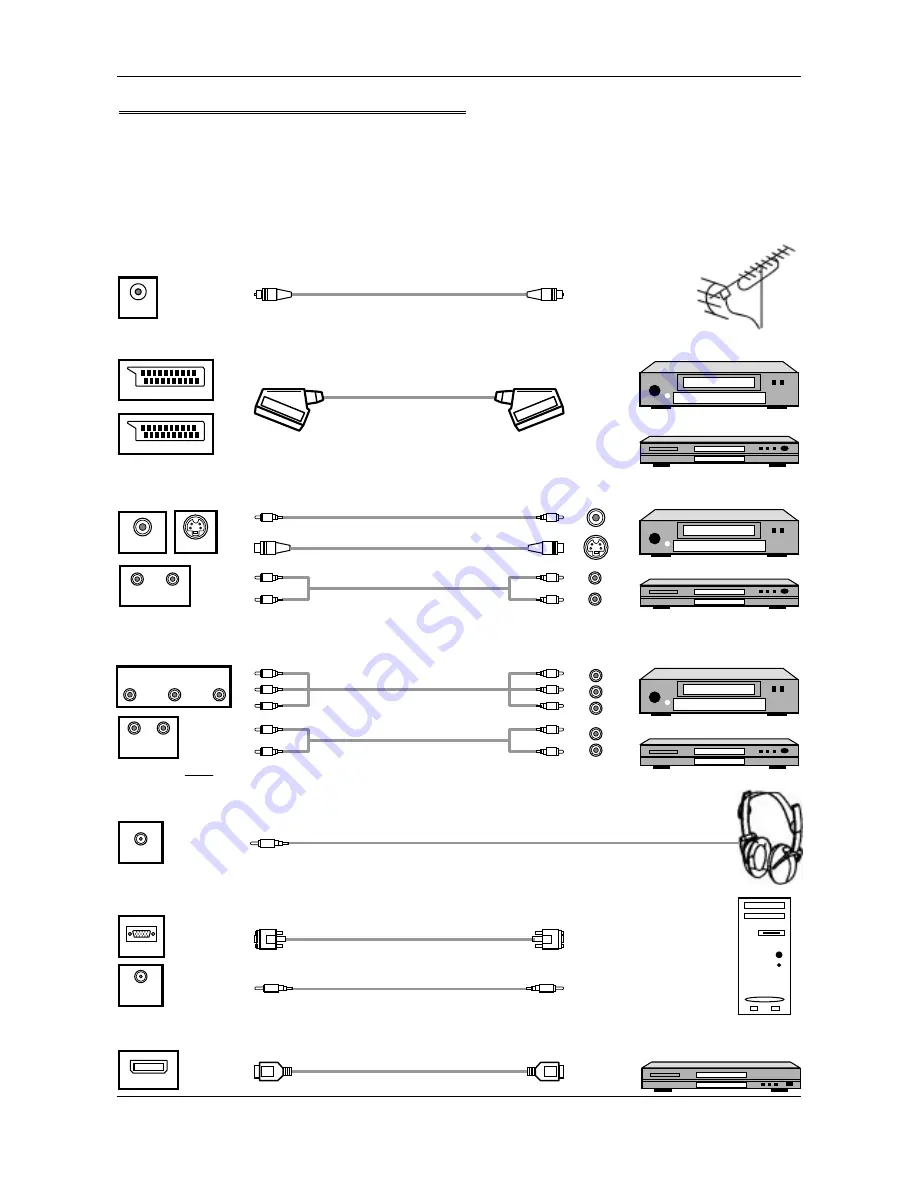
Antenna
YUV Audio cable
YUV component cable
VGA cable
PC audio cable
Connecting your PC
Note: YUV Y, Pb,Pr/Y,Cb,Cr
Earphone
Connecting the Earphone
Connecting DVD/VCR with CVBS or S-Video Cable
Connecting to an antenna
Connecting DVD/VCR with Component Cable
Connecting equipment with HDMI interface
ANT
VCR
DVD
VCR
DVD
VIDEO
S-VIDEO
Y
U V
YUV AUDIO IN
L R
EARPHONE
VGA
PC
AUDIO IN
Equipment with HDMI interface
Video cable
S-Video cable
Audio cable
HDMI cable
HDMI
AV AUDIO IN
L R
SCART cable
Connecting DVD/VCR with SCART Cable
VCR
DVD
SCART 1
SCART 2


