


PLX35-NB2
Local Configuration Using the PLX35-NB2 Configuration Webpage
Network Bridge
User Manual
ProSoft Technology, Inc.
Page 40 of 69
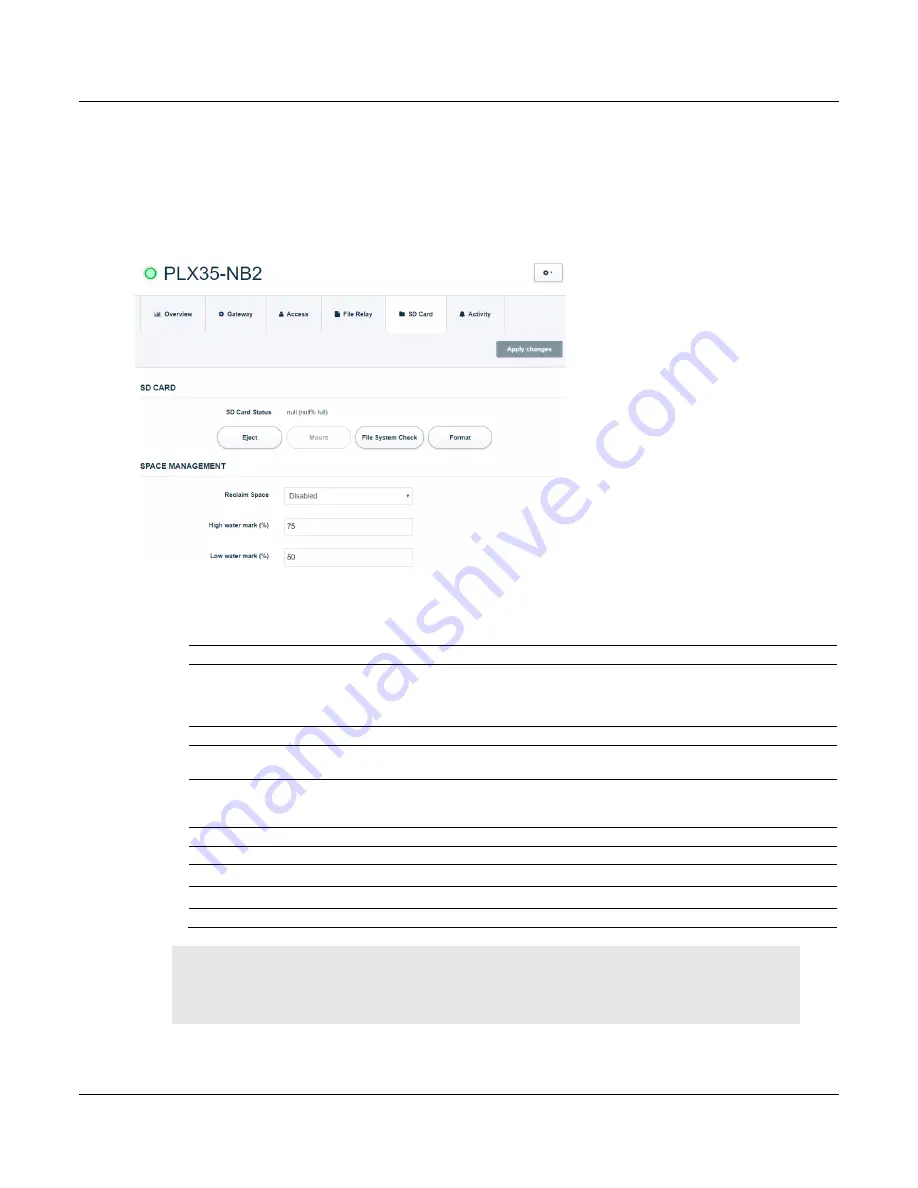
4.6 SD Card
The
SD Card
tab allows you to Eject, Mount, Format, and diagnose the PLX35-NB2 SD
Card. You can also optimize the SD Card in this tab.
You can only access the SD Card from a FTP/SFTP Client.
1
Use the following table to enter the appropriate parameters:
Parameter
Description
SD Card
Note:
The
SD Card
options may be greyed out according to the SD card status.
If the SD Card is not present, the SD Card options are greyed out.
If the SD Card is not mounted, the Eject and Format buttons are greyed out.
If the SD Card is mounted, the Mount button is greyed out.
Eject
Recommended to be done before manually removing SD Card.
Mount
This allows the SD card to be visible to the PLX35-NB2. When the SD Card is not
‘mounted’, it will not be visible to the PLX35-NB2.
File System Check
Checks the SD Card for errors. This should be used in case the SD Card cannot be
mounted. The page will be refreshed after the File System Check process is finished,
then the user can manually mount the SD Card using Mount button.
Format
Removes the data from the SD Card and creates a new file system (FAT32 type).
Space Management
Reclaim Space
Automatically cleans up the SD Card. Default value is
Disabled
.
High Water Mark (%)
The system will start deleting files from the SD Card when this threshold is reached.
Low Water Mark (%)
The system will delete files from the SD Card until this threshold is reached.
Note: The High and Low Water Mark values should be based on the size of the SD Card and the
sizes of the uploaded files. Inappropriate values may cause the deletion of files before the upload
is performed.
2
Click
A
PPLY
C
HANGES
when complete.


