ProScan PLEDV2488A Instruction Manual Download Page 18


Audio Effe ct


Audio Effe ct


AVL


Analo g Language


It is only available in ATV.


Analog Language

Mono,S te re o or Sap

.


Dig ita l


Language


. It is available Only in DTV.


Digita l


Language

English ,

.


Dig ita l Audio Outp ut


Send th e audio outp ut ty pe of coax or opti cal te rm ical.


Digita l Audio Outp ut
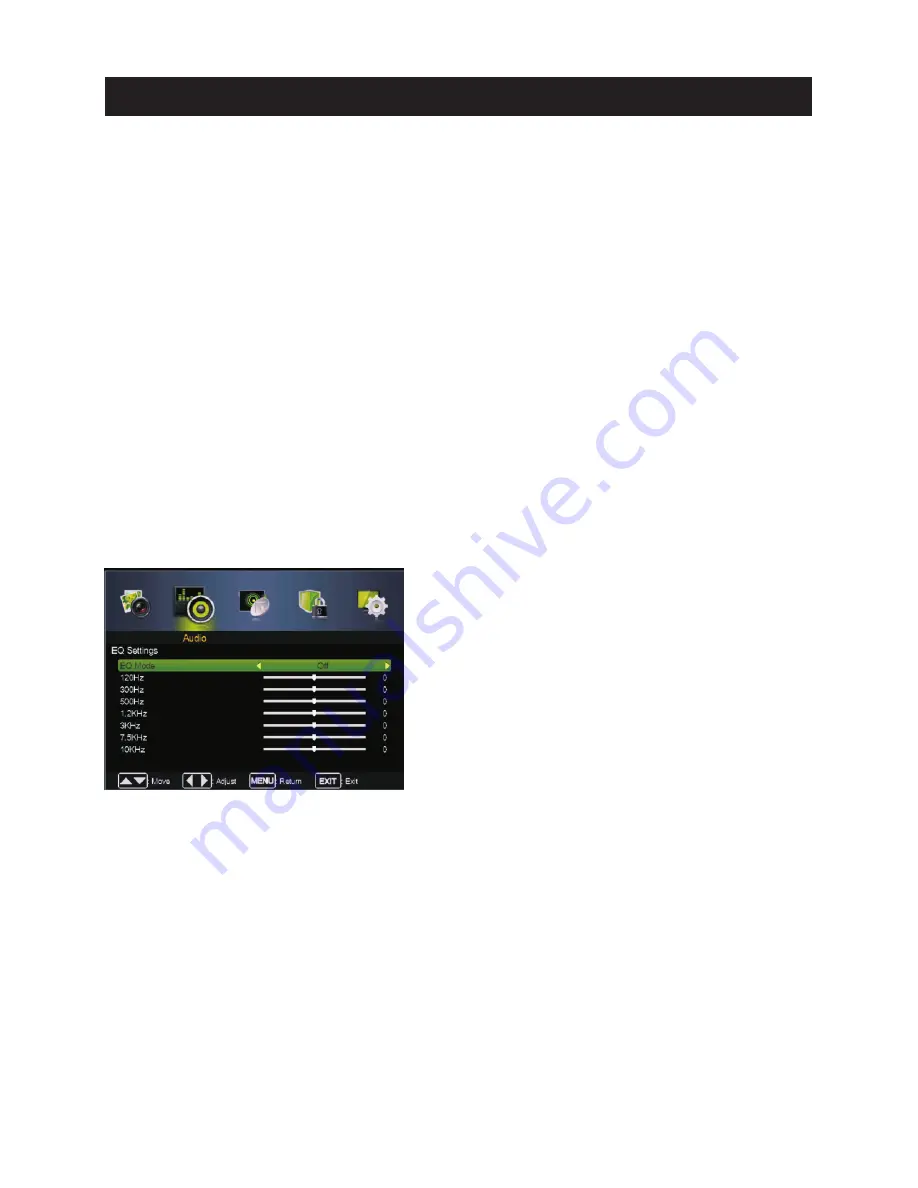


EQ  Settin gs

EQ  Sett ings

Pre ss 

 / 

 butt on to select 

,  th en pre ss◄ / ► butt on to select On or Off.

Pre ss 

 / 

 butt on to select AVL ,  th en pre ss◄ / ► butt on to select On or Off.

Pre ss 

 / 

 butt on to select 

,  th en pre ss◄ / ► butt on to select 

Pre ss 

 / 

 butt on to select 

,  th en pre ss◄ / ► butt on to select 

Pre ss 

 / 

 butt on to select 

,  th en pre ss◄ / ► butt on to select Off,R AW or PCM.

Pre ss 

 / 

 butt on to select 

,  th en pre ss 

Ente r

 / ►butt on to ente r sub-m enu.


Set


th e


auto


volume


contro l

.


Confi gure s th e multi -tra ck sound


Adjust th e curv e of 7 bands equalizer.


Mono                        Sets th e sound to mono.

    Ste re o                      Sets th e sound to ste re o when ste re o is not available, th e sound is auto mati cally switc hed to mono.
    Sap                          Sets th e sound to th e second audio pro gra m.


Select th e language supporte d by th e chosen digita l channel

Fre nch ,S panish


EQ Mode

Press 

 / 

 button to select EQ  Mode,  then press◄ / ► button to select.

(Available EQ mode: Off,Rock,Pop,Jazz,User).

17

Main Menu Operation

Summary of Contents for PLEDV2488A

Page 1: ...PLEDV2488A INSTRUCTION MANUAL LED TV...

Page 2: ...the Remote Control Install TV Set your TV Connect Antenna and power Turn On TV Help 2 3 4 6 7 8 9 12 13 29 32 33 TV Bracket assembly 5 Specifications Select Input Source Wall Mount In Stallation Pictu...

Page 3: ...the literature accompanying the appliance Correct disposal of this Product W aste Electrical Electronic Equipment WEEE Your product is designed and manufactured with high quality materials and compon...

Page 4: ...3...

Page 5: ...4 8 3 95 3 95 4 3 95 x 3 95 100 100 Wall Mount Installation...

Page 6: ...sembly 5 1 Match the TV unit into the stand then hold the TV stand revolve and lock the tv unit tightly as the arrowhead point 2 Fix the screws into the TV stand after installing the tv unit and tv st...

Page 7: ...VOL The functions of the buttons on the are as follows TV CH When watching TV select channels MENU 1 Press Menu 2 Press SOURCE to enter 3 Use CH to shift UP DOWN 4 Press SOURCE to confirm then press...

Page 8: ...e PC AUDIO IN PC audio input VGA IN VGA signal from computer output YPbPr Connect to the composite terminal of your DVD VCR ANT 75 EARPHONE For Upgrade Use AV INPUT Earphone output COAXIAL Digital Aud...

Page 9: ...STEP REPEAT A B Zoom Angle Subtitle Audio D TITLE A B During the playback press this button to repeat playback of a specific section on a disc SLEEP Select amount of time before TV turn off automatic...

Page 10: ...3 side indicator 9 10cm 10cm 10cm LED TV...

Page 11: ...COAXIAL 2 10 COAXIAL Y Pb Pr Service Port...

Page 12: ...Y Pb Pr Service Port 11 Y Pb Pr Service Port...

Page 13: ...to display the input source list Press or SOURCE button to select the input source you want to Press ENTER button to enter the input source Press EXIT button to quit 12 Select Input Source Source TV A...

Page 14: ...PICTURE menu 2 Press Enter button to adjust 3 After finishing your adjustment Press MENU button to save and return back to the previous menu Picture Settin gs Press button to select Picture Mode then...

Page 15: ...center Zoom Expands image to fill screen Top and button maybe cut off Normal Produces a vivid image Warm Produces a red hued image Cool Produces a gentle blue hued image Off Select to turn off video n...

Page 16: ...then press button to select PICTURE menu Press to enter and press to select PC Settings Hposition Adjust the horizontal position of the picture Vposition Adjust the vertical position of the picture P...

Page 17: ...ack to the previous menu Audio Mode Audio Mode Press button to select then press Enter button to enter sub menu Sound Mode Press button to select Sound Mode then press button to select Available Sound...

Page 18: ...lect Press button to select then press button to select Press button to select then press button to select Off R AW or PCM Press button to select then press Enter button to enter sub menu Set the auto...

Page 19: ...ous menu Signal Type Signal Type Auto Search Auto Search Press button to select then press button to select Air or Cable Press button to select then press Enter button to start the auto searching Chan...

Page 20: ...er button to enter sub menu All of your favorite channels are listed in this menu and you can choose them quickly Channel Edit Channel Edit Press button to select then press Enter button to enter sub...

Page 21: ...to select then press Enter button to enter sub menu Label Rename label of the channels Press button to select the channel and ENTER to enter the edit state Press button to select the character press t...

Page 22: ...p ENTER 1 Press button to select the option that you want to adjust in the PARENTAL menu 2 Press Enter button to adjust 3 After finishing your adjustment Press MENU button to save and return back to t...

Page 23: ...n press Enter button to enter sub menu nter a 4 digital number you want to set twice Press button to select then press button to select On or Off Press button to select then press button to select On...

Page 24: ...control which come from MPAA rules Rating Define G General audience All ages admitted PG Parental guidance suggested Some material may not be suitable for children PG 13 Parents strongly cautioned So...

Page 25: ...situations TV 14 No one 17 and under admitted V Violence TV MA Adult audience only Fantasy violence Note The content ratings will increase depending on the level of the age based rating For example a...

Page 26: ...lder 18 Adult programming Canadian French The ratings are for programs which are using French rating system Rating Defined as E No Rating G General 8 ans Not recommended for younger children 13 ans No...

Page 27: ...lid signal input When analog TV input and has no signal snow noise will display if this option is cleared Press button to select Blue Back then press button to select On or Off Audio Only When you hig...

Page 28: ...ok of digital Closed Captioning Automatic uses broadcaster s style ress button to select by Custom or by Program Available CC1 2 3 4 Displays corresponding caption channel of a analog program Usually...

Page 29: ...ss button to select Time Settings Time Settings Press button to select then press Enter button to enter sub menu Sleep Time Set a timer for the TV to turn off automatically Sleep Time Sleep Time Off 1...

Page 30: ...t Settin g Reset TV to factory default Default Setting Press button to select The TV will calculate current day of week according to the time Press button to select then press Enter button to enter su...

Page 31: ...s to select thedesired menu page General Audio Dolby Video Preferences and use buttons to select the items in each menu then use buttonto enter the selected item If you then change any setting press E...

Page 32: ...ocal TV system PAL TV Multi NTSC TV Audio Disc audio language selection disc dependent Subtitle Disc subtitle language selection disc dependent Disc Menu Disc Menu language selection disc dependent Pa...

Page 33: ...Help 33...

Page 34: ...ion 60HZ 640x480 800X600 1024x768 1360x768 Vertical frequency hz HDMI 60HZ 50HZ 50HZ 60HZ 50HZ 60HZ Vertical frequency hz Format 576 i P 720 P 480 i P 1080 i P 60HZ 60HZ 60HZ NTSC ATSC 1253 PAL NTSC I...

Reviews: