


Preparation for using your new TV – Rear panel
11
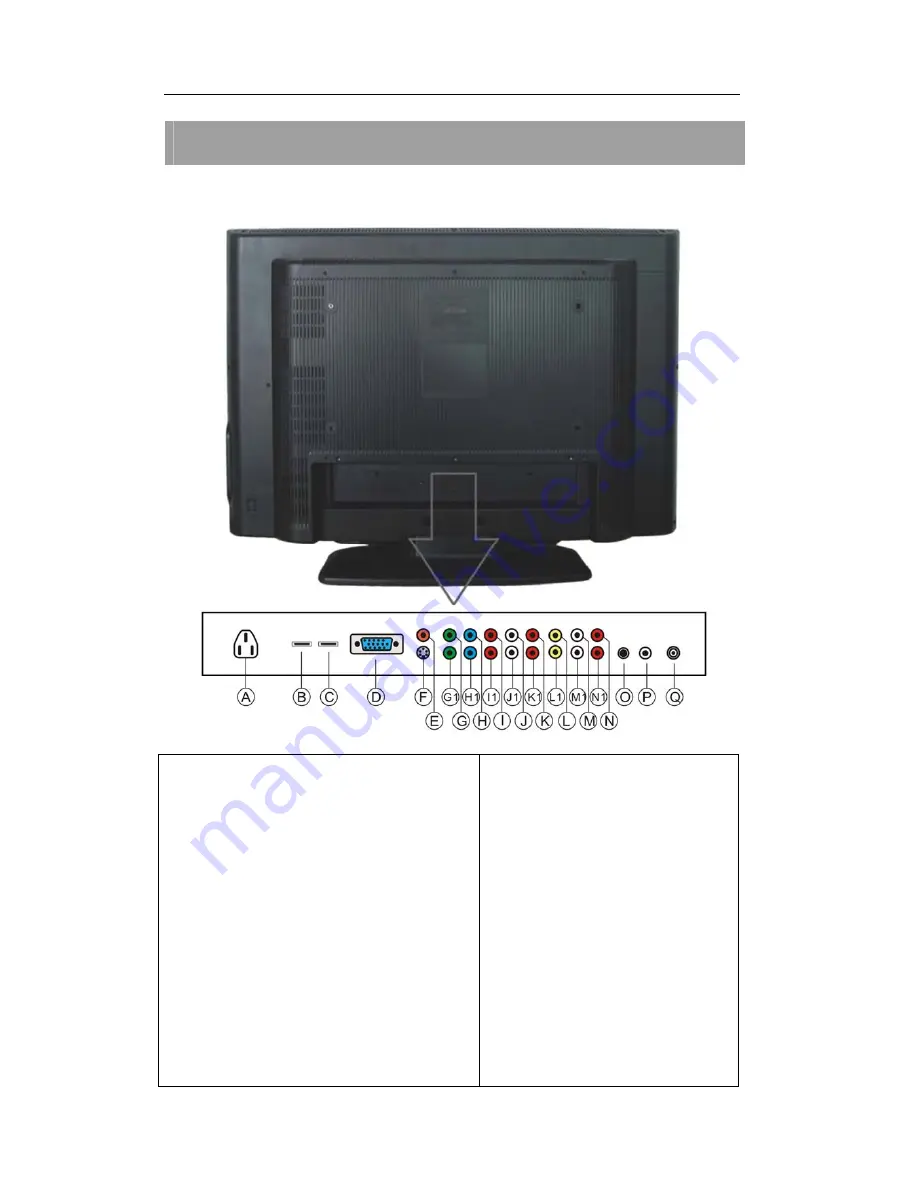
REAR PANEL
Rear panel
(The picture of the product may vary depending on the model)
HDMI Input
-
Input1:
B
-
Input2:
C
Component Input 1
-
Video: G, H , I
-
Audio:
J,
K
Component Input 2
-
Video: G1, H1, I1
-
Audio: J1, K1
AV1 Input
-
Video:
L
-
Audio: M, N
AV2 Input
-
Video:
L1
-
Audio: M1, N1
S-Video Input
- Video: F
- Audio: M, N
VGA Input
- Video: D
- Audio: O (3.5mm plug)
AUDIO Output
- Headphone: P (3.5mm plug)
- COAX Digital Out: E
OTHERS
- Power Input: A
- External Antenna: Q
Summary of Contents for 32LB45Q
Page 1: ......


