background image


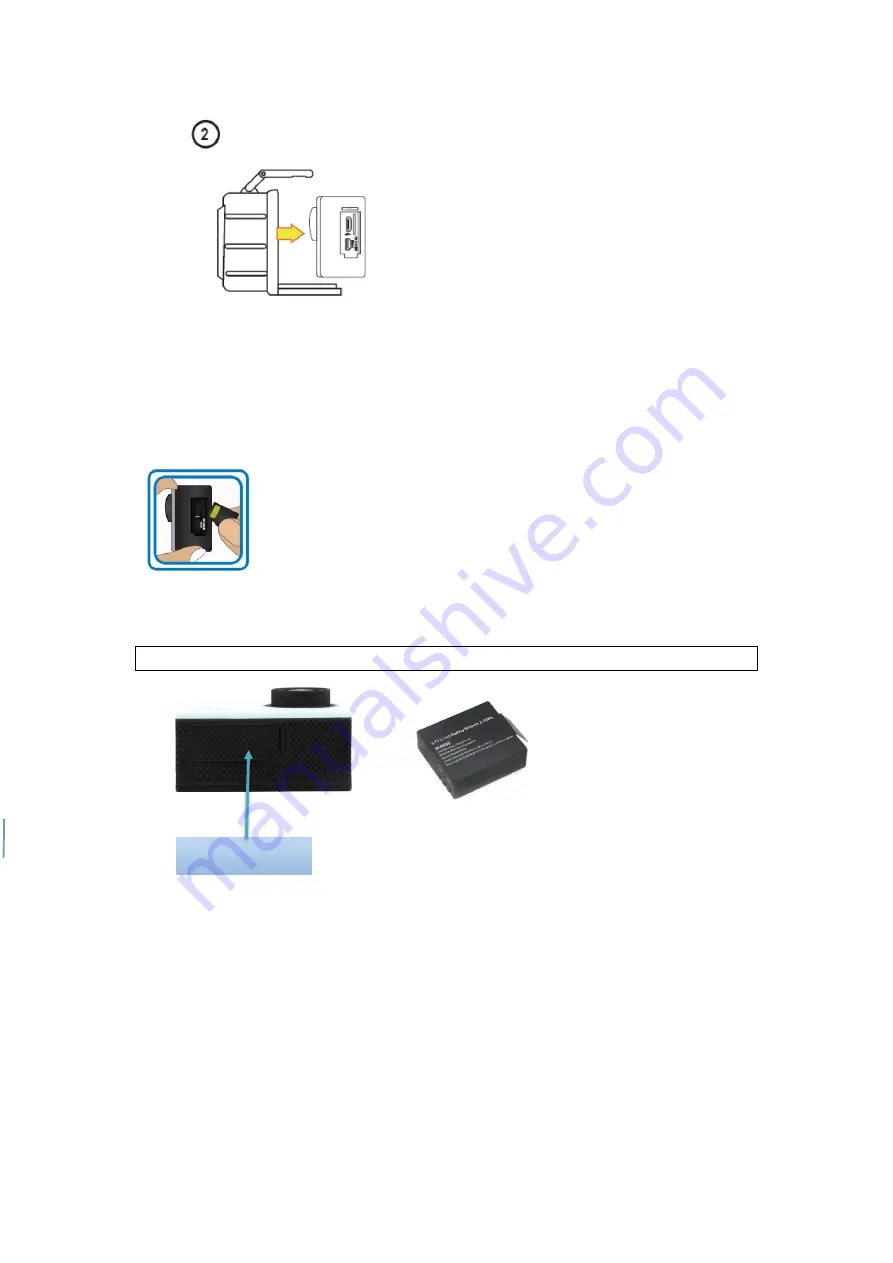
Inserting Micro SD Card


Note: Sometimes when you are using the Micro SD card for the first time in this camera, 
it can’t read the data of Micro SD card, please format it on computer or in the setting 
menu before using (please do remember to back up your data before formatting the 
card). If possible, please choose branded card for a better using experience.


Installing and removing batteries


A Open the battery door as shown in below picture;


B: Insert the battery and close the battery door. 


Note

: you can reset the camera by pull out the battery, and insert the battery again.


Charging 


Charging the battery for at least 5 hours when charging before the first time use and 
ensure they are subsequently discharge and charged fully. This aids a long service life 
of the battery. Charge the battery directly via the Micro-USB port. Using the supplied 
USB cable and your computer for charging under shutdown status. The red charging 
indicator will be on when charging, and will be off when the battery is fully charged. 
Generally, the battery can be fully charged after about 3-5 hours.


Battery door


Summary of Contents for 058465799687

Page 1: ...rtis International Ltd PROSCAN is are registered trademarks of Technicolor USA used under license by Curtis International Ltd Any other product service company trade or product name and logo referenced herein are neither endorsed nor sponsored by Technicolor USA or its affiliates ...

Page 2: ...ase check if the video camera operates normally before use If dirt or stain is accumulated on the video camera or on its lens use soft clean and dry rag to wipe it away gently If the video camera or its lens is stained with sand particles blow them away gently Do not use a cloth to wipe the surface Otherwise it may scratch the surface of video camera or its lens If it is required to clean camera s...

Page 3: ...3 Parts of the Camera ...

Page 4: ...4 Waterproof case open way ...

Page 5: ... Insert the battery and close the battery door Note you can reset the camera by pull out the battery and insert the battery again Charging Charging the battery for at least 5 hours when charging before the first time use and ensure they are subsequently discharge and charged fully This aids a long service life of the battery Charge the battery directly via the Micro USB port Using the supplied USB...

Page 6: ...o enter exit the menu Short press this button in the menu mode to confirm the button Turn on off Press the power button three seconds to turn on the blue light will turn on when the boot Press the power button for three seconds to turn off again then the blue light is off Note Low battery will prompt the battery voltage is low automatically shut down Your camera has different modes for the various...

Page 7: ... default mode when the camera is powered ON to take a video aim your camera as desired and press the Shutter OK button to start recording To stop recording press the Shutter OK button again To access the various Video Capture settings long press the OK button while in Video capture mode Photo Capture mode Use this mode to capture pictures with your camera After turning on your camera short press t...

Page 8: ...he playback press the OK button To access the various playback mode settings long press the OK button while in playback mode Details of the product Display 2 0 inch Language Options Chinese Simplified Chinese Traditional English Korean Japanese Spanish French Italian Portuguese Deutsche etc Resolution of Video s 720P VGA Video Format AVI Video Time Off 1min 3min 5min Motion Detect support Delay ca...

Page 9: ...ort Light Freq 50HZ 60HZ USB Function 1 USB Disk 2 PC Cam For service assistance and product information please call 1 800 968 9853 Curtis International Ltd 7045 BECKETT DRIVE UNIT 15 MISSISSAUGA ON L5S 2A3 www curtisint com ...

Page 10: ...national Ltd PROSCAN est une marque déposée de Technicolor USA utilisée sous licence par Curtis International Ltd Tout autre produit service entreprise nom de commerce ou de produit et logo référencé dans le présent document ne sont ni approuvés ni parrainés par Technicolor USA ou ses filiales ...

Page 11: ...o exempte de poussière et de produits chimiques Gardez le dans un endroit frais sec et bien ventilé Ne laissez pas la caméra vidéo dans un environnement très chaud humide ou poussiéreux Veuillez vérifier si la caméra vidéo fonctionne normalement avant utilisation Si de la saleté ou des taches se sont accumulées sur le caméscope ou sur son objectif utilisez un chiffon doux propre et sec pour l essu...

Page 12: ...de la carte mémoire 5 Cette carte mémoire est retirée ou l alimentation électrique est interrompue lorsque cette caméra vidéo ou cet ordinateur est connecté à la carte mémoire c est à dire pendant la lecture l écriture et le formatage 6 Touchez la surface de contact métallique de la carte mémoire avec les doigts ou des matériaux métalliques Parties de l appareil photo ...

Page 13: ...13 ...

Page 14: ...r ou dans le menu de configuration avant de l utiliser vos données avant de formater la carte Si possible veuillez choisir une carte de marque pour une meilleure expérience d utilisation Installation et retrait des piles A Ouvrez la porte de la batterie comme indiqué sur l image ci dessous B Insérez la batterie et fermez le couvercle de la batterie Remarque vous pouvez réinitialiser l appareil pho...

Page 15: ...rgée après environ 3 5 heures Fonction 1 Emplacement de carte TF Insérer une carte TF 2 bouton haut Dans l option de menu du bouton Sélectionner réglez la touche de fonction vers le haut En mode de lecture la touche de sélection est retournée 3 Puissance Mode Appuyez brièvement sur ce bouton pour basculer entre la prise de photos enregistrement lecture vidéo Appuyez longuement allumez éteignez 4 b...

Page 16: ...il photo Pour apporter des modifications aux paramètres de l appareil photo suivez les instructions ci dessous Appuyez longuement sur le bouton OK une fois pour accéder au menu Capture photo Vidéo ou Lecture Appuyez à nouveau longuement sur pour accéder au menu des paramètres généraux de l appareil photo Pour quitter le menu appuyez longuement sur le bouton OK Dans le menu des paramètres généraux ...

Page 17: ... brièvement sur le bouton Alimentation Mode pour ouvrir le mode de capture photo Appuyez sur le bouton Shutter OK pour prendre la photo Pour accéder aux différents paramètres de capture photo appuyez longuement sur le bouton OK en mode de capture photo Mode de lecture Utilisez ce mode pour afficher et gérer les photos et vidéos sur votre appareil photo Après avoir allumé votre appareil photo appuy...

Page 18: ...a vidéo 720P VGA Format vidéo AVI Heure vidéo Arrêt 1min 3min 5min Détection de mouvement soutien Retard de capture soutien Résolution de photo 5MP 3MP 1 3MP Format de photo JPG Carte mémoire Carte TF jusqu à 32 Go Microphone intégré soutien Construit en audio soutien Vidéo avec son soutien Lumière Freq 50HZ 60HZ Fonction USB 1 USB Disk 2 PC Cam Pour obtenir assistance et information appelez 1 800...

Reviews: