Chapter 3: Management with the Promise Utility
35
3.
Click the
Rebuild Rate
dropdown menu and choose a rate:
•
Low
– Fewer system resources to the Rebuild, more to data read/write
operations.
•
Medium
– Balances system resources between the Rebuild and data
read/write operations.
•
High
– More system resources to the Rebuild, fewer to data read/write
operations.
4.
Check the
Enable Auto Rebuild
box to enable Auto Rebuild (rebuilds when
you swap out the failed drive with a new one).
5.
Click the
Confirm
button.
6.
Click the
X
icon to close the background activities panel.
Migration
The term “Migration” means either or both of the following:
•
Change the RAID level of a logical drive.
•
Expand the storage capacity of a logical drive.
See “Migrating a Logical Drive” on page 65 and “RAID Level Migration” on
page 84.
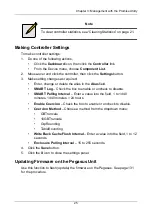
Making Migration Settings
To make migration settings:
1.
From the Admin menu, choose
Background Activities
.
2.
Click the
Settings
button.
3.
Click the Migration Rate dropdown menu and choose a rate:
•
Low
– Fewer system resources to Migration, more to data read/write
operations.
•
Medium
– Balances system resources between Migration and data
read/write operations.
•
High
– More system resources to Migration, fewer to data read/write
operations.
4.
Click the
Confirm
button.
5.
Click the
X
icon to close the background activities panel.
PDM
Predictive Data Migration (PDM) is the migration of data from the suspect disk
drive to a spare drive, similar to rebuilding a disk array. But unlike rebuilding,
PDM automatically copies your data to a spare drive
before
the drive fails and
your logical drive goes Critical.

