background image

11

abrasive cutting-off wheels are only 

allowed when a cut-off guard.

Always approach the job at the same 

angle at which you would like to cut. 

Maintain this angle during cutting 

and do not exert any side pressure 

on the wheel.

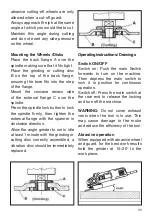
Mounting the Wheels /Disks

Place  the  back  flange  A  over  the 

spindle making sure that it fits tight.

Place the grinding or cutting disc 

B  on  the  top  of  the  back  flange, 

ensuring the bore fits into the step 

of the flange.

Mount the concave recess side 

of  the  external  flange  C  over  the 

spindle.

Press the spindle lock button to lock 

the  spindle  firmly,  then  tighten  the 

external flange with the spanner in 

clockwise direction.

Allow the angle grinder to run in idle 

at least 1 minute with the grinding or 

cutting disc correctly assembled, a 

vibration disc should be immediately 

replaced. 

Operating instructions / Drawings

Switch ON/OFF

Switch on: Push the main Switch 

forwards to turn on the machine. 

Then depress the main switch to 

lock it in position for continuous 

operation.

Switch off: Press the main switch at 

the rear end to release the locking 

and turn off the machine.

WARNING:

 Do not cover exhaust 

vents when the tool is in use. This 

may cause damage to the motor 

and reduce the efficiency of the tool.

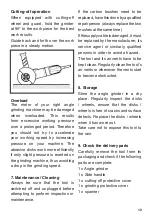
Abrasive operation

When equipped with abrasive wheel 

and guard, for the best work results 

hold the grinder at 15~20° to the 

work piece

.

Summary of Contents for PRO-ES750

Page 1: ...Angle Grinder User s Manual Model No PRO ES750 English 2 I Español 18 ...

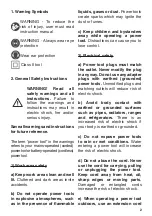
Page 2: ...s which may ignite the dust or fumes c Keep children and bystanders away while operating a power tool Distractions can cause you to lose control 2 Electrical safety a Power tool plugs must match the outlet Never modify the plug in any way Do not use any adapter plugs with earthed grounded power tools Unmodified plugs and matching outlets will reduce risk of electric shock b Avoid body contact with...

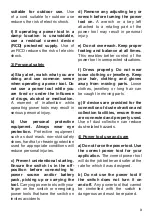
Page 3: ...wer tools with your finger on the switch or energising power tools thathave the switch on invites accidents d Remove any adjusting key or wrench before turning the power tool on A wrench or a key left attached to a rotating part of the power tool may result in personal injury e Do not overreach Keep proper footing and balance at all times This enables better control of the power tool in unexpected...

Page 4: ...ccordance with these instructions taking into account the working conditions and the work to be performed Use of the power tool for operations different from those intended could result in a hazardous situation 5 Service Have your power tool serviced by a qualified repair person using only identical replacement parts This will ensure that the safety of the power tool is maintained Safety Warnings ...

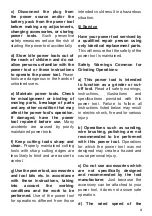
Page 5: ...f and bystanders away from the plane of the rotating accessory and run the power tool at maximum no load speed for one minute Damaged accessories will normally break apart during this test time h Wear personal protective equipment Depending on application use face shield safety goggles or safety glasses As appropriate wear dust mask hearing protectors gloves and workshop apron capable of stopping ...

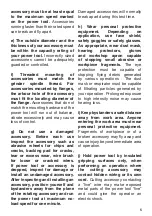
Page 6: ...ther accessory Pinching or snagging causes rapid stalling of the rotating accessory which in turn causes the uncontrolled power tool to be forced in the direction opposite of the accessory s rotation at the point of the binding For example if an abrasive wheel is snagged or pinched by the workpiece the edge of the wheel that is entering into the pinch point can dig into the surface of the material...

Page 7: ...nnot be adequately protected c The guard must be securely attached to the power tool and positioned for maximum safety so the least amount of wheel is exposed towards the operator The guard helps to protect operator from broken wheel fragments and accidental contact with wheel and sparks that could ignite clothing d Wheels must be used only for recommended applications For example do not grind wit...

Page 8: ...rk piece is properly supported Do not use cutting off wheel for side grinding Ensure that sparks resulting from use do not create a hazard e g do not hit persons or ignite flammable substances Ensure that ventilation openings are kept clear when working in dusty conditions If it should become necessary to clear dust first disconnect the tool from the mains supply use non metallic objects and avoid...

Page 9: ...ibration emission during actual use of the power tool can differ from the declared total value depending on the ways in which the tool is used Warning avoid vibration risk Suggestions 1 wear glove during operation 2 limit operating time and shorten trigger time 6 Operation Assembly Drawing Overview 1 Switch 2 Drive shaft 3 Side handle 4 Gear box 5 Protective cover grinding 6 Lock button 7 Spanner ...

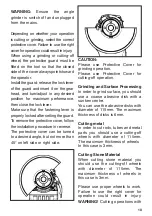
Page 10: ...n procedure in reverse The protective cover can be turned to a desired angle but not more than 45 on left side or right side CAUTION Please use Protective Cover for grinding operation Please use Protective Cover for cutting off operation Grinding and Surface Processing In order to grind surface you should use a coarse abrasive disk with a sunken centre You can use the abrasive disks with diameter ...

Page 11: ... tighten the external flange with the spanner in clockwise direction Allow the angle grinder to run in idle at least 1 minute with the grinding or cutting disc correctly assembled a vibration disc should be immediately replaced Operating instructions Drawings Switch ON OFF Switch on Push the main Switch forwards to turn on the machine Then depress the main switch to lock it in position for continu...

Page 12: ...rm inspection or maintenance If the carbon brushes need to be replaced have this done by a qualified repair person always replace the two brushes at the same time Ifthesupplycableisdamaged itmust be replaced by the manufacturer its service agent or similarly qualified persons in order to avoid a hazard The tool and its air vents have to be kept clean Regularly clean the tool s air vents or wheneve...

Page 13: ...e original purchase invoice 2 For warranty service please contact the present the warranty card and the original invoice for the warranty service 3 This Warranty DOES NOT applies for Transportationdamagesaftersales Services not provided by our authorized service centers Accessories and spare parts if any provided in the package Damageresultedfromcommercial or industrial use as this product is inte...

Page 14: ...NOTES ...

Page 15: ...NOTES ...

Page 16: ...www promakertools com ...

Page 17: ...Esmerilador Angular Manual del Usuario Modelo No PRO ES750 ...

Page 18: ...s herramientas eléctricas generan chispas que pueden encender el polvo o vapores combustibles c Mantenga alejados a los niños y transeúntes mientras maneja una herramienta eléctrica Las distracciones pueden ocasionar que usted pierda el control 2 Seguridad eléctrica a Los enchufes de la herramienta eléctrica deben coincidir con el tomacorriente Deningunamanera nunca modifique el enchufe No utilice...

Page 19: ...resté en posición de apagado antes de conectar la fuente de alimentación y o batería así como al recoger o transportar las herramientas Llevar las herramientas eléctricas con el dedo en el interruptor o energizar las herramientas que tienen el interruptor activado provoca accidentes d Retire cualquier llave de ajuste o llave inglesa antes de encender la herramienta eléctrica Una llave inglesaounal...

Page 20: ...as reparar antes de usarlas Muchos accidentes son causados por herramientas mal mantenidas f Mantenga las herramientas de corte bien afiladas y limpias Las herramientas de corte adecuadamente mantenidas con bordes de corte afilados son menos propensos a trabarse y son más fáciles de controlar g Utilice la herramienta eléctrica accesorios brocas etc de acuerdo con estas instrucciones y de la manera...

Page 21: ...ado Antes de cada uso inspeccione los accesorios tales como discos abrasivos para virutas y grietas almohadillas de respaldo para grietas rotura o desgaste excesivo así como cepillo de alambre suelto o agrietado Si se deja caer la herramienta eléctrica o el accesorio inspeccione si hay daños o instale un accesorio no averiado Después de inspeccionar e instalar un accesorio sitúese usted mismo y la...

Page 22: ...te los orificios de ventilación de las herramientas eléctricas El ventilador del motor extrerá el polvo dentrodelacarcazaylaacumulación excesiva de polvo metálico puede causar riesgos eléctricos o No opere la herramienta eléctrica cerca a materiales inflamables Las chispas podrían encender estos materiales p No utilice accesorios que requieran líquidos refrigerantes El uso de agua u otros líquidos...

Page 23: ...r el accesorio giratorio y causar pérdida de control y contragolpe e No fije una hoja de sierra dentada Estas cuchillas crean contragolpes frecuentes y pérdida de control Advertencias de Seguridad Específicas para Operaciones de Esmerilado y Corte a Utilice solo tipos de discos recomendados para su herramienta eléctrica y el protector específico para el disco seleccionado Los discos para los cuale...

Page 24: ...e acuerdo con las instrucciones del fabricante Asegúrese de que el papel secante se utilice cuando sea requerido cuando se suministran con el producto abrasivo adherido Asegurar que el producto abrasivo está correctamente montado y apretado antes de usar y poner en movimiento la herramienta sin carga durante 30 seg En una posición segura deténgase inmediatamente si hay vibración considerable o si ...

Page 25: ...claje Se reciclarán o se desmantelarán para reducir el impacto sobre el medio ambiente Los equipos eléctricos y electrónicos pueden ser peligrosos para el medio ambiente y para la salud humana ya que contienen sustancias peligrosas 5 Especificacionesdelaherramienta ESPECIFICACIONES TÉCNICAS Voltaje Frecuencia 120V 60Hz Potencia 750W Velocidad 11000rpm Cable 2m Peso 2kg Diámetro del disco 4 115mm E...

Page 26: ...esmerilado seleccione la guarda protectora correcta Si no usa la guarda correcta para operar podría causar lesiones Cuando utilice un disco de esmerilar o cortar la protección debe montarse en la herramienta de manera que el lado cerrado de la tapa apunte siempre hacia el operario del equipo Instale el protector suelte la palanca de bloqueo del protector e insértelo en el cabezal del engranaje y g...

Page 27: ...e permiten cuando hay un protector de corte Siempre enfoque el trabajo en el mismo ángulo durante el corte y no ejerza ninguna presión lateral sobre el disco Montaje de los Discos Coloque la tuerca trasera A sobre el eje asegurándose que encaja con el tornillo Coloque el disco de corte o de esmerilar B en la parte superior de la tuerca trasera asegurándose que encaje en el reborde de la tuerca Mon...

Page 28: ...stante Sobrecarga El motor de su esmeriladora de ángulo recto puede dañarse cuando se sobrecarga Esto resulta de una presión de trabajo excesiva durante un tiempo prolongado Por lo tanto no debe tratar de acelerar su velocidad de trabajo aumentando la presión de su máquina Los discos abrasivos funcionan de manera más eficaz si se ejerce solo una ligera presión sobre la máquina esmeriladora evitand...

Page 29: ...jear la herramienta por una de mayor capacidad si el rendimiento no cumple con su requerimiento abonando la diferencia del precio Todos los atributos ofrecidos por la garantía son válidos presentando la factura de compra original 2 Paraelserviciodegarantía porfavor póngase en contacto con el Centro de Servicio Autorizado Presente la tarjeta de garantía y la factura original para el servicio de gar...

Page 30: ...NOTAS ...

Page 31: ...NOTAS ...

Page 32: ...www promakertools com ...

Reviews: