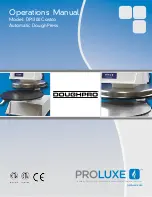
Proluxe DOUGHPRO DP1300 Series Operation Manual Download Page 5


-4- 

DP1300  2/04 

International Symbols 


Preventative Maintenance Suggestions 
 

The Doughpro DP1300 machines are 
relatively maintenance free.  For a long 
and trouble-free life, the following 
preventative maintenance should be 
followed: 
 
Daily Care: 
 

1.


Platens

:  Turn your machine off 

and allow to cool down before 
attempting to clean.  These 
platens should 

only

 be cleaned 

with mild soap and warm water 
then wiped off with a clean, soft 
cloth or soft sponge.  

Never use 

steel wool or harsh abrasives or 
you will cause costly damage.


2.


All other exterior surfaces

:  

Here again a daily wipe down 
with mild soap and warm water 
will do the job quite nicely.  


Never use steel wool or harsh 
abrasives or you will cause 
costly damage.  


Service Problems: 
 

Contact our factory or approved service 
agency (800) 624-6717 (U.S. only).  

Note: When contacting factory for 
information, parts or service 
instructions, it is of the 

utmost 

importance

 that the serial number of the 

machine be provided.  This number can 
be found on the serial plate located on 
the rear of the machine. 


Summary of Contents for DOUGHPRO DP1300 Series

Page 1: ...formerly DOUGHPRO New Name Same Quality Superior Service proluxe com Operations Manual Model DP1300 Costco Automatic Dough Press...

Page 2: ...y Doughpro warrants this dough press machine when operated under normal conditions to be free from manufacturing defects in material and workmanship for a period of one year on parts and labor from th...

Page 3: ...ress MODE button until temperature is displayed Press and hold SET button while pressing the UP and DOWN arrow buttons to desired temperature setting 3 Changing Time Press MODE button until time is di...

Page 4: ...ness is determined through experimenting with your own dough and is a product of dough weight temperature pressing time and thickness setting 5 Swing open the lower platen and apply a quick spray of a...

Page 5: ...n soft cloth or soft sponge Never use steel wool or harsh abrasives or you will cause costly damage 2 All other exterior surfaces Here again a daily wipe down with mild soap and warm water will do the...

Page 6: ...wait for 1 min then plug machine on and depress power button ___ Digital Controller on startup goes through LED segment check 8888 then to version and then loops back to to the above reboot The relay...

Page 7: ...are Adjustment Bolts Break free the 4 Locking blts With a open end wrench adjust the A bolts 1 8 turn at a time where needed and test with dough After satisfied tighten the Locking bolts making sure n...

Page 8: ...28 30 31 128 32 33 34 36 37 4X 39 40 4X 50 57 61 61 61 64 65 9 66 67 68 4X 69 4X 70 4X 70 4X 71 72 73 74 74 74 74 75 2X 76 77 78 80 81 80 81 82 82 87 86 88 89 90 92 92 93 94 95 95 96 97 98 99 100 101...

Page 9: ...49 42 43 41 44 45 46 47 40 12X 49 48 122 51 52 53 54 55 56 61 39 61 38 38 61 62 62 35 74 65 75 2X 79 4X 85 12X 120 44 122 123 124 2X 122 125 125 A9 EXPDP1301CO RC 031819 CUSTOMER MANUAL PAGE 2 OF 2 63...

Page 10: ...T381612CP SST381612CP 2 22 BASE ASSEMBLY DP1821101 DP1821101 DP1821101 DP1821101 1 23 COVER PLATE BASE 11054 11054 11054 11054 1 24 SCREW PHILLIPS PAN HEAD 8 32 X 1 4 SP83214 SP83214 SP83214 SP83214 2...

Page 11: ...R 11096975 11096975 MPPT700R MPPT700R 1 73 RELAY MPR90217 MPR90217 MPR90217 MPR90217 1 74 SCREW PAN HEAD PHILLIPS 8 32X3 8 SP83238 SP83238 SP83238 SP83238 6 75 SCREW PAN HEAD PHILLIPS 8 32X 1 2 SP8321...

Page 12: ...LIT516 WLIT516 3 118 NUT HEX 1 4 20 NH1420 NH1420 NH1420 NH1420 1 119 BOLT HEX 1 4 20 X 1 1 2 BH1420112 BH1420112 BH1420112 BH1420112 1 120 SOLENOID VALVE 4 W 1 4 12VDC WITH LEADS 11017511604 11017511...

Page 13: ......

Page 14: ...30 31 128 32 33 34 36 24 4X 39 37 4X 50 57 40 61 61 64 65 9 66 67 61 4X 68 4X 69 4X 70 4X 71 72 70 73 74 74 74 74 2X 76 77 78 80 81 80 81 82 82 87 86 88 89 90 92 75 92 94 95 93 95 97 98 99 100 101 10...

Page 15: ...49 42 43 41 44 45 46 47 40 12X 49 48 122 51 52 53 54 55 56 61 39 61 38 38 61 62 62 35 74 65 75 2X 79 4X 85 12X 120 44 122 123 124 2X 122 125 125 A9 EXPDP1301CO RB 101018 CUSTOMER MANUAL PAGE 2 OF 2 63...

Page 16: ...T381612CP SST381612CP 2 22 BASE ASSEMBLY DP1821101 DP1821101 DP1821101 DP1821101 1 23 COVER PLATE BASE 11054 11054 11054 11054 1 24 SCREW PHILLIPS PAN HEAD 8 32 X 1 4 SP83214 SP83214 SP83214 SP83214 2...

Page 17: ...11096975 11096975 MPPT700R MPPT700R 1 73 RELAY MPR90217 MPR90217 MPR90217 MPR90217 1 74 SCREW PAN HEAD PHILLIPS 8 32X3 8 SP83238 SP83238 SP83238 SP83238 6 75 SCREW PAN HEAD PHILLIPS 8 32X 1 2 SP83212...

Page 18: ...OOTH 5 16 WLIT516 WLIT516 WLIT516 WLIT516 3 118 NUT HEX 1 4 20 NH1420 NH1420 NH1420 NH1420 1 119 BOLT HEX 1 4 20 X 1 1 2 BH1420112 BH1420112 BH1420112 BH1420112 1 120 SOLENOID VALVE 4 W 1 4 12VDC WITH...

Page 19: ......

Page 20: ...pany s products the following instructions must be adhered to First contact our customer service department for approval and a return authorization number Please have the serial number of your item av...

Reviews: