background image

ELECTRICAL CONNECTION (UK ONLY) 

For your safety please read the following information. 
 

Warning: This appliance must be earthed. 

 
The appliance must be connected to a 220 - 240 volts 50 cycle AC supply by means of a 
three pin socket, suitably earthed and should be protected by a 13 amp fuse in the plug. 
The appliance is supplied with a standard 13 amp 3-pin plug fitted with a 13-amp fuse. 
Should the fuse require replacement, it must be replaced with a fuse rated at 13 amp and 
approved to BS1362. 
If the mains plug is unsuitable for the socket outlet in your home or is removed for any 
other reason, then the cut off plug should be disposed of safely, do not insert the cut off 
plug into a mains outlet to prevent the hazard of electric shock. Remove the fuse before 
disposal. 
There is a danger of electric shock if the cut off plug is inserted into any 13-amp socket 
outlet. 
 

How to wire a 13 amp plug: 


Important 

The wires in the mains lead on this appliance are colored in accordance with the following 
code: 
Green and Yellow - Earth 
Blue – Neutral 
Brown – Live 
 
As the colours may not correspond with the markings identifying the terminals in your plug 
proceed as follows. 
The green and yellow wire must be connected to the terminal in the plug which is marked 

with the letter E or with the earth symbol 

 or colored green and yellow. 

The blue wire must be connected to the terminal marked N. 
The brown wire must be connected to the terminal marked L. 
You must make sure the mains cord is firmly secured under the cord clamp. 
 

Warnings: 
Keep ventilation openings, in the appliance enclosure or in the built in structure, 
clear of obstructions. 
Do not use mechanical devices or other means to accelerate the defrost process, 
other than those recommended by the manufacturer. 
Do not damage the refrigerant circuit. 
Do not use electrical devices inside the food storage compartments of the appliance, 
unless they are of the type recommended by the manufacturer. 

Summary of Contents for PMZ60BK-U

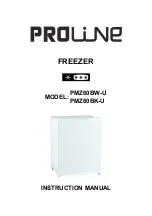
Page 1: ...FREEZER PMZ60BW U MODEL PMZ60BK U INSTRUCTION MANUAL...

Page 2: ...1 DESCRIPTION OF THE APPLIANCE 1 Thermostat Knob 2 Drip Tray 3 Wire Shelves 4 Recessed Handle 5 Door Gasket 6 Adjustable Foot 7 Fixed Foot...

Page 3: ...g of any refrigeration equipment please contact your local waste disposal department for advice on the correct method of disposal This appliance must only be used for its intended purpose i e the stor...

Page 4: ...zard Do not operate the appliance with a damaged cord or plug or after the appliance malfunctions or has been damaged in any way Consult the retail store where you bought the appliance for advice Do n...

Page 5: ...t How to wire a 13 amp plug Important The wires in the mains lead on this appliance are colored in accordance with the following code Green and Yellow Earth Blue Neutral Brown Live As the colours may...

Page 6: ...in the control panel regulates the temperature of the freezer compartment Position MIN Cold Position NORMAL Colder Normally setting at this position Position MAX Coldest Turning the thermostat contro...

Page 7: ...ON THIS PRODUCT THE REFRIGERANT FLUID NEEDS TIME TO SETTLE DO NOT STORE FOOD IN THE FREEZER UNTIL IT HAS BEEN RUNNING FOR AT LEAST 4 HOURS UNDER NO CICUMSTANCES MUST THE REFRIGERATING CIRCUIT BE DAMA...

Page 8: ...KEEP FROZEN FOODS TOGETHER When you are going around the supermarket and when you are travelling home if you keep all the frozen foods together they will help to keep each other cold STORE FOOD STRAI...

Page 9: ...afterwards SAFETY TIPS Never re freeze anything that has thawed out unless you cook it again to kill off harmful bacteria Never re freeze thawed shellfish FREEZING FRESH FOOD TIPS Use quality food an...

Page 10: ...polishes or cleaning products containing bleach or alcohol External Cleaning wash the outer cabinet with warm soapy water Do NOT use abrasive products There are sharp edges on the underside of the pr...

Page 11: ...oot and transfer it to the right hand side FIGURE 3 5 Re fit the lower hinge to left hand side of the cabinet 6 Return the appliance to the vertical position and re fit the door on the lower hinge pin...

Page 12: ...rough the pipe Compressor operating at high temperatures Prolonged idle periods If you are going to leave the freezer idle for any period of time proceed as follows Disconnect the freezer from the mai...

Page 13: ...ngerous substances in your freezer It has been designed for the freezing of edible foodstuffs only Don t Consume food which has been frozen for an excessive length of time Don t Leave the door open fo...

Page 14: ...d current 0 65A Climate Class Ambient Range N 16 to 32 Energy class 1 A Energy consumption kWh year 2 190 Supply voltage 220 240V 50Hz Noise dB A re 1pW 40 Refrigerant Amount R600a 26g Product dimensi...

Page 15: ...posed of separately from household waste when the product reaches its end of life Contact your local authority to learn about disposal and recycling The product should be taken to your local collectio...

Reviews: