11
ECLIPSEFS
3.4 STATIC
This mode is used to decide how the projector should operate.
• Press the MODE button so many times until the display shows
STATIC
, then press the button ENTER.
• Press the UP/DOWN button to scroll through the menu, then select
Play
and press the ENTER button.
• Press UP/DOWN to scroll through the menu, and then select one of the following settings:
-
DMX Receive
- The projector will need to operate based on the received DMX signal.
-
Slave Receive
- Means that the projector will act as a slave in a slave master chain,
-
Presets
- The projector will be able to play the selected preset (
All, Red, Green, Blue, Lime, Cyan, Magenta,
Yellow, Orange, Light Yellow, Light Blue, Light Pink, White 2700K, White 3200K, White 4200K, White 5000K, White
5500K, White 6000K, White 7000K, White 8000K, White 9000K, White 10000K Tungsten (Red, Green Blue, Lime))
. This
can be done as a
Master
, that is the projector will act as a slave in a Master Slave chainas, as
Alone
or
as
DMX
, choosing the DMX chart at
1CH.
-
Color Mix 1-16
- The projector will be able to play the selected preset (
All, Red, Green, Blue, Lime, Cyan,
Magenta, Yellow, Orange, Light Yellow, Light Blue, Light Pink, White 2700K, White 3200K, White 4200K, White 5000K,
White 5500K, White 6000K, White 7000K, White 8000K, White 9000K, White 10000K Tungsten (Red, Green Blue, Lime)
.
This can be done as a
Master
, that is the projector will act as a slave in a Master Slave chainas, as
Alone
or as
DMX
, choosing the DMX chart at
1CH (
after activation thought
Switch On
option).
NOTE: if more mix colors have the ad
on switch
, these will be played in sequence.
-
Tungsten
- Allow to choose the maximum value that each color must have when the
1 ch Tungsten
mode is used.
• Press the ENTER button to confirm your choice.
• Press the MODE button to go back or to meet the waiting time to exit the setup menu.
3.5 LINKING
1. Connect the DMX OUT of the master unit via 5-pole XLR cable to the DMX IN of the first slave unit.
2. Connect the DMX OUT of the first slave unit to the DMX IN of the second slave unit, etc. until all units
are connected in a chain.
3.6 DMX CONFIGURATION
ECLIPSEFS is equipped with different DMX configuration.
• Press the button MODE so many times until shows
CONNECT
, and press the button ENTER to confirm.
• Select
Mode
through the buttons UP/DOWN, then press the button ENTER.
• Select the desired DMX configuration (
1CH - - 2CH - 3CH - 3CHRGB - 4CH RGBL- 5CH - 5CHRGBL - 8CH - 13CH - 1CH 3200K
- 1CH 5400K - 1CH 6500K
) through the buttons UP/DOWN.
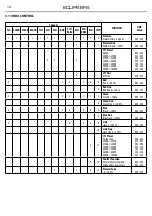
The tables on page 13 indicate the operating mode and DMX value. The ECLIPSEFS is equipped with
5-pole XLR connections.
3.7 DMX MODE
• Press the button MENU so many times until the display shows
CONNECT
, and press the button ENTER to
confirm.
• Select
DMX Address
through the buttons UP/DOWN, then press the button ENTER.
• Press UP/DOWN button to select the desired value (
001-512
). Press and hold to scroll quickly.
• Press ENTER button to store.
• Press the MODE button to go back or to meet the waiting time to exit the setup menu.
To able to operate the ECLIPSE with a light controller, adjust the DMX start address for the first a DMX
channel. If e. g. address 33 on the controller is provided for controlling the function of the first DMX
channel, adjust the start address 33 on the ECLIPSE. The other functions of the light effect panel are then


