


11
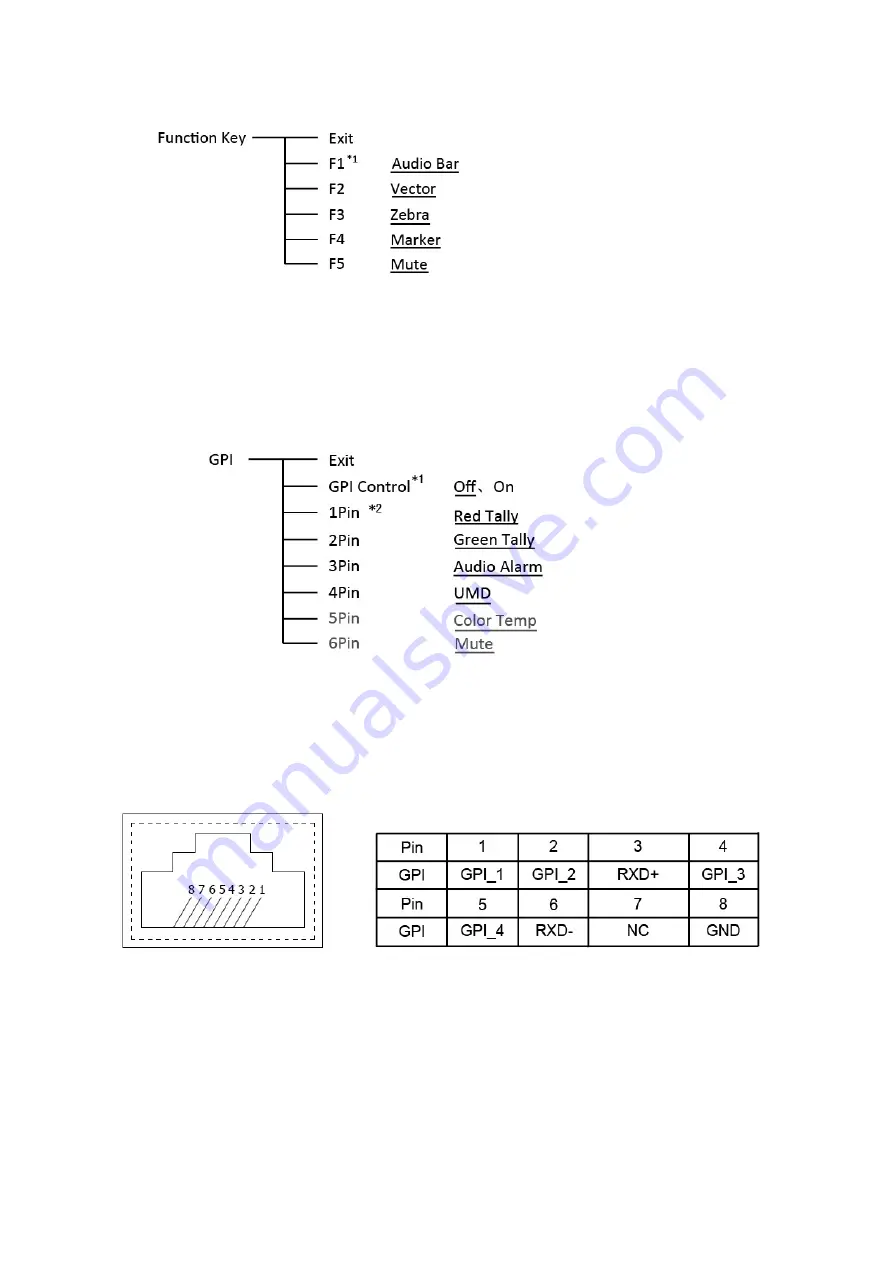
4. Function key
To define the F1
~
F5 function keys.
*1 Function keys F1
~
F5 can be set as the down below functions:
Audio Bar, Histogram, False Color, AFD, H/V Delay, R/G/B/Mono, Marker, Color Bar, UMD,
Audio Alarm, Focus Assist , Aspect Ratio, Scan Mode, Zoom Mode, Mute, Freeze Frame, Flip
Mode, CVBS, HDMI , SDI1, SDI2 ,Color Temp, Time Code, Zebra, Vector.
5. GPI
User can set GPI pins to relevant functions to turn on or off this function.
*1 When “GPI control” is set to “On”, the monitor can be operated through external GPI control
unit.
*2 The GPI pins can be set to the down below functions:
Red Tally, Green Tally, Yellow Tally, Aspect Ratio, Scan Mode, Zoom Mode, Mute, Freeze
Frame, Flip Mode, Color Temp, Time Code, Zebra, Vector, Audio Bar, Histogram, False Color,
AFD, H/V Delay, R/G/B/Mono, Marker, Color Bar, UMD, Audio Alarm, Focus Assist.
When connecting the GPI pin with ground, the setted function will be turned on, and goes out
when disconnecting.
Example 1: Under “GPI ” submenu, set “GPI control” to “On”, set “2 Pin” to “Red Tally”, when
the pin 2 of the extenal GPI control unit is connected with ground, the Tally light on the front
panel will turn red. When disconnected, the tally light will turn off.
Example 2: Under “GPI ” submenu, set “GPI control” to “On”, set “6 Pin” to “Scan Mode”, when
the pin 6 of the extenal GPI control unit is connected with ground, the Scan mode will change
and follow the sequence: “Normal” →”Overscan”→”Native” .