ProForm 585 TL PETL42561 User Manual Download Page 10

27

55

66*

64

85

6

6

6

100

95

102

1

21

125

124

69

11

10

11

10

8

9

13

45

3

12

61

86

76

46

75

76

13

46

5

54

39

67

38

68

14

44

47

14

44

47

29

48

77

56

78

14

29

79

47

14

51

14

50

14

14

44

47

125

14

44

47

16

16

80

16

31

31

31

31

31

81

17

18

19

82

17

18

61

95

3

62

3

41

1

3

4

42

60

59

58

24

24

84

60

21

49

34

57

32

32

32

32

40

23

23

40

23

22

22

20

20

93

83

43

43

43

43

53

5

5

65

72

72

14

44

19

23

74

3

3

88

89

90

33

14

91

70

92

99

96*

97

28

103

14

7

104

106

25

106

26

87

107

28

21

49

16

109

110

16

16

3

113

120

119

15

15

3

74

117

118

15

122

19

101

14

6

6

114

114

114

114

30

52

71

2

14

121

121

127

127

4

3

42

111

111

111

63

116

116

105

115

123

126

126

15

126

35

112

112

36

37

108

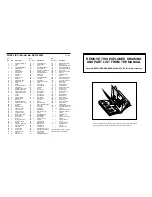
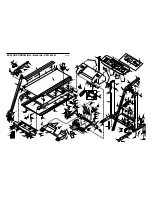
EXPLODED DRAWING—Model No. PETL42561

R1098A

Summary of Contents for 585 TL PETL42561

Page 1: ...MBER OF THE PRODUCT see the front cover of this manual The KEY NUMBER OF THE PART S see the EXPLODED DRAWING and PART LIST attached in the centre of this manual The DESCRIPTION OF THE PART S see the EXPLODED DRAWING and PART LIST attached in the centre of this manual If possible place the treadmill near your telephone for easy reference when calling Model No PETL42561 Serial No QUESTIONS As a manu...

Page 2: ... An EXPLODED DRAWING and a PART LIST are attached in the centre of this manual Please save them for future reference IMPORTANT PRECAUTIONS WARNING To reduce the risk of burns fire electric shock or injury to persons read the following important precautions and information before operating the treadmill 1 It is the responsibility of the owner to ensure that all users of this treadmill are adequatel...

Page 3: ...for longer than 20 minutes Breathe regularly and deeply as you exercise never hold your breath A Cool down Finish each workout with 5 to 10 minutes of stretching to cool down This will increase the flexibility of your muscles and will help to prevent post exercise prob lems WARNING Before beginning this or any exercise program consult your physician This is especially important for in dividuals ov...

Page 4: ... centred Plug in the power cord insert the key and run the treadmill for a few minutes Repeat until the walking belt is properly tightened 6 SYMPTOM THE TREADMILL SITS UNEVENLY ON THE FLOOR a Make sure that the six base pads are attached to the treadmill see assembly step 2 on page 5 Thank you for selecting the PROFORM 585 TL tread mill The 585 TL treadmill combines advanced technol ogy with innov...

Page 5: ...nt bolts counterclock wise 1 4 of a turn When the walking belt is properly tightened you should be able to lift each side of the walking belt 7 to 10 cm off the walking platform The centre of the walking belt should just touch the walking platform Be careful to keep the walking belt centred Plug in the power cord insert the key and run the treadmill for a few minutes Repeat until the walking belt ...

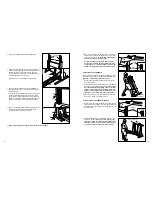
Page 6: ... slide open the storage latch and hold it open Pivot the treadmill until the frame is past the storage latch 2 Hold the treadmill firmly with both hands and lower the treadmill to the floor Caution To avoid pinching your hands do not hold the treadmill in the locations indi cated by the arrows To decrease the possibility of in jury bend your legs and keep your back straight Base Front Wheel Storag...

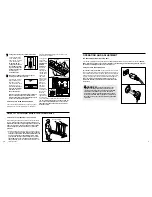
Page 7: ... conductor can result in an in creased risk of electric shock Check with a qualified electrician or serviceman if you are in doubt as to whether the product is properly earthed Do not mod ify the plug provided with the product if it will not fit the outlet have a proper outlet installed by a qualified electrician FU SE D Change the incline of the treadmill if desired To change the incline of the t...

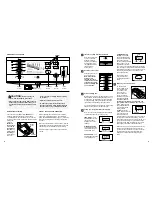
Page 8: ... step onto the walking belt and begin walking Change the speed of the walk ing belt as desired by sliding the speed control To stop the walking belt step onto the foot rails and slide the speed control to the lowest position Follow your progress with the four displays Note The console can display distance and speed in either kilometres or miles see page 10 TIME display This display shows the total...

Page 9: ...re Harness Grommet 75 1 Shock 76 2 Base Extension 77 1 Power Supply w Clips 78 1 Controller 79 1 Incline Leg 80 1 Belly Pan 81 1 Endcap Plug 82 1 Rear Roller Cover 83 1 Frame 84 1 Walking Platform 85 1 Console Base 86 1 Upright Base 87 2 Left Endcap Foot 88 1 Magnet 89 1 Allen Wrench 90 1 Adhesive Clip 91 1 Reed Switch 92 1 Walking Belt 93 1 Frame Cover 94 1 Adjustment Bolt Long 95 3 Handlebar Mou...

Page 10: ...2 3 41 1 3 4 42 60 59 58 24 24 84 60 21 49 34 57 32 32 32 32 40 23 23 40 23 22 22 20 20 93 83 43 43 43 43 53 5 5 65 72 72 14 44 19 23 74 3 3 88 89 90 33 14 91 70 92 99 96 97 28 103 14 7 104 106 25 106 26 87 107 28 21 49 16 109 110 16 16 3 113 120 119 15 15 3 74 117 118 15 122 19 101 14 6 6 114 114 114 114 30 52 71 2 14 121 121 127 127 4 3 42 111 111 111 63 116 116 105 115 123 126 126 15 126 35 112...

Reviews: