PC-DKP1211_IM
13.02.20
33
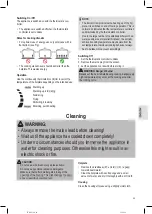
Switching On / Off
The appliance is switched on with the thermostatic con
-
troller.
•
The appliance is switched off when the thermostatic
controller is set to
min
.
Notes for Cooking Utensils
•
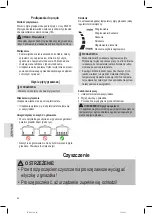
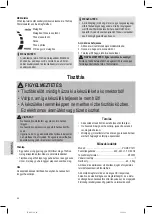
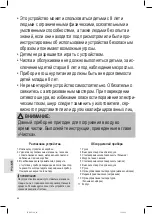
For optimum use of energy, use only pots / pans with a
flat bottom (see Fig.).
•
The cooking utensil never should be smaller than the
hotplate. This wastes energy.
Operation
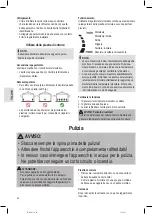
Use the continuously thermostatic controller to select the
temperature of the hotplate depending on the intended use:
Warming up
Warming up / simmering
Simmering
Frying
Parboiling, browning
Browning, quick heating
NOTE:
•
The indicator lamp indicates the heating up of the hot
-
plate. It is switched on and off during operation. This is
normal and indicates that the temperature is controlled
and maintained by the thermostatic controller.
•
Due to the large number of qualitatively different cook
-
ware (quality, size or material thickness), the actually
achieved cooking temperature may deviate from the
set temperature. Individual cooking behaviour always
has to be taken into account accordingly.
Switching Off
1. Set the thermostatic controller to
min
.
2. Remove the mains plug from the socket.
3. Let the appliance cool down before storing it.
WARNING: Danger of burns!
Because of the heat radiated during cooking, dangerously
high temperatures may occur at the cooking zone after
the cooking cycle.
Cleaning
WARNING:
•
Always remove the mains lead before cleaning!
•
Wait until the appliance has cooled down completely!
•
Under no circumstances should you immerse the appliance in
water for cleaning purposes. Otherwise this might result in an
electric shock or fire.
CAUTION:
•
Do not use a wire brush or any abrasive items.
•
Do not use any acidic or abrasive detergents.
•
Make sure that no fluid matter gets into any of the
openings of the housing. This might damage the appli
-
ance or result in an electric shock.
Hotplate
• Remove food residues with a moist cloth or a paper
towel while still warm.
• Clean the hotplate with a soft sponge and a small
amount of water, and dry it thoroughly with a soft cloth.
Housing
Clean the housing after use using a slightly moist cloth.
Summary of Contents for PC-DKP 1211
Page 55: ...PC DKP1211_IM 13 02 20 ...
Page 56: ...PC DKP1211_IM 13 02 20 ...
Page 57: ...PC DKP1211_IM 13 02 20 ...


