Procolored A3-DX5 Manual Download Page 12

*Due to occasional product upgrades, this manual is for reference only.

11

7.Maintenance

7.1. Work environment The best working environment temperature 25-30 degrees,
humidity above 50%
7.2. The ink Please try to use up the ink within 3 months after opening to avoid
spoilage.
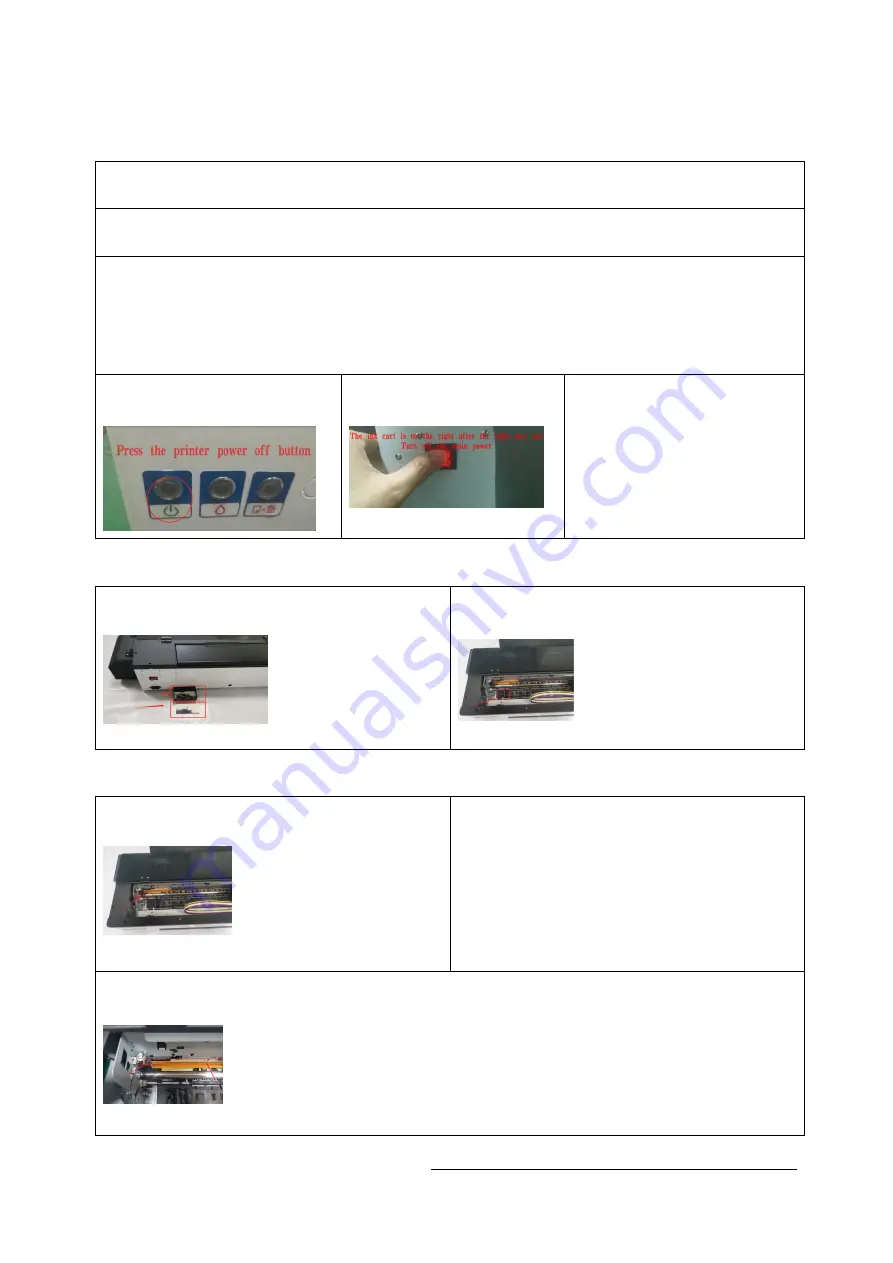
7.3. Shut down the device After the work is completed, please turn off the equipment
in the normal order, first turn off the printer with the button, then turn off
the main power supply, and keep the ink cartridge cart on the right side (this
is to make the print head and the waste ink pump fit closely to prevent the print
head from clogging) .
7.3.1 turn off the printer
with the button

7.3.2 turn off the main
power supply

7.3.3 keep the ink
cartridge cart on the
right side

7.4.clean the ink
7.4.1Regularly clean up the waste ink
cartridge and ink sponge

7.4.2 Clean and suck the ink on the left
side of the machine regularly

7.5.Cleaning guide rails and grating strips
7.5.1 Clean the black lubricating oil on
the ink car guide rail regularly

7.5.2 add new lubricating oil to keep the
ink car guide rail smooth.

7.5.3 Clean the grating strips regularly with alcohol and dust-free cloth to ensure
the printing accuracy.

Summary of Contents for A3-DX5

Page 1: ...Due to occasional product upgrades this manual is for reference only 0 A3 DX5 Sheet version Dtf Printer manual...

Page 2: ...able of Contents Safety Instructions 2 Machine Views 3 Introduction of printer buttons 4 1 Connect the printer 5 2 Install the drive 6 3 Install the rip software 7 4 Install print curves 8 5 Machine I...

Page 3: ...rvice person for examination and repair 5 This equipment is not intended for use by persons including children with reduced physical sensory or mental capabilities or lack of experience and knowledge...

Page 4: ...onal product upgrades this manual is for reference only 3 Machine Views Waste ink collector Film feed position Temperature and humidity display Nozzle position Ink position film exit position printer...

Page 5: ...on to print the head to the ink check position After changing the cartridge press this button to return the print head to the initial position When the ink indicator lights go out press the button for...

Page 6: ...ble 1 2 Insert data U disk 1 3 Connect the cable and start the power supply 1 4 Click the Start button on the front of the printer 1 5 In the process of self checking it lights up with red double flas...

Page 7: ...Due to occasional product upgrades this manual is for reference only 6 2 Install the drive 2 1 Find the driver file R2000 drive in the data U disk 2 2 install to C drive...

Page 8: ...fore installing the software Under the root directory of your Computer s C drive create a new folder and name it C DTGRIP 3 3 add the DTGRIP folder to the white list in your computer Settings Settings...

Page 9: ...etup file in the data U disk 4 2 Find the 2 folders media and profile and copy them 4 3 Find the installation folder of the rip software and copy the two folders just copied to the installation folder...

Page 10: ...per shortage to test the feeder 5 4 Set the preheating temperature between 35 C to 45 C 5 5 Install the pet film tray 5 6 Install the battery to display P S Need to buy an LR44 button battery 5 7 Fill...

Page 11: ...Select print color first and color white then press print 6 6 When the printing is done put the pet film into powder and shake to make the powder spread evenly 6 7 Set the oven at 95 100 c for 200 sec...

Page 12: ...ight side this is to make the print head and the waste ink pump fit closely to prevent the print head from clogging 7 3 1 turn off the printer with the button 7 3 2 turn off the main power supply 7 3...

Page 13: ...t head If you do not use it for more than three days please install the print head moisturizing solution you can contact our after sales service to get the operation method 2 The work that must be don...

Reviews: